
Many cloud projects forget Network Engineers and Network Architects and only bring them in afterward. Often, when network guys are in, things are already complicated and there's not much time for them to learn AWS from scratch.
There are no prerequisites for AWS certifications anymore. So it's not mandatory to take the Associate certifications. I would still recommend taking at least the AWS Solutions Architect Associate or even the Cloud Practitioner certification if you're new to cloud computing. In addition to AWS certification, Aviatrix offers a free course which covers an Intro to Public Networking in AWS through ACE-Associate as you can see below
It's a good course on Cloud Networking whether or not you're considering Aviatrix. Here's the registration link and voucher code to make it free
ACE-Associate registration link: https://aviatrix.teachable.com/
Voucher code: AWSAKL
To me, learning through practical experience or even parallel learning and building is the way I like to go. In this post, we'll learn and build networking constructs in AWS from scratch. Go ahead and create an AWS account or use an existing one if you want to follow along. If you're new to AWS, make sure to setup MFA to protect your account, see video below on how to setup MFA on your AWS account
We're going to use free resources as much as possible so you shouldn't be charged for anything. However, I'm not responsible for any charges you may incur. 🙂
VPC (Virtual Private Cloud)
VPC is the foundation of AWS networking. Think of it like a logical data center you're building inside AWS. Similar to on-prem, before you can run a server or storage inside a data centre, you'll need a network switch and at least a network/subnet/VLAN to connect them. We will build from UI - ClickOps style and we'll explore using IaC tools like CloudFormation template or Terraform in other posts. So let's create a VPC and a CIDR block, and in this example, we'll create a VPC called "first-vpc" and we'll use "10.1.0.0/16" as our CIDR block. While you can use any IPv4 ranges, it is recommended to use the RFC1918 ranges.
Overall steps as follows:
- Log on to AWS Console
- Select desired region
- Go to VPC
- Create VPC, enter VPC name (tag) and input CIDR block
In this case, I'll be using Sydney (ap-southeast-2) region

On the search bar, type VPC and click the VPC hyperlink - you can click the star to add VPC into the favorites list/bar.

If your using a new AWS account, you'll notice that there's an existing VPC also referred as the Default VPC which is an Internet connected VPC, more about default VPC is documented here: https://docs.aws.amazon.com/vpc/latest/userguide/default-vpc.html. While you can use this VPC to deploy AWS services, it is recommended to create a custom VPC. Default VPC is also considered as a high severity in tfsec, see this link: https://aquasecurity.github.io/tfsec/v1.8.0/checks/aws/vpc/no-default-vpc/. You can delete the default VPC if you're not planning to use it.
Click the Create VPC button
As we want to learn step by step and observe the components, choose the "VPC only" option, we'll use the "VPC and more" option later.
Enter "first-vpc" as the name tag and "10.1.0.0/16" as the IPv4 CIDR. The "10.1.0.0/16" will be the primary IPv4 block and you can add a secondary IPv4 block e.g., "100.64.0.0/16". The use case of secondary CIDR block could be because you're running out of IPs and need to add additional block, or there's a VPC with overlapping CIDR which you need to peer or connect. See this blog post on how a secondary CIDR block is being used in an overlapping IP scenario: https://aws.amazon.com/blogs/networking-and-content-delivery/how-to-solve-private-ip-exhaustion-with-private-nat-solution/

Leave the tags as default, you can add more tags if you want and click Create VPC

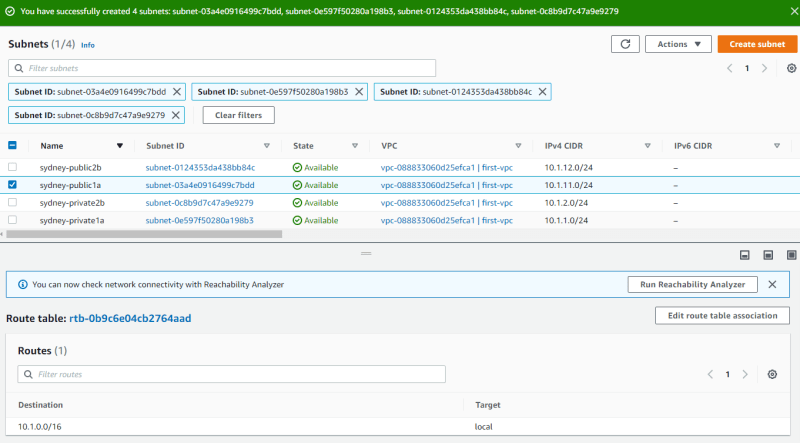
As soon as the VPC is created, it's assigned with a vpc-id and there's a route table created that serves as the main route table - rtb-0b9c6e04cb2764aad in below example.

Right click the rtb-id, open a new tab, and select the Routes tab to observe the configuration.

The route table has a default local route which is used for communication within the VPC. If there's multiple CIDR blocks (secondary VPC CIDR), then you will have local route for each CIDR block as below example

Now you have a VPC and a route table, but you won't be able to put anything inside. If you try to create an EC2 instance for example, you can't proceed as it requires subnets.
Subnets
VPC can be created on a region basis, but a subnet where services run can only live in one availability zones (AZs). In order to offer services in multiple AZs, you'll need a subnet on each of them. For more details on regions and zones, check out this document:
https://docs.aws.amazon.com/AWSEC2/latest/UserGuide/using-regions-availability-zones.html
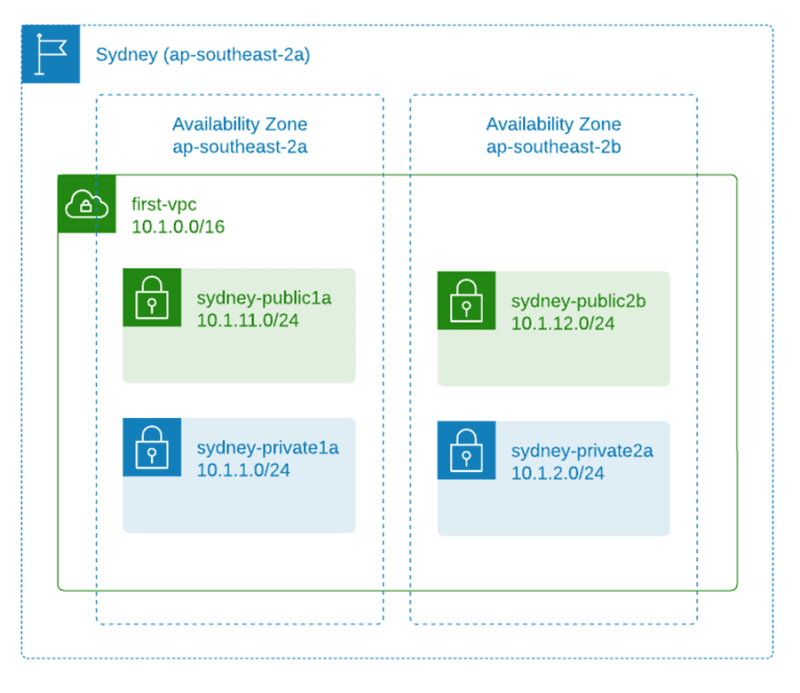
Let's create two subnets across two AZs as shown in below diagram (you can create more AZs if you want). The smallest subnet we can create is /28 with a total of 14 usable IP. 5 IP addresses are reserved by AWS as described in this document: https://docs.aws.amazon.com/vpc/latest/userguide/configure-subnets.html#subnet-sizing
| Subnet name | AZ | CIDR block |
|---|---|---|
| sydney-public1a | ap-southeast-2a | 10.1.11.0/24 |
| sydney-private1a | ap-southeast-2a | 10.1.1.0/24 |
| sydney-public2b | ap-southeast-2b | 10.1.12.0/24 |
| sydney-private2b | ap-southeast-2b | 10.1.2.0/24 |
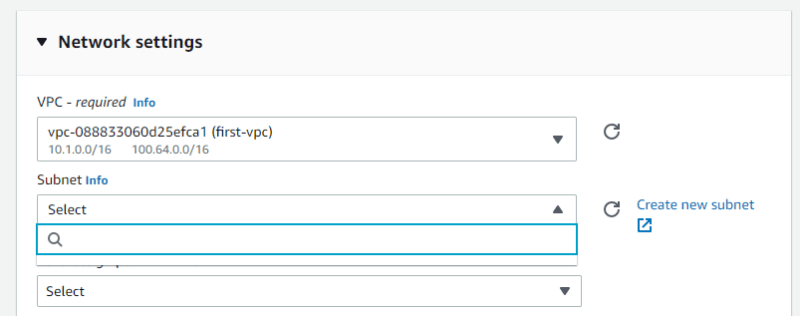
Go to VPC > Subnets > Create Subnets and select the VPC that you've created previously - the "first-vpc"
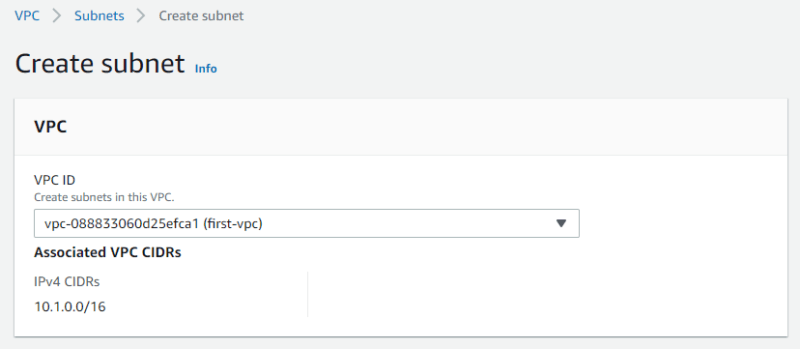
Enter the subnet settings detail. Don't click the "Create subnet" button just yet, click the "Add new subnet" button to add the remaining subnets then after completing all the required subnets, click "Create subnet"
Note: if you don't choose a zone, it will be randomly picked by AWS.

Once done, you should see all the subnets you just created on the console. If you missed any, just create a subnet and select your desired VPC. As of now, you can deploy EC2 instances into the VPC by selecting one of the subnets, but the public subnet doesn't have any Internet access at this stage. When you select a public subnet > route, you'll see it uses the main route table and only has the local route, no default route for Internet access.
Public Subnets
Technically, the subnets are still private. You'll need these to make it work as public subnets:
- An Internet Gateway (IGW) attached to the VPC
- Route table with default route towards the IGW
- Public IP assigned to the AWS resources (e.g., EC2 instances)
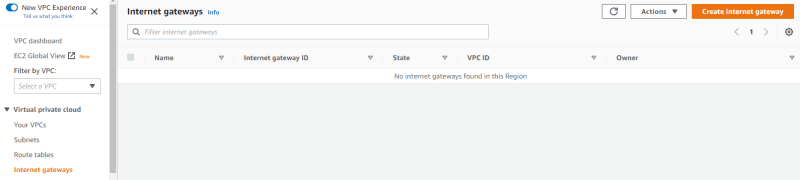
Go to VPC > Internet gateways and click "Create internet gateway"
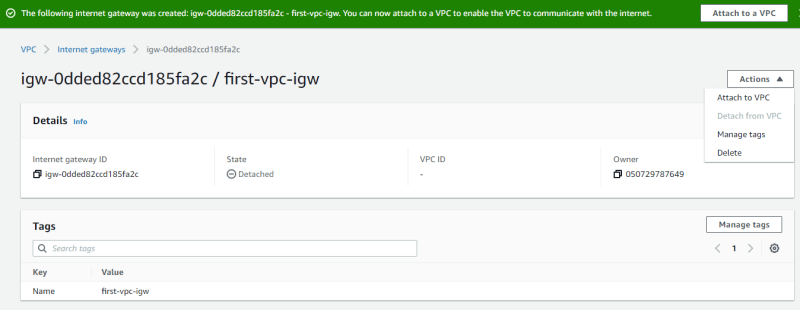
Put a name tag and click create internet gateway

Attach the IGW to the first-vpc

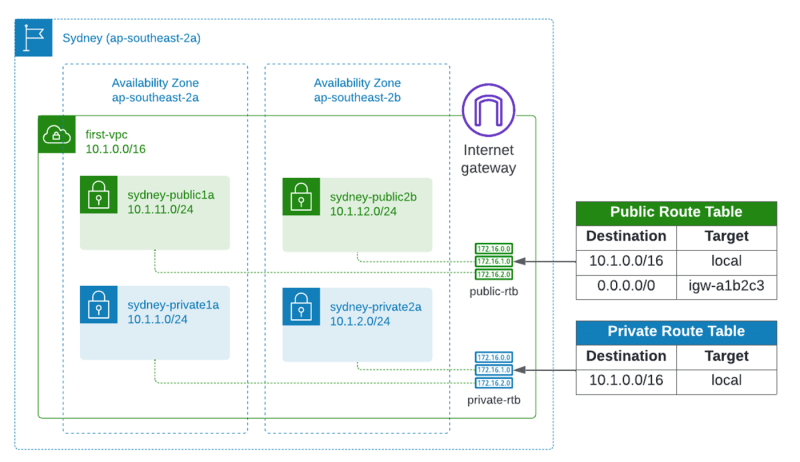
We want the private subnets to be private, we don't want the private subnets to have a default route to the Internet. For that, we'll need to create a separate route table for the public subnets. Here's a diagram showing what we're trying to do.
Let's go to the route table menu and create a route table for the public subnets.

Put a name for the route table e.g., first-vpc-public-rtb and select the desired vpc - "first-vpc"

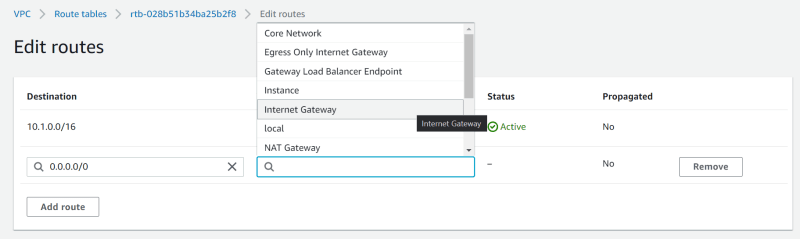
Once created, edit the route table, add a default route to the IGW

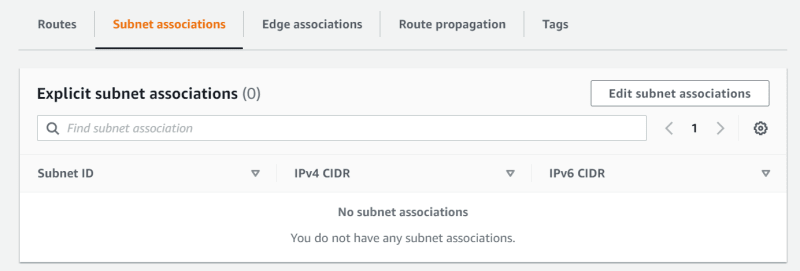
Next, go to the "Subnet associations" tab and click "Edit subnet associations"
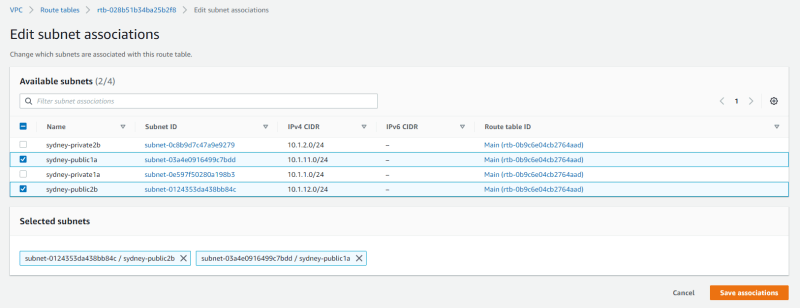
Select the public subnets and click "Save associations"
That's it! Now that the VPC is ready, you can run an EC2 instance in public subnets if they need Internet access or in private subnets if they don't.
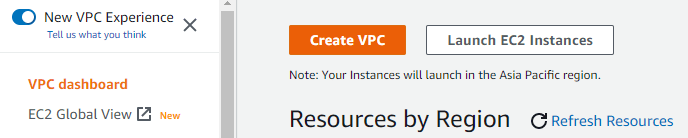
But let's create another VPC but now using the other option which will create required route tables and internet gateway for us. Create a New VPC and choose "VPC and more" this time
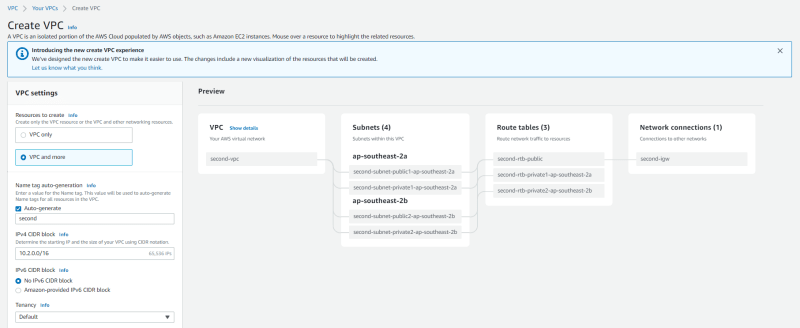
We'll create using below parameters
| Parameters | Value |
|---|---|
| Name tag (auto-generate) | second |
| IPv4 CIDR block | 10.2.0.0/16 |
| Number of AZs | 2 |
| First AZ | ap-southeast-2a |
| Second AZ | ap-southeast-2b |
| Public subnet first AZ | 10.2.11.0/24 |
| Public subnet second AZ | 10.2.12.0/24 |
| Private subnet first AZ | 10.2.1.0/24 |
| Private subnet second AZ | 10.2.2.0/24 |
| NAT gateways | None |
| Enable DNS hostnames | Checked (default) |
| Enable DNS resolution | Checked (default) |
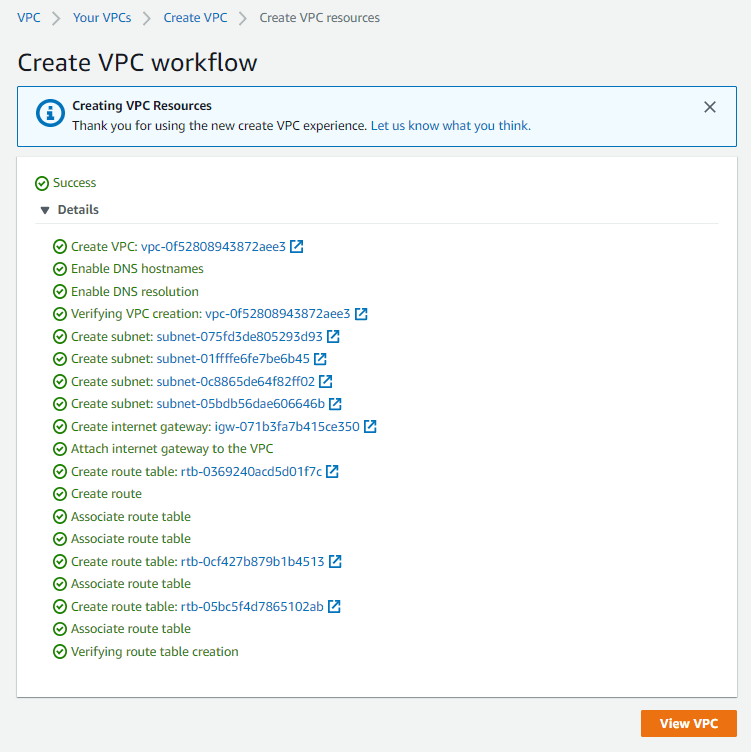
Hit "Create VPC" once completed, you can see that the wizard will create all of the required components similar to what we've created for the first-vpc.
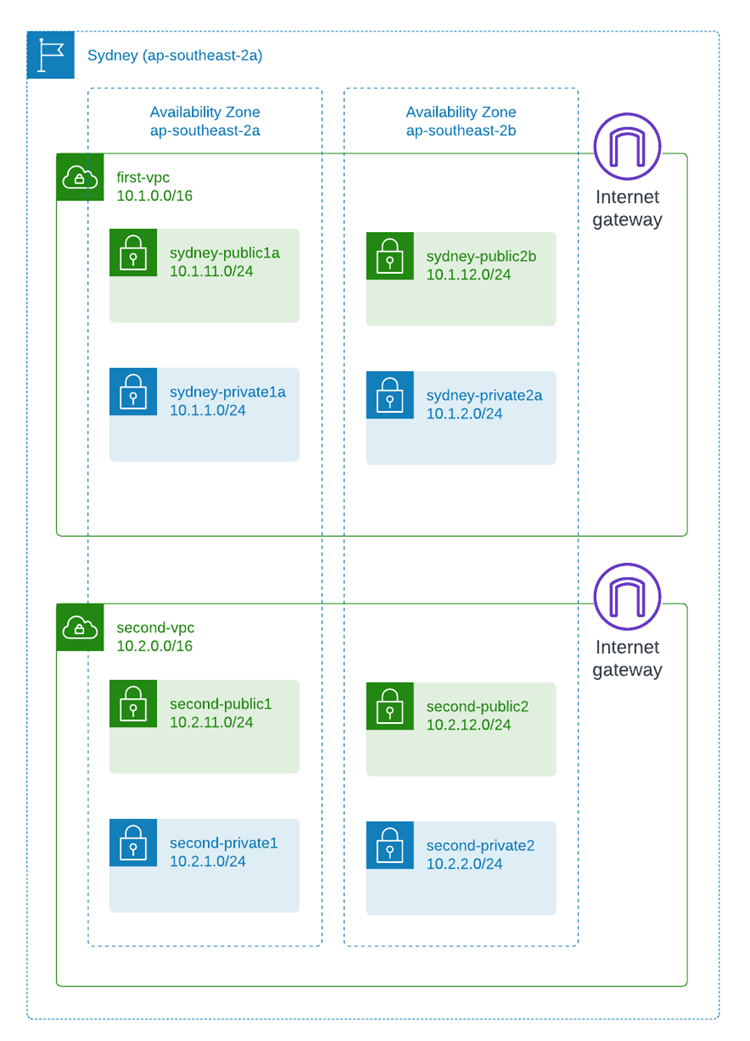
Now you have two VPCs and they are ready to take on workloads as shown in below diagram:
I hope this post helps you better understand AWS and cloud networking, especially some of the foundation of VPC networking. We haven't touched on security groups, NACL, how to give egress Internet access to the private subnets, how to connect VPCs, how to automate the build and manage the resources using IaC, I'll save that for future posts. Watch this space!
References:

Top comments (0)