Recently, I discovered The Cat API. This API returns an image of a cat on which we can vote. Their front page shows a great example. As an owner of two adorable cats, I immediately knew that I had to create a simple app for this. Luckily with Flutter, this is a pretty simple thing to build! So what are we going to develop? First, we will display an image of a cat. Then, the user can swipe it to the right to like the image or swipe it to the left to downvote the image. While doing this, we will explain a few standard tasks, such as calling the API, displaying the image, caching the image, and dragging the image.
Setup the Project
Before we can start with coding, we are going to add some dependencies to the project. First, we will need Flutter Hooks and Hooks Riverpod for the state management. Then, for the rest calls, we will need the HTTP package. At last, we are going to add the transparent image package, which we use to show a loading circle while the image is loading.
dependencies:
  flutter:
    sdk: flutter
  http: ^0.13.3
  flutter_hooks: ^0.17.0
  hooks_riverpod: ^0.14.0
  transparent_image: ^2.0.0
Do not forget to install the dependency, running the following command:
flutter pub get
Drag and drop
Let’s start with the drag and drop of the container. Afterward, we can connect this to the Cat API. Luckily, drag and drop is pretty simple to create in Flutter. We discuss drag and drop in more detail here. But, for now, all we need to know is that we need a Draggable Widget. The Draggable Widget is a Widget that we can drag around, which we need for our App.
class CatPage extends HookWidget {
  @override
  Widget build(BuildContext context) {
    return new LayoutBuilder(
        builder: (BuildContext context, BoxConstraints constraints) {
      return Center(
        child: Draggable(
          child: Container(
            width: constraints.maxWidth - 10,
            height: constraints.maxHeight - 200,
            child: Card(
              color: Colors.green,
              child: Icon(Icons.downloading),
            ),
          ),
          feedback: Center(
            child: Container(
              width: constraints.maxWidth - 10,
              height: constraints.maxHeight - 200,
              child: Card(
                color: Colors.grey,
                child: Icon(Icons.downloading),
              ),
            ),
          ),
        ),
      );
    });
  }
}
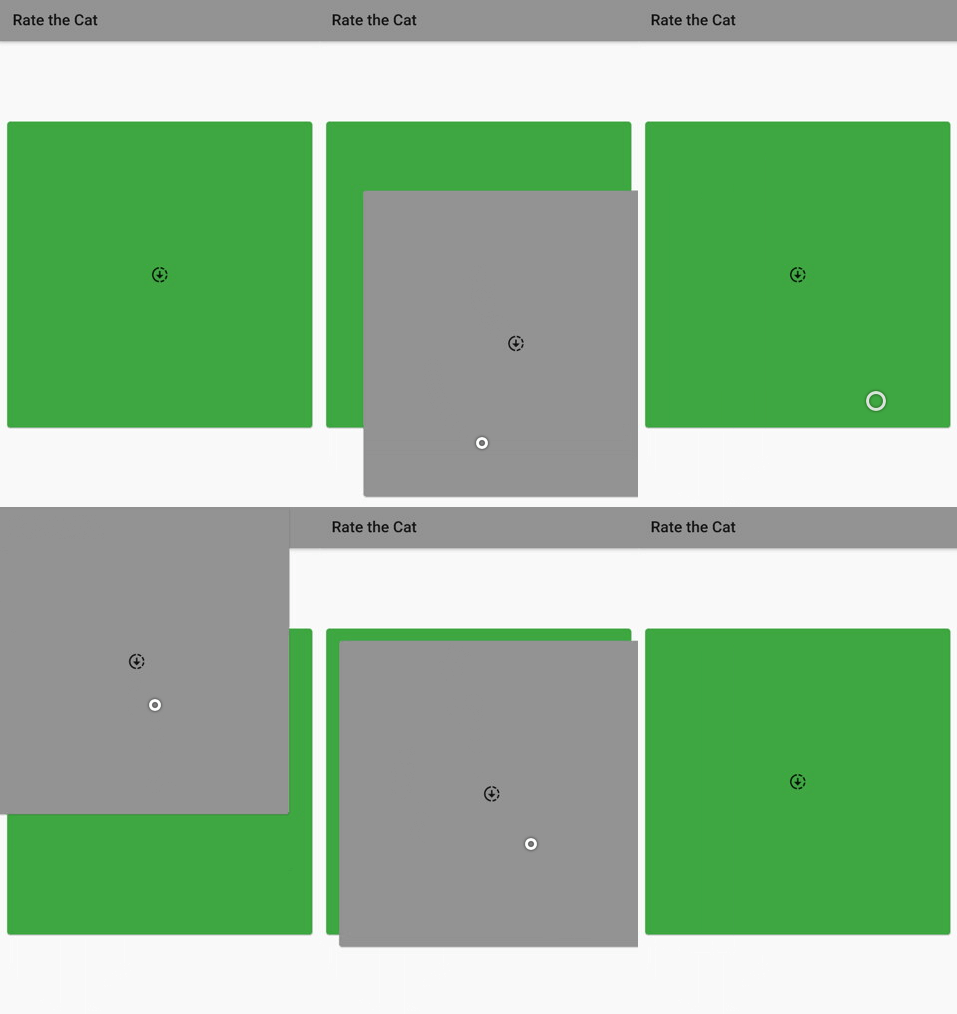
We can now run our app, and we should see a container that we can drag around. As we supplied the child of the Draggable, which is what we see displayed when nothing happens. We also have the feedback parameter. Finally, the Widget that we return is displayed while dragging around the container. This should result in the following app when run:

So now we have a Draggable Widget. But nothing happens when we drop the container on the left or right side. For this, we can override the onDragEnd method. This method provides us with DraggableDetails The DraggableDetails contains information about where the user dropped the Widget. We can use this information to determine whether the user dropped the Widget to the left or right.
        child: Draggable(
          onDragEnd: (details) {
            if (details.offset.dx > 20) {
              print("Is dropped to the right");
            } else if (details.offset.dx < -20) {
              print("Is dropped to the left");
            }
          }
Here the value twenty is a variable that determines how sensitive the App is. You should play around with the value a bit to see what sensitivity bests suit your app. For now, we only print whether the user ended the drag and drop to the left or the right. Since we have no calls to the API yet, let's come back later to replace the logging with the actual implementation!
Placing the image
We can now drag the Widget and detect whether the Widget is slid to the left or right. This means the basis is ready, and we can start by calling the API. If you want to use the API too, you can register for a free API key here. We will call the search API for our app, which will return the information about the image. The search API returns the following information:
[
    {
        "breeds": [],
        "id": "19n",
        "url": "https://cdn2.thecatapi.com/images/19n.gif",
        "width": 499,
        "height": 367
    }
]
For now, we only need the URL, but we will also need the id to vote on the picture. Let's create an object, so we can deserialise the body of the call into our object.
class Cat {
  final String id;
  final String url;
  Cat({
    this.id,
    this.url,
  });

  factory Cat.fromJson(Map json) {
    return Cat(
      id: json['id'],
      url: json['url'],
    );
  }
}
We now have an object, so let's call the API. We can perform a GET call to the endpoint with the HTTP package, we added earlier. Since we have an async method, the result value of the function will be a Future. This means that we can already call this method, and show it is loading till the call is finished.
class CatRepository {
  Future fetchCat() async {
    final response = await http.get(
      Uri.parse('https://api.thecatapi.com/v1/images/search'),
      headers: {"x-api-key": "api-key", "Content-Type": "application/json"},
    );
    if (response.statusCode == 200) {
      return Cat.fromJson(jsonDecode(response.body)[0]);
    } else {
      throw Exception('Failed to load Cat');
    }
  }
}
We will create a FutureProvider to provide us with a Cat. The FutureProvider comes from the Riverpod package. We discuss the Riverpod FututerProvider in more detail in this blog post.
final cat = FutureProvider.autoDispose((ref) async {
  return ref.watch(catRepository).fetchCat();
});
We can retrieve the information about the picture of the cat with the useProvider method. Do not forget to make sure the Widget extends the HookWidget to make use of hooks. Since the provider provides us with a Future, we can implement the when method of this future. Here we can return a different Widget for each scenario. The data scenario is for when the API returns the cat. The loading is when we are still waiting for a result and the error for when the call has failed.
class CatPage extends HookWidget {
  @override
  Widget build(BuildContext context) {
    final currentCat = useProvider(cat);
    return currentCat.when(
        data: (catData) {
          return new LayoutBuilder(
              builder: (BuildContext context, BoxConstraints constraints) {
            return Center(
              child: Draggable(
                onDragEnd: (details) {
                  if (details.offset.dx > 20) {
                    print("Is dropped to the right");
                  } else if (details.offset.dx < -20) {
                    print("Is dropped to the left");
                  }
                },
                child: Container(
                  width: constraints.maxWidth - 10,
                  height: constraints.maxHeight - 200,
                  child: Card(
                    child: Stack(children: [
                      Loading(),
                      Center(child: CatImage(url: catData.url))
                    ]),
                  ),
                ),
                feedback: Center(
                  child: Container(
                    width: constraints.maxWidth - 10,
                    height: constraints.maxHeight - 200,
                    child: Stack(children: [
                      Loading(),
                      Center(child: CatImage(url: catData.url))
                    ]),
                  ),
                ),
              ),
            );
          });
        },
        loading: () => Loading(),
        error: (e, s) => ErrorWidget(s));
  }
}
Here the CatImage is a simple Widget to display the content of an URL.
class CatImage extends StatelessWidget {
  const CatImage({Key key, this.url,}) : super(key: key);

  final String url;

  @override
  Widget build(BuildContext context) {
    return FadeInImage.memoryNetwork(
      placeholder: kTransparentImage,
      image: url,
    );
  }
}
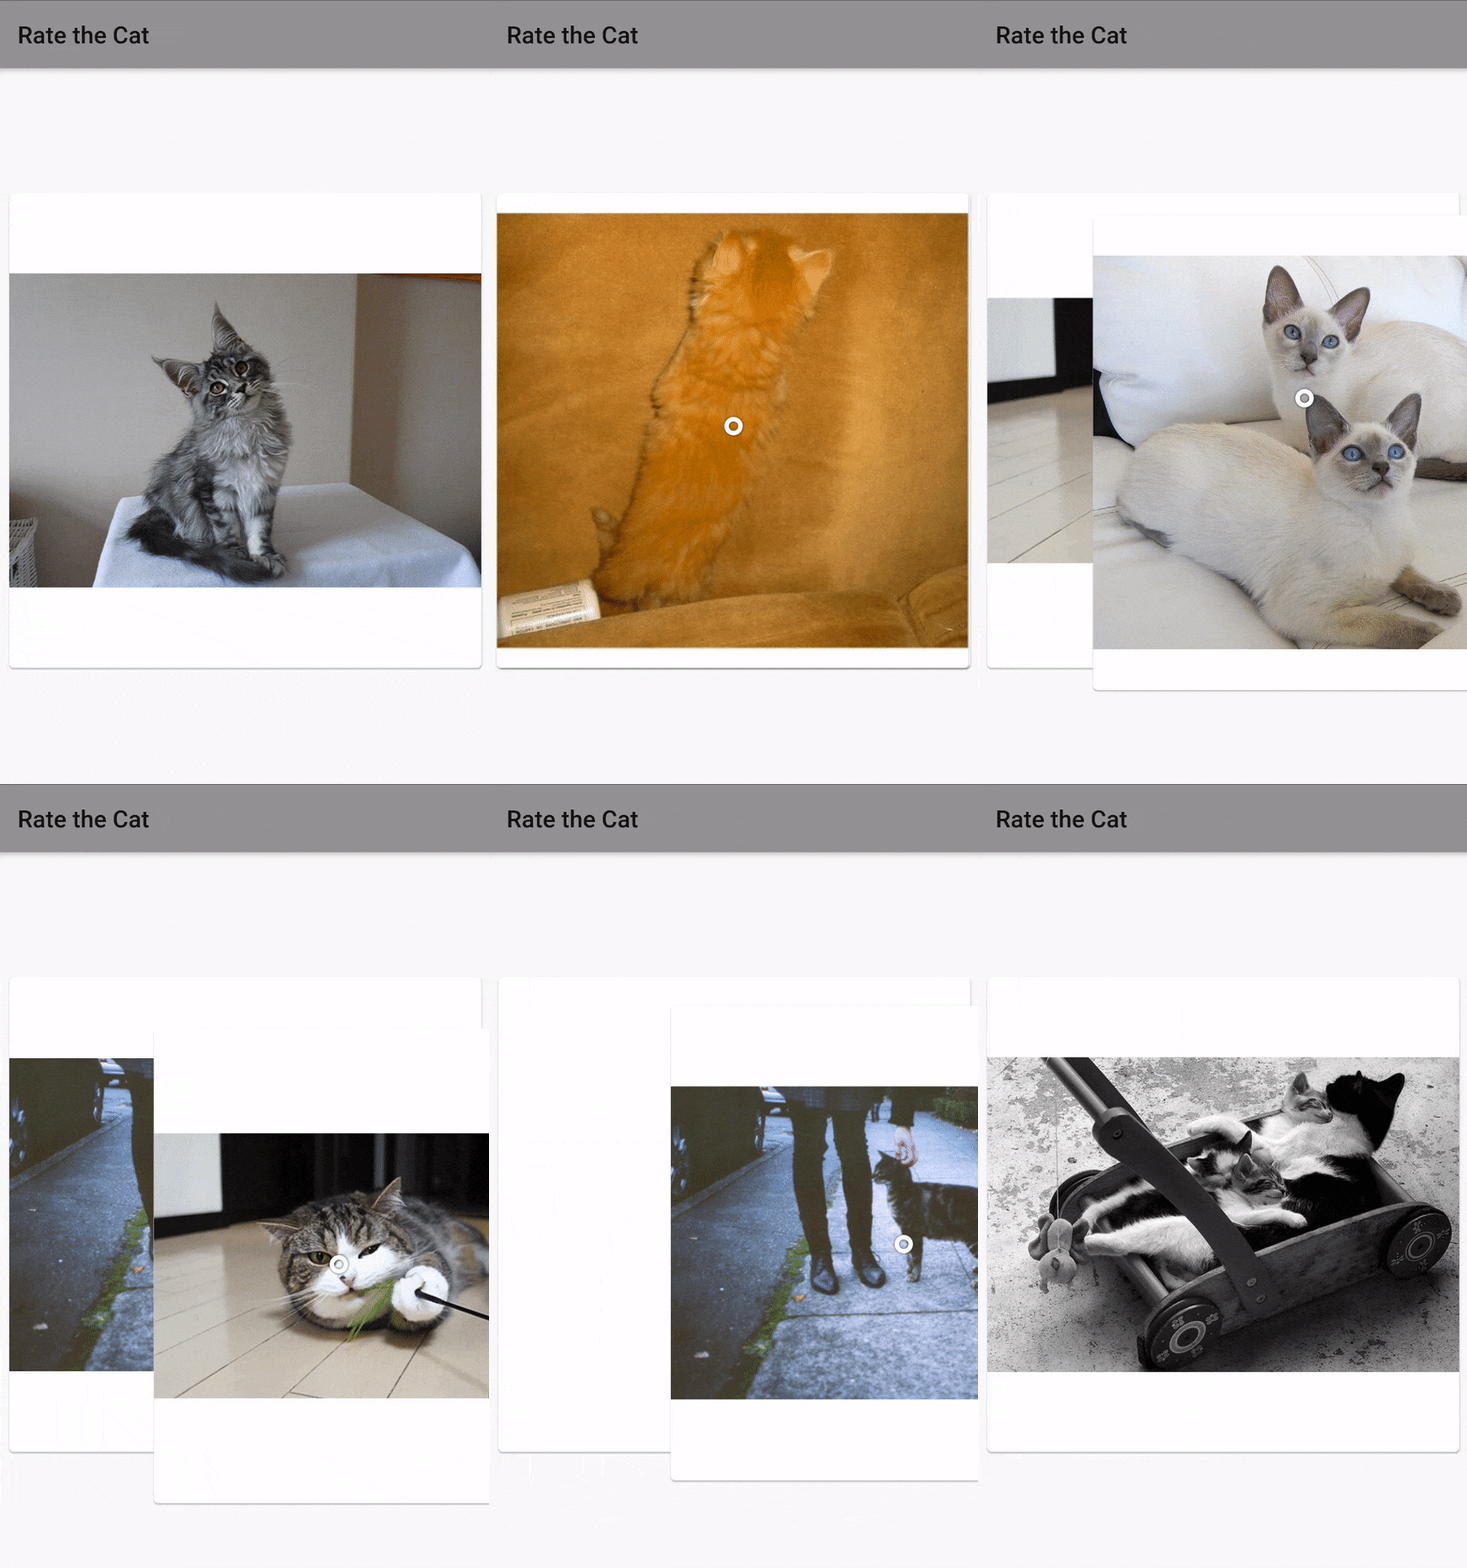
If we run the app, we can now see a cat:

Rating the image
Now that we have displayed a picture of the cat through the API, it is time to vote on it! For this we can post the following body to the API:
{
  "image_id": "2gl",
  "value": 1
}
To do this, we create an object for serialization of this body.
class Vote {
  final String id;
  final int value;

  Vote(this.id, this.value);

  Map toJson() => {
        'image_id': id,
        'value': value,
      };
}
We can then use the jsonEncode to post this vote to the API.
  rateCat(Vote vote) {
    http.post(Uri.parse("https://api.thecatapi.com/v1/votes"),
        headers: {
          "x-api-key": "api-key",
          "Content-Type": "application/json"
        },
        body: jsonEncode(vote));
  }
Displaying the next image
Finally, we have to get the next image after rating the current cat picture. While doing this, we are going to implement some improvements. We will prefetch the next image while we are rating the current one. After that, we will also display the next image underneath the current one while dragging. For this, we can make great use of the Riverpod family call here. We can supply an ID that will be used to determine whether it will return an existing value or a new one. We can use this to retrieve a new cat picture each time we fetch a cat. This also means we can already make a call for the next cat, while we are retrieving the current cat.
final cat = FutureProvider.autoDispose.family((ref, id) async {
  return ref.watch(catRepository).fetchCat();
});
We can now supply an extra number to the useProvider method. Each time the number is different, another cat is retrieved. Combining this we an useState hook to maintain the count, we can retrieve another cat from the API each time we increase the number. Now after rating the cat, we can increment the count and this will get us another cat.
  @override
  Widget build(BuildContext context) {
    final counter = useState(0);
    final currentCat = useProvider(cat(counter.value));
    return currentCat.when(
        data: (catData) {
          return new LayoutBuilder(
              builder: (BuildContext context, BoxConstraints constraints) {
            return Center(
              child: Draggable(
                onDragEnd: (details) {
                  if (details.offset.dx > 20) {
                    rateCat(Vote(catData.id, 1));
                    counter.value++;
                  } else if (details.offset.dx < -20) {
                    rateCat(Vote(catData.id, 0));
                    counter.value++;
                  }
                },
We can already cache the image of the next cat by calling the _precacheImage _method.
    final nextCat = useProvider(cat(counter.value + 1));
    nextCat.when(
      data: (nextCat) {
        precacheImage(Image.network(nextCat.url).image, context);
      },
      loading: () {},
      error: (o, s) {},
    );
To display the next cat picture while we are dragging the current cat picture, we have to maintain a bit of state. We will use an useState for whether the image is being dragged or not. We can then use this state to determine whether the .. of the Draggable should be the current of the next cat.
class CatPage extends HookWidget {
  rateCat(Vote vote) {
    http.post(Uri.parse("https://api.thecatapi.com/v1/votes"),
        headers: {"x-api-key": "api-key", "Content-Type": "application/json"},
        body: jsonEncode(vote));
  }

  @override
  Widget build(BuildContext context) {
    final counter = useState(0);
    final currentCat = useProvider(cat(counter.value));
    final nextCat = useProvider(cat(counter.value + 1));
    final dragging = useState(false);

    nextCat.when(
      data: (nextCat) {
        precacheImage(Image.network(nextCat.url).image, context);
      },
      loading: () {},
      error: (o, s) {},
    );
    return currentCat.when(
        data: (catData) {
          return new LayoutBuilder(
              builder: (BuildContext context, BoxConstraints constraints) {
            return Center(
              child: Draggable(
                onDragEnd: (details) {
                  if (details.offset.dx > 20) {
                    rateCat(Vote(catData.id, 1));
                    counter.value++;
                  } else if (details.offset.dx < -20) {
                    rateCat(Vote(catData.id, 0));
                    counter.value++;
                  }
                  dragging.value = false;
                },
                onDragStarted: () {
                  dragging.value = true;
                },
                child: Container(
                  width: constraints.maxWidth - 10,
                  height: constraints.maxHeight - 200,
                  child: Card(
                    child: Stack(children: [
                      Loading(),
                      Center(
                        child: dragging.value == false
                            ? CatImage(url: catData.url)
                            : nextCat.when(
                                data: (nextCat) {
                                  return CatImage(url: nextCat.url);
                                },
                                loading: () {
                                  return Loading();
                                },
                                error: (Object error, StackTrace stackTrace) {
                                  return ErrorWidget(stackTrace);
                                },
                              ),
                      )
                    ]),
                  ),
                ),
                feedback: Center(
                  child: Container(
                    width: constraints.maxWidth - 10,
                    height: constraints.maxHeight - 200,
                    child: Card(
                      child: Stack(children: [
                        Loading(),
                        Center(child: CatImage(url: catData.url))
                      ]),
                    ),
                  ),
                ),
              ),
            );
          });
        },
        loading: () => Loading(),
        error: (e, s) => ErrorWidget(s));
  }
}
Thanks for reading this blog post. As a cat lover, I had a great time creating this small App for rating those cats. This is a great simple app to learn more about Flutter. It contains state management, calling an API, and dealing with loading states. You can find the full code of this project on Github.
The post Creating a Cat Voting App with Flutter appeared first on Barttje.


Top comments (0)