This is a step by step guide for deploying and managing a Node.js application using Nesabox. As a sample project, we'll be deploying a strapi application but this tutorial would work for any Node.js framework or project.
Requirements
- A free Nesabox account
Creating a virtual private server
The first thing we need is a VPS to host our application. You can obtain one of almost any size from server providers such as Digital Ocean, Vultr, Linode and AWS. Nesabox connects your account with these providers to make it easy to provision a server. You can also obtain a VPS from any provider of your choice running Ubuntu 18.04 and connect it to your Nesabox account.
In this example, we'll use Digital Ocean, but any provider would work just fine. Visit your account settings page to connect your provider by adding an API token obtained from Digital Ocean (Or your chosen provider).
Once done, visit your dashboard to provision a server.
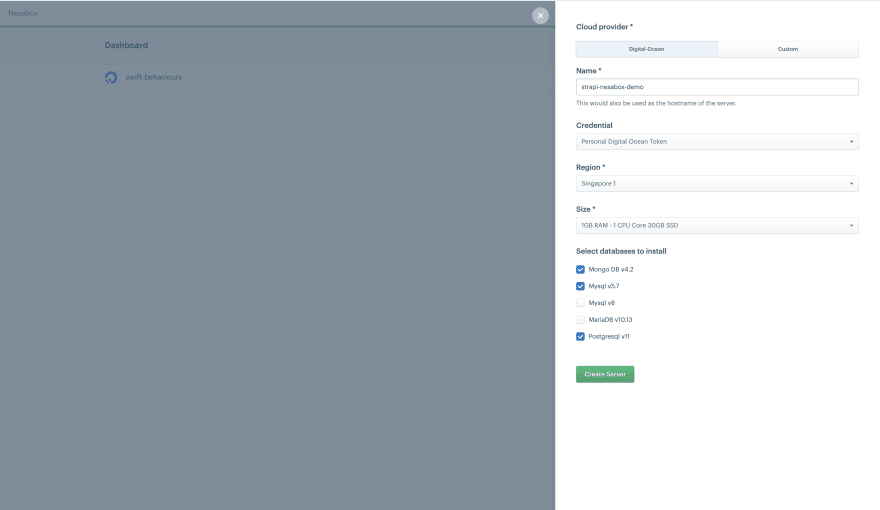
Be sure to select the databases you'll need on this server. In this case, I selected all databases supported by Strapi.
The provisioning takes abut 10 minutes. During this time, Nesabox installs all necessary packages, databases, and configures the server for production.
Creating a database
Once your server is ready, click to manage it. You should see the Mongodb tab. You can manage your Mongodb installation here by adding new databases and users.

Add a new database. We'll connect our application to this database.

We need to add a new database user to this database to access it. Click on the people icon to manage database users.
Add a database user with password.

Creating a site
Visit the Sites tab and add a new site. The name of the site should match the domain of your site.

Connecting site to Github repository.
Click to manage the newly created site. To connect the site to Github, you need to connect your account to Github from your account applications page. Once connected, provide the repository and branch for the application. In this case, bahdcoder/strapi-nesabox-demo.
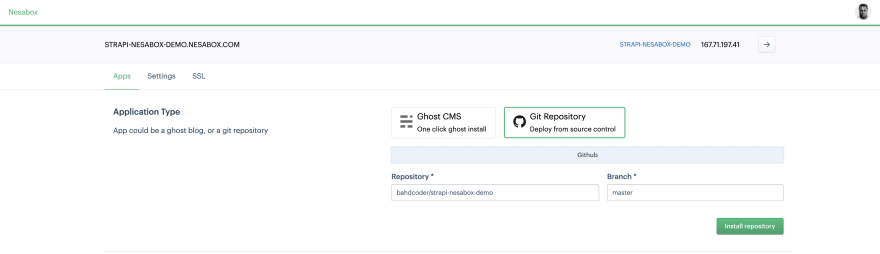
This process would take only a few seconds to clone and install your project repository.
Configuring PM2
PM2 is an advanced production ready process manager for Node.js applications. Nesabox creates an ecosystem.config.js file specific to your application on the server.
On the Site Settings tab, you can update this file to add execution commands, node versions, environment variables, log files and any other configurations supported by PM2.
On the Settings tab, when you click the Edit PM2 Ecosystem file, the ecosystem.config.js file for this site is fetched securely over SSH and placed in an editor for you to edit.

The first important configurations are the script:npm and args:start. This instructs PM2 to run the npm start command when starting or restarting the application in production.
Next, we have the interpreter configuration which is a path to the specific node version this app will run on. By default, it's the latest stable version.
We can also configure all environment variables for our project in the env object. The PORT environment variable is automatically generated by Nesabox. If you need to change this, then you also have to make sure the Nginx configuration proxies to your new port too.
For this application, all the environment variables really needed are database configurations. The DATABASE_NAME, DATABASE_USERNAME and DATABASE_PASSWORD all match the MongoDB credentials we created earlier.
Setting up deploy script
The Deploy Script is the script Nesabox runs on your server on every deployment. By default, it pulls the latest changes from the deployment branch, installs npm dependencies and restarts the application with PM2.
For this application, we'll need to build the application before starting it. We'll modify it as follows:

It simply runs the npm run build command before starting with PM2.
Deploy your application
To deploy, click deploy 🚀 ! You can monitor the deployment in real time too.
To view your application, be sure to point your site domain to your server.
🎉🎉🎉

BONUS - Secure your site with Let's Encrypt
On the SSL tab, with one click, you can secure your site with a Let's Encrypt SSL certificate.
🎉🎉🎉

Conclusion
Nesabox makes deployments and application management really easy. This article is just the tip of the iceberg. Please reach out with questions if you have any. Thank you for reading this far!

Top comments (0)