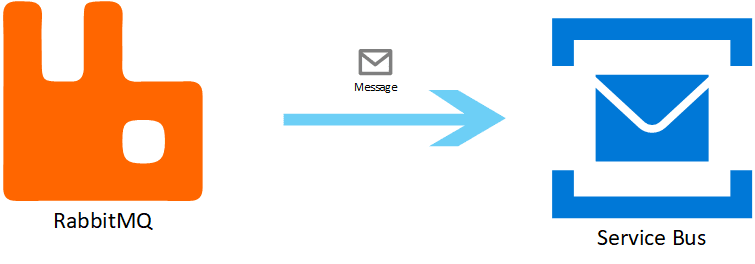
In this article we are going to learn how to send messages from RabbitMQ to Azure Service Bus.
Here's a few scenarios in which we can make use of these capabilities:
- Edge Setups: We have an edge setup where we are sending messages to RabbitMQ, but we want to forward those messages to Azure Service Bus for further processing, so we can use many of the Azure Big Data capabilities.
- Hybrid Cloud: Your company just acquired a third party that uses RabbitMQ for their messaging needs. They are on a different cloud. While they transition to Azure you can already start sharing data by bridging RabbitMQ with Service Bus.
- Third Party Integration: A third party uses RabbitMQ as a broker, and wants to send their data to us, but they are outside our organization. We can provide them with SAS Key giving them access to a limited set of Service Bus queues where they can forward their messages to.
The list goes on, but we can solve most of these use cases by bridging RabbitMQ to Azure.
First you need to create a free Azure account by signing up here
Once you are signed in to your account go to the azure portal and create a new Service Bus namespace. Namespaces are the scoping containers where our messaging components will live, like queues and topics.
Adding a new Service Bus Namespace
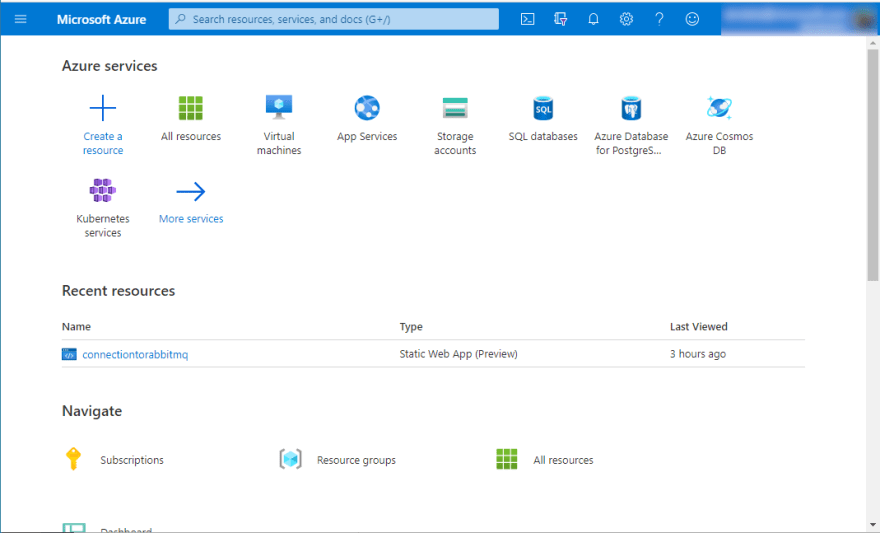
In Azure Portal click the big plus button to add a new resource
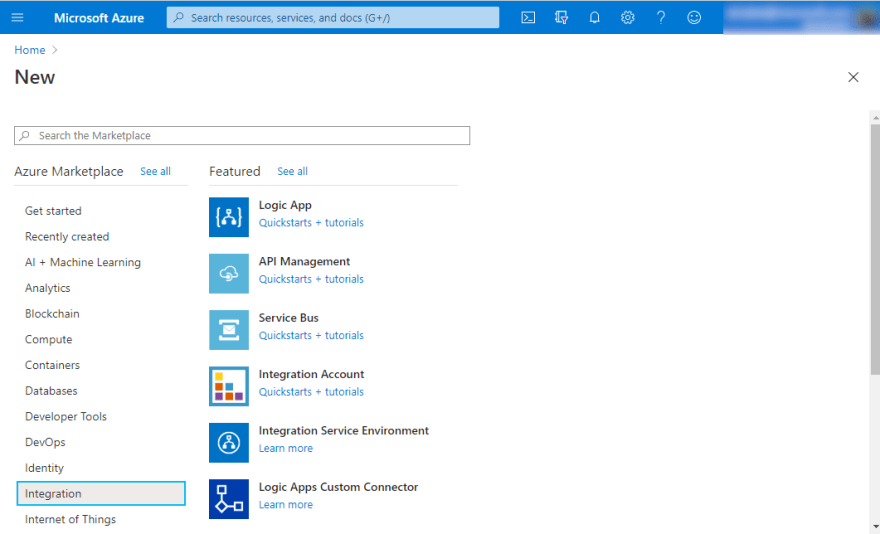
Then select Integration and click on Service Bus to create a messaging namespace:
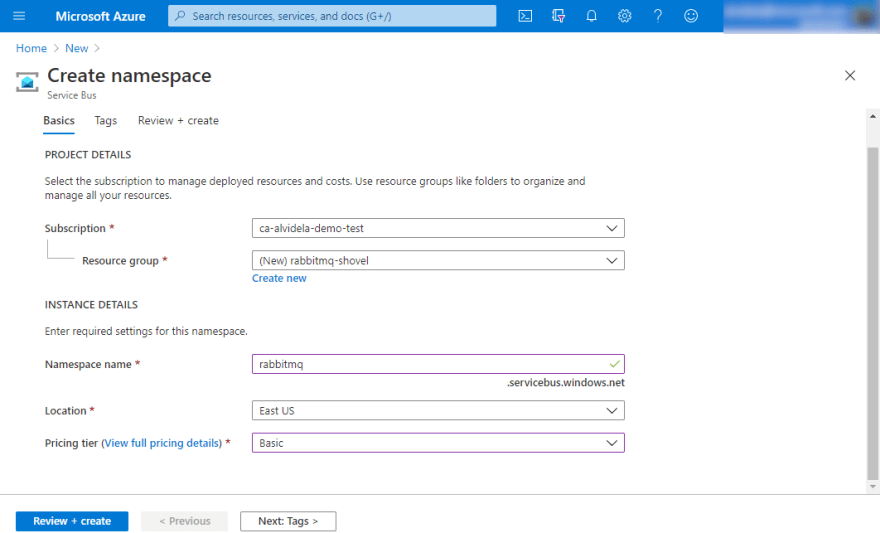
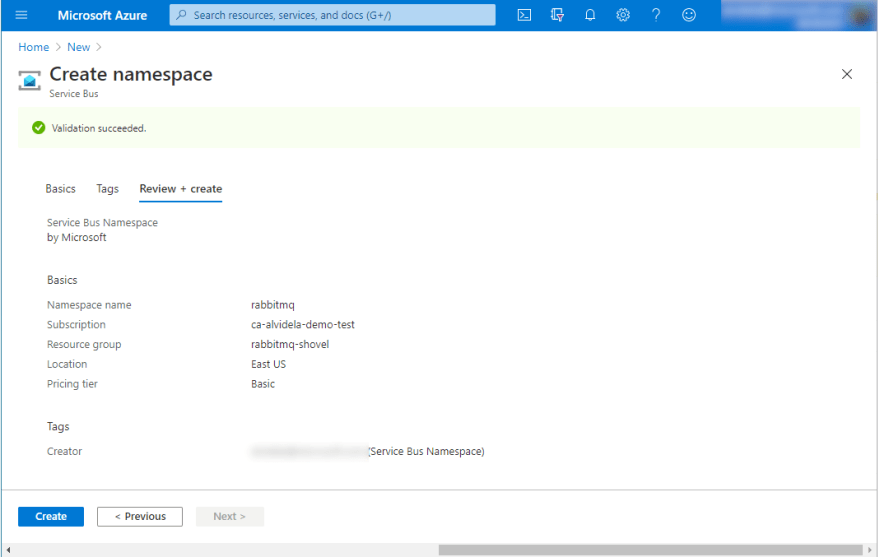
You will be prompted to enter the information for the namespace. So first select the Azure subscription you want to use, and create a new resource group if you don't have one already (more on resource groups here).
For Namespace name you can use rabbitmq but it could be anything you want. Then set East US for the location, and in this case take the Basic price tier.
If all went well you should see the following confirmation screen:
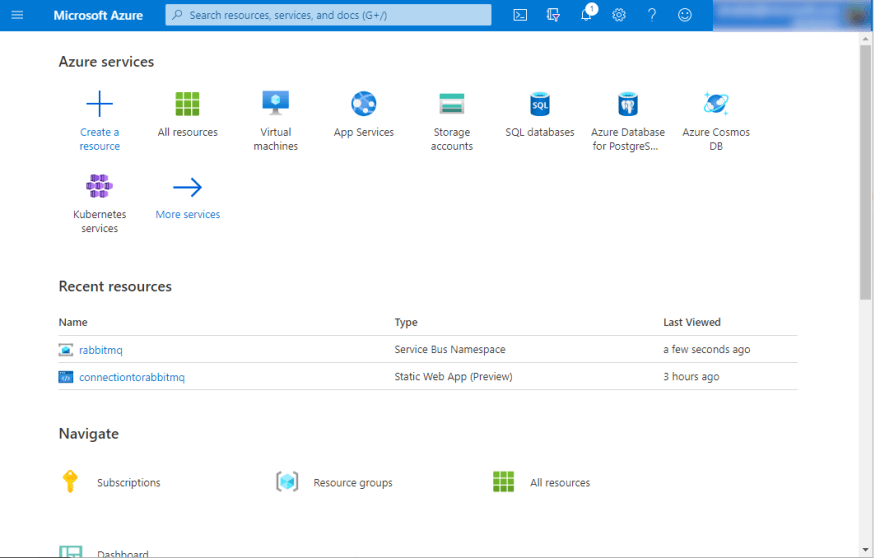
Then back at the Azure Portal you'll see your new rabbitmq namespace listed there. Click on it to access the resource so you can add a queue to it.
Creating our Service Bus Queue
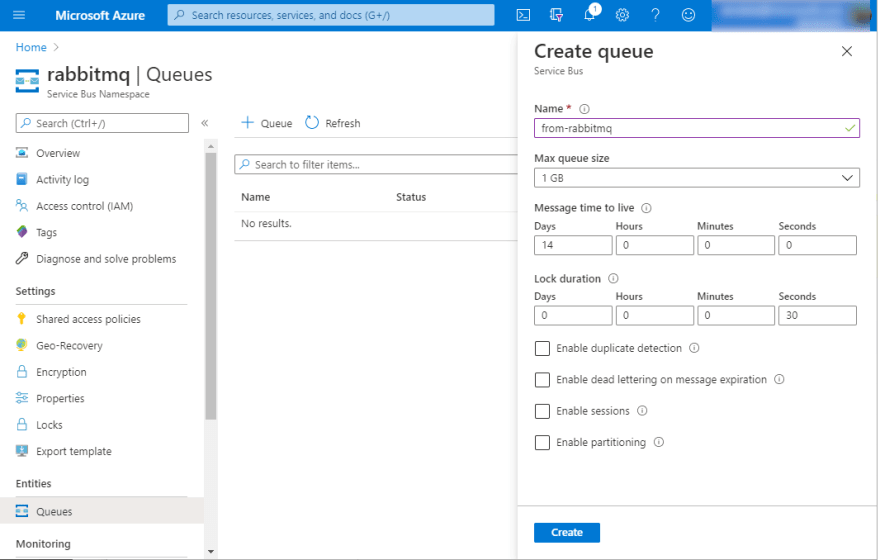
Now that you have your service bus namespace, click on the Queues button on the left, under Entities, so you can add a new queue:
The name of the queue will be from-rabbitmq just as a reminder to where are the messages coming from. You can leave all the other options as defaults, but of course you can change them to fit the needs of your app.
Enabling the RabbitMQ Shovel Plugin
To ship messages from RabbitMQ to Azure Service Bus we are going to use the Shovel Plugin that comes packaged with RabbitMQ. You can enable it with the following command (you might need to run this command with administrator privileges or via the rabbitmq user):
rabbitmq-plugins enable rabbitmq_shovel_management
Actually that command enables the visual interface for the plugin, which ends up enabling the shovel plugin for us.
Now is time to get the credentials required for connecting RabbitMQ to Azure.
Connecting RabbitMQ to Azure Service Bus
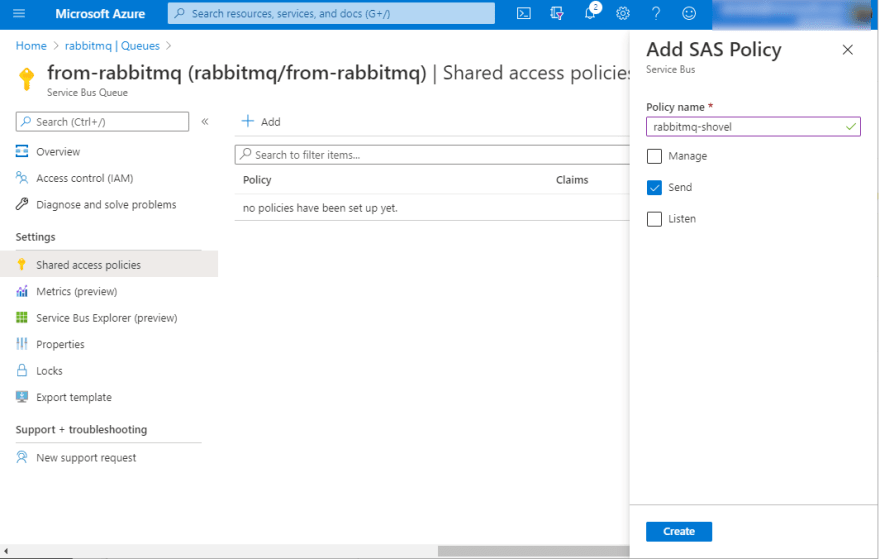
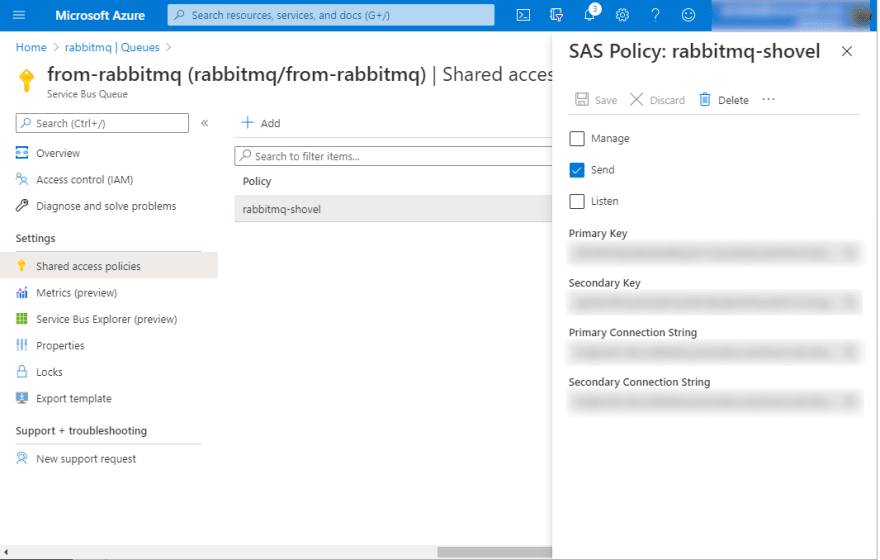
You'll need to create a Shared Access Policy (SAS) for your queue, so RabbitMQ can publish messages to it. A SAS Policy will allow us to specify how much an external party can do with our resource. In this case the idea is that RabbitMQ is just able to send messages, but not listen to the queue, or to manage the queue.
So in this case tick the Send box and then click Create to have our SAS Policy in place.
Once the policy has been created click on it to see the Primary Connection String which is what you are going to use to let RabbitMQ talk to Azure Service Bus:
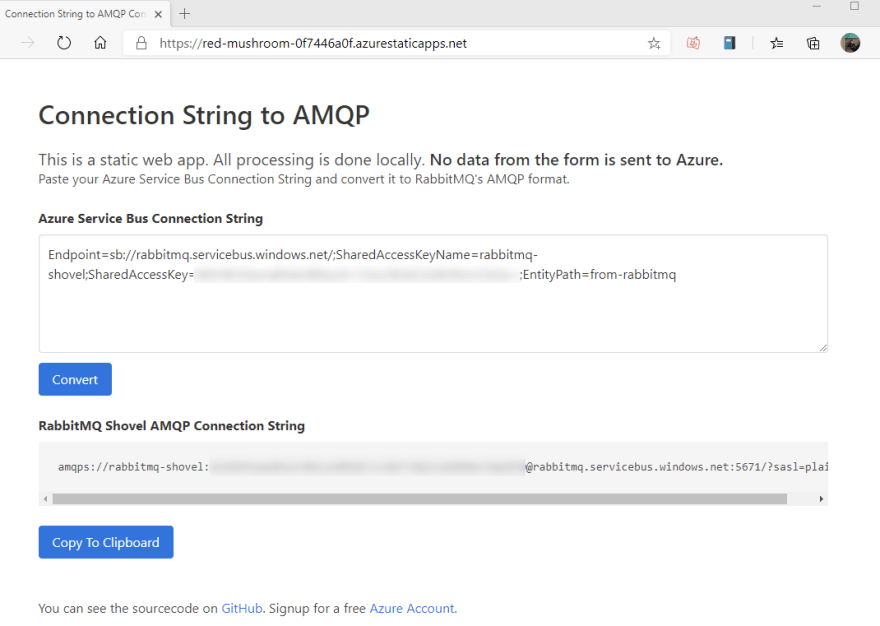
Before you can use that connection string, you'll need to convert it to RabbitMQ's AMQP connection format. I created a basic website to ease that process. So go here and paste your connection string in the form, click convert, and you will get a connection string that is RabbitMQ ready. (Don't worry, that website runs everything in your browser so your data is safe). If you wanna be sure, the source code is on GitHub.
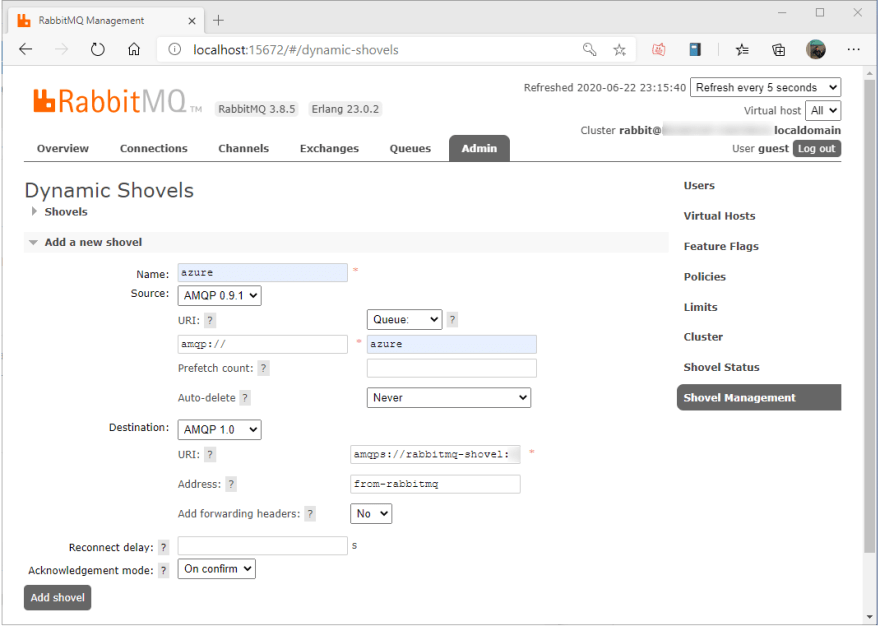
Now open the RabbitMQ management plugin in our browsers http://localhost:15672/#/dynamic-shovels and go to Admin -> Shovel Management, where you can add your new shovel that will take care of sending messages from a RabbitMQ queue to your Azure Service Bus queue.
Here name your shovel azure and choose AMQP 0.9.1 as the source protocol. This tells the shovel plugin how to connect to your local RabbitMQ server. In the screenshot we have amqp:// which is the default URI that connects us to a local RabbitMQ server. Make sure to adapt that to your current deployment.
On the queue side of things, specify the name of your queue. In this case I used azure which is the name of a queue that I had already created in RabbitMQ. If you don't have that queue you can create it on the RabbitMQ management plugin, under the Queues tab. You can leave the other options as default.
Then on the destination side of things, we are going to choose AMQP 1.0 as the protocol. In the URI field we'll enter the connecting string that we got from the previous step that converted our Azure connection string to our RabbitMQ format. It should look like this:
amqps://rabbitmq-shovel:StringOfRandomChars@rabbitmq.servicebus.windows.net:5671/?sasl=plain
In the Address field we'll enter the name of our Service Bus Queue, in this case, it was called from-rabbitmq. Click Add Shovel, and our set up should be ready to start receiving messages.
Publishing Messages from RabbitMQ to Azure Service Bus
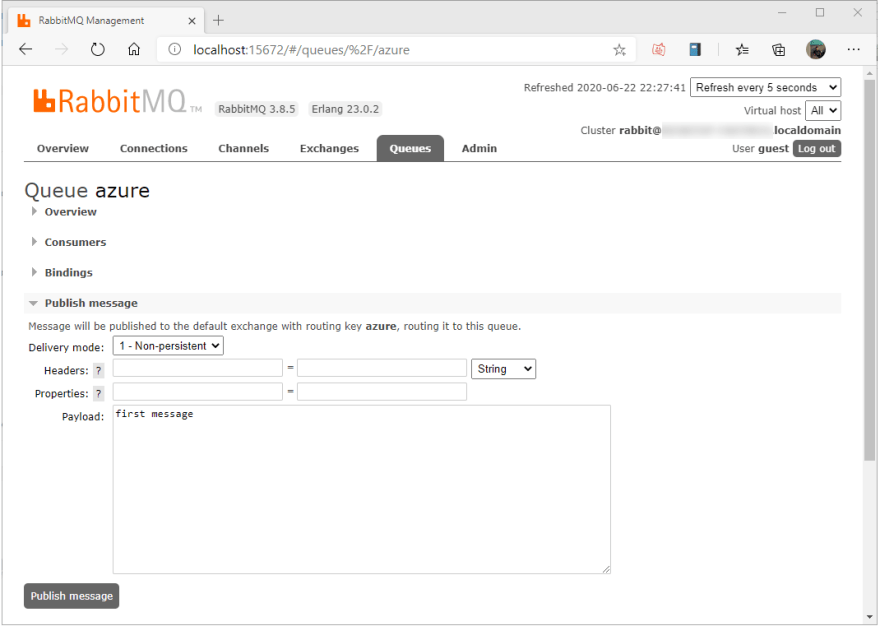
In the RabbitMQ Management interface we can go to Queues, select the azure queue, and search for the Publish message panel. There a form will appear that will let you publish messages directly to our queue. For our example we are just going to add fist message as the Payload and hit Publish Message:
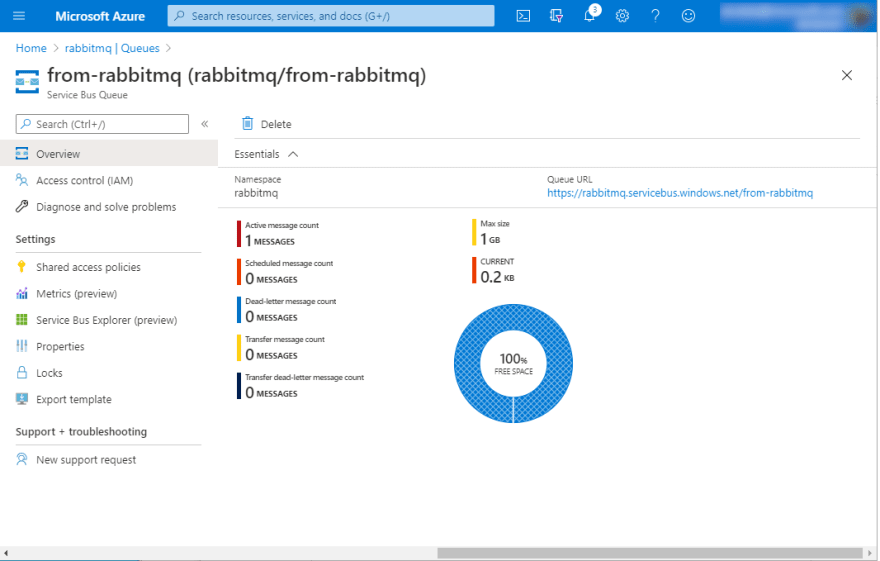
Go back to Azure and inspect your queue. Click Service Bus Explorer in the left panel. If all went well you'll see your queue now has one message. Yay, congrats!
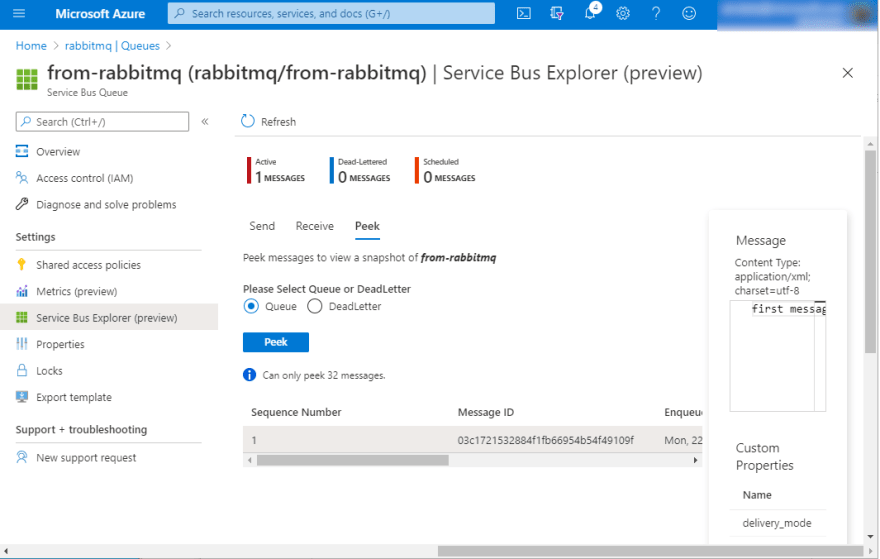
But let's make sure that message is the one you sent from RabbitMQ. Select the Peek tab and click the Peek button to retrieve the last messages in your queue. Click on the message to inspect its contents. You should see something like the image below where your first message is listed.
Let's Recap
Congrats! We did a lot and we managed to get our messages from RabbitMQ to Azure Service Bus, let's recap the steps:
- Create an Azure Service Bus Namespace
- Add a queue to the namespace
- Add a SAS Policy to our queue
- Get the queue connection string
- Enable the RabbitMQ shovel plugin & the management interface
- Convert the Azure Service Bus connection string to RabbitMQ's AMQP format
- Add a new shovel to RabbitMQ
- Publish messages
By following the previous steps you were able to integrate areas of your org that might be outside of Azure, by shipping messages from RabbitMQ to Azure Service Bus using the Shovel Plugin. This has enormous advantages since we can even allow trusted third parties to connect their apps with our Azure deployment.
In the end, messaging is about enabling connections, and with this technique we just opened a new one.


Top comments (8)
Thanks for the article! Found it really interesting. Only one small question... is it somehow possible to use this shovel generated link to connect using non service bus specific libraries?
I.e: github.com/streadway/amqp Streadway AMQP library for Go
Do you know if Microsoft is planning to offer RabbitMQ compatible access to Service Bus? Is there any technical reason why this is not possible? I think it would be interesting as it allows some applications using RabbitMQ to run unmodified.
If someone in the community would want to build a RabbitMQ compatible API on top of the Service Bus AMQP interface, we would certainly be willing to help with advice and reviews. All the required features to do this are available via our AMQP 1.0 support.
What would "RabbitMQ compatible access to Service Bus" look like for you? Do you have an example of what you would like to have? No promises, but I can ask.
About the Go library, yes, it should work with that string, assuming the library works similar to the RabbitMQ Erlang client.
I have some code which posts events to a RabbitMQ queue. Nothing too complicated. Just posting messages to a queue. It uses github.com/streadway/amqp (Which is the Go AMQP 0.9.1 client). Currently for dev i'm using a RabbitMQ container, but in the production environment, I would like in the long term to remove the dependency on RabbitMQ.
My Question was if it is possible to just replace the RabbitMQ connection string (amqp://user:password@local-rabbit-server) with some Azure Service Bus special connection string, and that would allow my code to post events to Azure Service Bus unmodified, or maybe with few changes.
In the end, I just changed my code to support both. I've just added the Microsoft service bus client library for Go to my project and some additional configuration flags to support switching between both .
Thanks to both of you for your help.
the streadway/amqp seems to be an AMQP 0.9.1, while Azure Service Bus uses AMQP 1.0, so I don't think it's going to work.
I use rabbitmq for local development and azure service bus for deployed environments. the best way to accomplish this that i have found is to add the amqp 1.0 plugin in rabbit and then use an amqp 1.0 compliant library. With that, it's only configuration/connection strings to point to rabbit or service bus.
This was a good read. Do you know if it's possible to do this with ActiveMQ?
Hi Cecil, thanks for your comment. It should be possible if ActiveMQ supports AMQP 1.0. I would need to check to see how to make it work