Harden SSH
If you work with Secure Shell, you will definitely want to check out the following tips to harden SSH on your ubuntu server. Working as a Ubuntu server administrator, you are more likely to use Secure Shell (SSH) for remote access to the server.
As the name suggest SSH is relatively a secure protocol. However, we can make it more secure with a few steps. The aim of this article is to help you better lock down the SSH server.
Don’t Permit Empty Passwords

Firstly, make sure user accounts without passwords are not able to login. Some server administrators can create standard system users without a password. By default, SSH is configured to permit empty password.
Now, open the SSH daemon configuration file with the following command:
sudo nano /etc/ssh/sshd_config
Find the line with
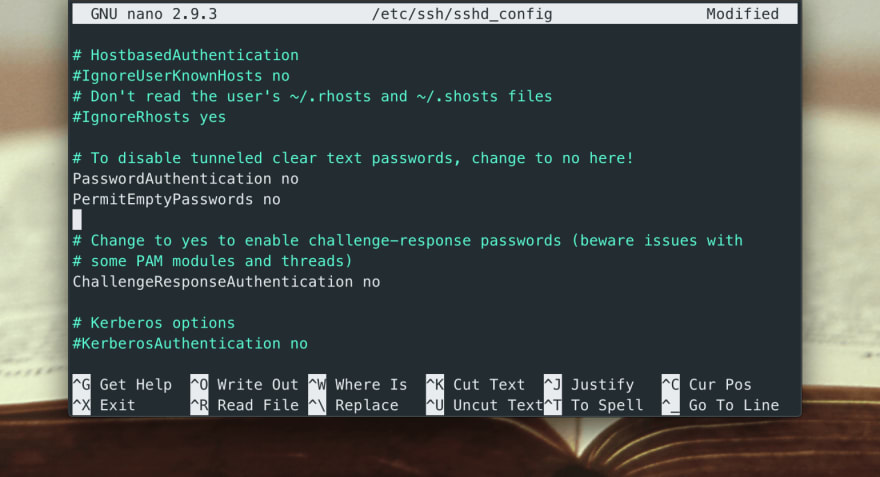
#PermitEmptyPasswords no
Remove the comment as shown below:
PermitEmptyPasswords no
Save the configuration and restart the SSH server with the command below:
sudo systemctl restart sshd
Limit Max Authentication Attempts

Frankly speaking, the best approach to preventing brute force attacks on your server is to limit the login attempts. To limit the number of attempts on login locate.
#MaxAuthTries 6
Uncomment it as shown below:
MaxAuthTries 3
Set Idle Timeout Interval

Consequently, the idle timeout is how long an SSH session is allowed to be idle. However, when the timeout is set, the SSH connection will be broken whenever the time passes. By default, this option is disabled.
In fact, I will enable the idle timeout and set the timeout to four minutes (240 seconds).
Now, locate the line with:
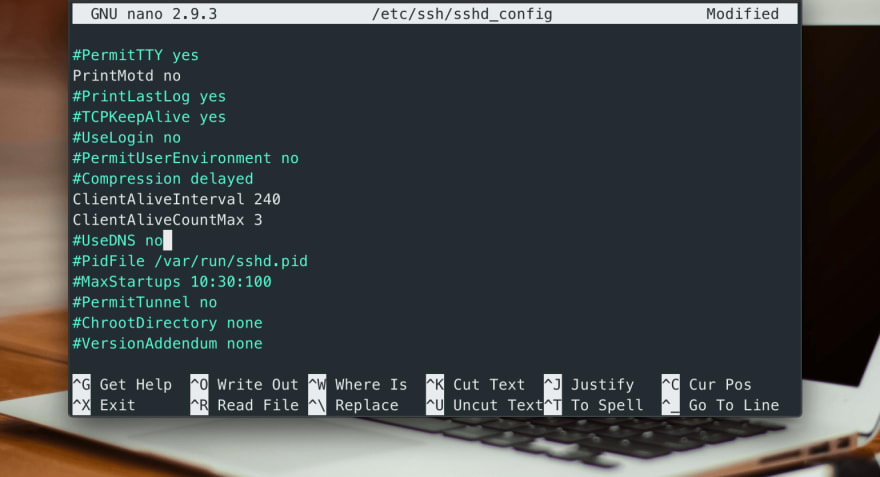
#ClientAliveInterval 0
#ClientAliveCountMax 3
And, uncomment the line as shown below:
ClientAliveInterval 240
ClientAliveCountMax 3
Disable Root Login

To explain, the root account has the sudo privilege associated with it and it can dangerous if an unauthorized person has access to it. However, connecting to the server with an account that has the sudo privilege. Also, the sudo should be setup properly. On the other hand, let’s disable root login via SSH.
In the SSH configuration, find the line with:
PermitRootLogin yes
Replace it with:
PermitRootLogin no

One other way to harden SSH is to change the default port. Thus, SSH runs on port 22 as by default. Mostly, hackers will target the default port. Changing it might prevent them from targeting you. It is not necessary to change the port but it is also a security measure to the hardening SSH server. In the configuration find the line with:
Port 22
Then, change the port to another port like 2019
Port 2019
Whitelist SSH Users

It is best to limit users allowed to login to the SSH server. Meaning only users in the list will be allowed to login to the server. And every other user will be denied access. Assuming, we want to allow john to login remotely through SSH. Add the line below to the configuration file.
AllowUsers john
Well, don’t forget to add your username to the list of AllowUsers.
Fail2Ban

This software scans your logs and temporarily ban IPs with suspicious activities. To install it run the command below:
sudo apt-get install fail2ban
Once installed, make a copy of the configuration file as shown below.
cp /etc/fail2ban/jail.conf /etc/fail2ban/jail.local
Then, open your copy of the fail2ban configuration file
nano /etc/fail2ban/jail.local
Look for the line that starts with [sshd] and uncomment enable = true and edit it as shown below:
[sshd]
enabled  = true
port    = ssh
logpath = %(sshd_log)s
Now restart fail2ban with the command below:
systemctl restart fail2ban
Accordingly, Fail2ban will now start monitoring your SSH logs for possible suspicious activities and then temporarily ban the source IP.
I also have an article on how to configure denyhosts on ubuntu. You might want to check it out.
Disable X11Forwarding

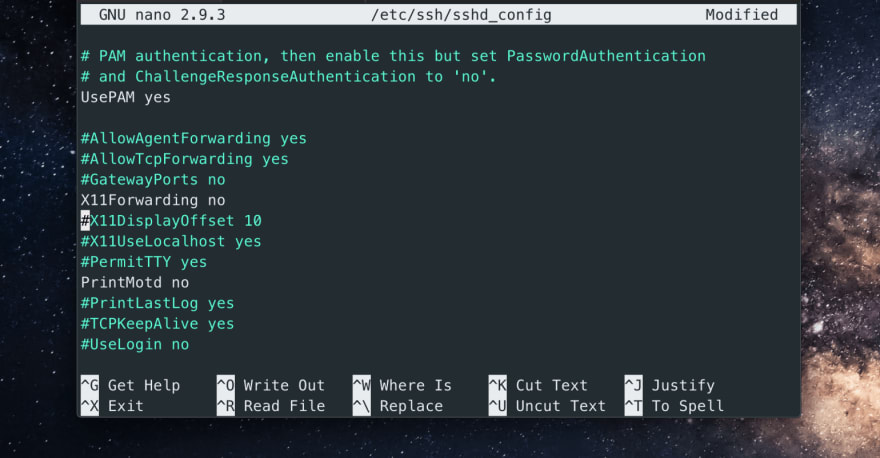
This article is meant for use with remote servers. In other words, there is no need to use GUI on a remote server. Apparently, this allows any other user to tunnel GUI applications via SSH. So disable X11 forwarding on the remote server. In the SSH configuration file /etc/ssh/sshd_config. Find the line:
X11Forwarding yes
And replace yes with no as shown below:
X11Forwarding no
Use SSH Keys
Apparently, you can SSH into the server with a username and password but with that, someone can brute force into the server. So, SSH keys can be used instead of passwords.
Generate SSH Key Pair
Now, let’s generate our encryption keys that come in pairs. Public and Private key. To generate the keys, run the following command on the machine that will be used to SSH into the server.
ssh-keygen
Well, you will be asked to enter passphrase to protect the keys. But, you can keep blank if you think it is not necessary.
Truly speaking, unprotected private SSH keys can be used to access the server by anyone in possession of that key.
Share Your Public Key
Use ssh-copy-id to copy your public key to the server.
ssh-copy-id john@192.168.10.4
You have changed your SSH port. Assuming, your SSH port is 2019 use the command below. Make sure you change the IP to the IP of your server.
ssh-copy-id -p2019 john@192.168.10.4
Afterward, try accessing the server via SSH with the following command:
ssh john@192.168.10.4
You may be asked to enter your passphrase. Thus, if you setup the passphrase during the key generation.
If the command runs successfully, you should see a message similar to the one below:
The authenticity of host '192.168.10.4 (192.168.10.4)' can't be established.
ECDSA key fingerprint is ff:fd:d8:f9:66:f6:73:84:e1:56:cf:d6:ff:ff.
Are you sure you want to continue connecting (yes/no)?
Your answer should be yes and you should access the server without entering password.
Disable Password Authentication
Eventually, we can now disable password authentication on the server. Since we have established SSH keys authentication. Open the SSH configuration file and find the line:
PasswordAuthentication yes
Then, change it to:
PasswordAuthentication no
Displaying Banner
Usually, banners are some form message or a statement saying “unauthorized access is not allowed”. Sometimes, the banner message contains legalese which turns to warn or scare hackers. Frankly speaking, this doesn’t add any security to the system, because anyone who manages to access your system won’t care about the warning sign but it might give the hacker a chuckle.
By default, banners are disabled on Ubuntu 18.04. Banners are normally displayed before authentication meaning anyone trying to SSH into the server will see the banner. Well, to see the banner you need to enable PasswordAuthentication.
To add a banner, edit the SSH configuration file and then uncomment:
#Banner /etc/issue.net
After that, try accessing the server if a wrong user account:
ssh fake_john@192.168.10.4
You will receive feedback similar to the one below:
Ubuntu 18.04.3 LTS
fake_john@192.168.10.4’s password:
Apparently, you can customize this message by editing /etc/issue.net file.
nano /etc/issue.net
###########################################################
#               Welcome to Anansewaa.com                  #                                        #                                                         #
#   Note that All connections are recorded and monitored  #                                       #                                                         #
#   Disconnect IMMEDIATELY if you are unauthorized user!  #                  #                                                         #
###########################################################
This message will make the hacker think of what he/she is doing before messing around.
Conclusion
Hopefully, you have found this article a bit helpful on how to harden SSH on your server. There is much more to learn about SSH.


Top comments (0)