Building Android with Flutter and AWS Amplify — Part 2
Introduction
This is Part two in a series of three articles describing how to build out an Android mobile application using Flutter and AWS Amplify. In Part One we scaffolded out our shopping list application using Flutter to build our UI. We then, added our initial offline first datamodel usingAWS Amplify AdminUI sandbox and tested that it worked with our UI. Then we deployed our changes and provisioned the AWS services that control our application’s backend ( AWS Appsync and Amazon DynamoDB ) and finally we made sure that all clients were correctly seeing the most up to date version of our shopping list data as it synchronized between them.
In Part two we are going add extra features to our application by creating a user login screen, this will add the ability to login, signup and verify signup for our application.
What are we going to build ?

First Screen — “Login”
- Enter Email
- Enter Password ( hidden)
- Submit
- Link to Signup
Second Screen — “SignUp”
- Enter UserName
- Enter Email
- Enter Password
- Submit
- Link to Login
Third Screen — “Confirm Signup”
- Enter email verification code
- Submit
So you can see what is a very standard login flow, prompting the user to login if they have an account. If they don't have an account then prompting the user to signup, with an additional step in signup to verify a code that has been sent to their signup email address.
Building the UI in Flutter
So the first step as always is to flesh out the UI and how that will behave using dart. Again as with the previous article all the code for this demo you can find here https://github.com/deekob/flutter_droidcon . Now we know from the last post that in Flutter everything is a widget so in this post I want to introduce another Flutter concept and that is that of Cubit and BloC patterns.
In basic terms the BLoC ( Business Logic Components ) is a pattern that has come from the Flutter community, so if you haven't built anything in Dart, its unlikely you would have come across it. However if you have used patterns like Redux, MVVM and MVC it will be very familiar to you. In a nutshell what BLoC does is take a stream of Events ( from the UI ) and transforms them to a stream of States — with Cubit being a subset of BloC and relies on methods as opposed to events to emit state change events. As there are a few state changes in a normal authentication flow, it means handling these changes and updating your UI accordingly can get fiddly, but using Cubit with a repository pattern is a nice way of decoupling these state changes.
So lets start by looking at the main login screen.
login_view.dart
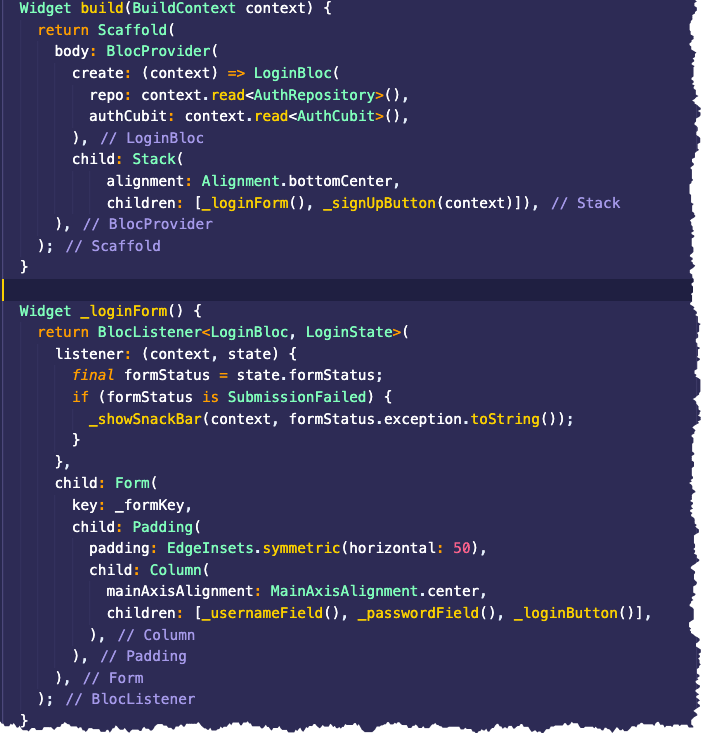
So if we look at login view for example, we can see in the build method we now introduce a context , inside of which we have an AuthRepository and an AuthCubit ( more on those later ). This context is then passed to the UI if elements need access to it. We then also have our widgets defined and they can be wrapped in a BlocListener which will be invoked when any state changes, so we can in effect update the UI based on state — which is exactly what we want for the auth flow. So lets now have a look at the LoginBloc that is taking the events from the UI and updating the state accordingly.
login_bloc.dart
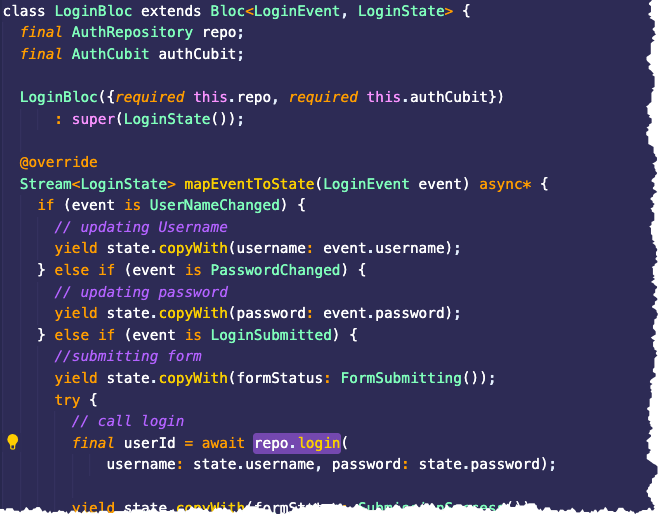
The main method in a Bloc is always the mapEventToState method — which does exactly what you think it would do. As you can see we are listening for events from the UI and depending on their type we are updating the state. Depending on the event we may also want to make a call to the Auth repository ( as we do here with LoginSubmitted ). The repository is how we are abstracting our auth store from our application. In Part One we also used a repository pattern to do the same for our data store holding our shoppinglist data. Next lets see what our auth repository looks like.
auth_repository.dart
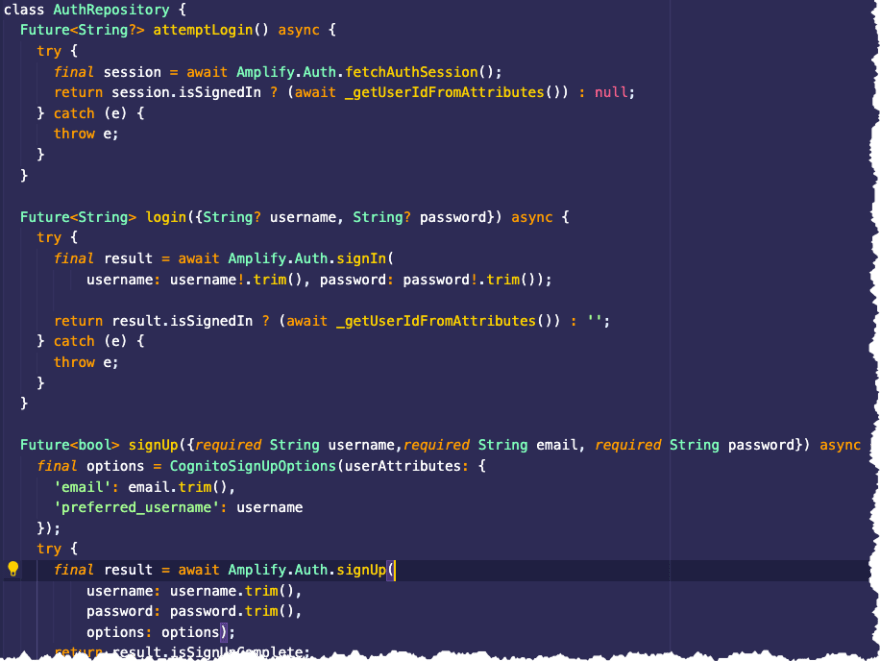
As you can see the repository is wrapping calls to the Amplify.Auth library, much the same way as in the previous post our repository was wrapping calls to the Amplify.Datastore library. So the next step is to update our application to add the Amplify Auth libraries and associated backend.
Adding Amplify Auth
The first thing we need to do is update pubspec.yml and add the new Amplify Auth dependancy — after that has been done the dependancies section in the file should look something like this:
pubspec.yml
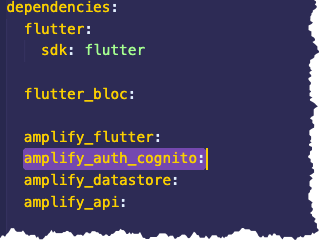
Notice we also have the other plugins we have been using, flutter_bloc , amplify_datastore and a mplify_flutter already there from Part One. Once ‘pub get’ has been run we can now go ahead and change our amplify configure code in main.dart to configure the new Amplify feature.
main.dart
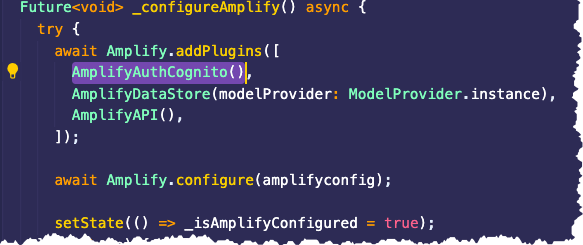
This will complete the code changes we need to do to configure the Amplify libraries, the final part is to configure and deploy the supporting backend. Just like the Amplify Datastore feature/category abstracted AWS AppSync and Amazon DynamoDBin Part One of this series, the Amplify Auth category abstracts Amazon Cognito as our identity provider (IDP) where our users are held. To provision this we can either use the Amplify CLI and call ‘amplify add auth’ or once again we can use the Amplify Admin UI. In this example we will use the Admin UI, we do that by selecting ‘User Management’ in the Admin UI.

User Management allows us to choose which login mechanism we would like to use (email, username, etc.), if we would like to add MFA and how that would behave (SMS, Authenticator app). We can choose what attributes users must provide when signing up as well as configuring our password policy.
In our example we will be using username as a login mechanism — so remove the default of email and replace it with Username.
Once happy with our choices, selecting ‘Save and deploy’ will create a Amazon Cognito instance for our user store and add it into our backend. This also enables us to create users for our app via the Admin UI. Once that is complete and the backend has been deployed we then re-pull the configuration down locally like before — as shown below:
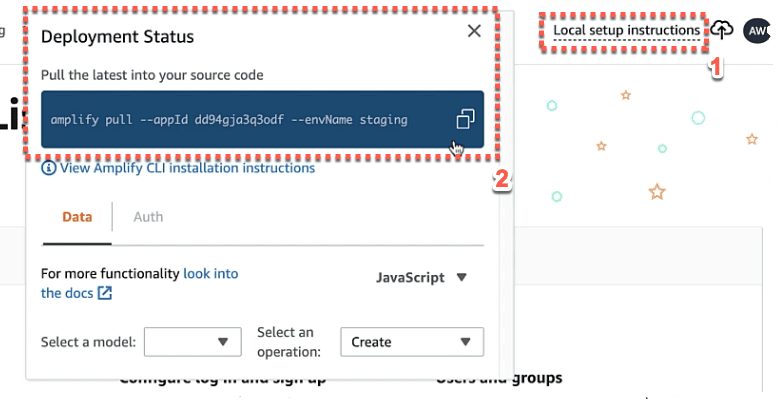
In the terminal in our local dev environment we simply run the ‘amplify pull’ command shown above to pull down all the backend configuration that we just created using thhe Amplify AdminUI.
Rinse and Repeat
This is the login UI, states and actions all connected into our repository, the next stage is to do the same for sign-up, and confirm. This involves writing the view , BloC and states for those actions, much the same way we just did for the login action. Below is an excerpt from the confirm view
confirm_view.dart
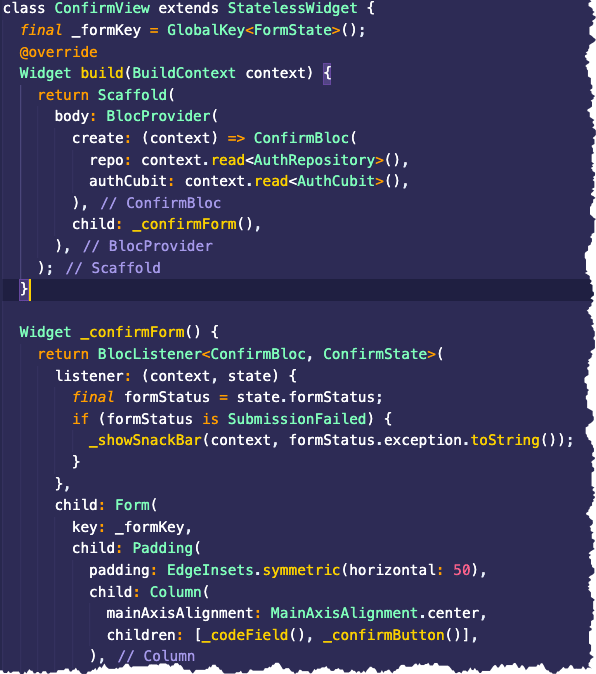
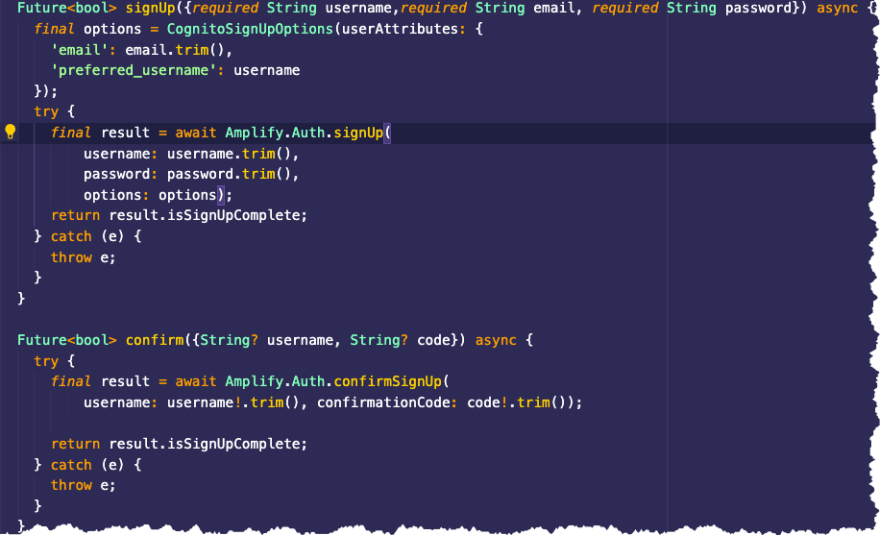
As you can see its exactly the same pattern. Once we have completed these classes for sign-up and confirm — we simply make sure that the repository has the necessary Amplify.Auth API calls and that should now be our functionality complete — you can see the calls in the Auth Repository snippet below
auth_repository.dart
Summing Up
So that is Part 2 of our Android Flutter application built, in this part we created the UI for login, signup and confirm screen flow. We talked about the BLoC / Cubit pattern in Flutter and how we can manage state changes with it. Then we added the Auth category from Amplify to the project which provisioned Amazon Cognito and gave us a consistent Auth API which we wrapped in a repository on the client.
In the next and final part of the series we will build out another screen in our application — this will hold the user profile information and we will learn how to implement image upload capabilities from our Android device so we can store our users picture as part of their profile in AWS.
If you want to follow along with this blog and build this application yourself, remember the finished code can be cloned from https://github.com/deekob/flutter_droidcon and you can also follow along with Kyle (aka Kilo Loco) in his excellent #30daysofflutter you-tube playlist
Until next time…


Top comments (0)