
In this post, you'll learn how to set up and deploy a website using Hugo (AWS Cloud9's Integrated Development Environment (IDE) for content management), AWS CodeCommit for source code management, and AWS Amplify for serving source-based websites, automated deployment process.
Configuring the AWS Cloud9 IDE
Start by provisioning the AWS Cloud9 IDE.
The AWS Cloud9 environment is based on Amazon Elastic Compute Cloud. You must provision an AWS Cloud9 environment in a public subnet in an Amazon Virtual Private Cloud in your AWS account.
This can be done with the following steps:
Sign in to your AWS account with credentials that have administrator privileges. If you don't have an AWS account, you can create one.
Open the Cloud9 console and Click Create Environment.

Use the wizard in the AWS Cloud9 console to create a new AWS Cloud9 environment.
Enter a name for your desktop and an additional description.

Choose Next Step.
In the Environment Settings section, under Environment type, choose Create a new environment EC2 instance (direct access).

- For Instance Type, choose the desired instance type.

For Network, under Network Settings (VPC), choose the VPC that will host your AWS Cloud9 instance.
Choose the public subnet of this VPC to deploy.
Leave all other settings unchanged and select Next Step.
Review the selections and choose Create Environment. It takes a few minutes to set up the environment.

- When your environment is ready, you can access the AWS Cloud9 IDE from your browser.
Configure the source code repository to track content changes
Use AWS CodeCommit, a fully managed resource management service that hosts secure Git-based repositories.
- Open the CodeCommit console in a new browser and create a new repository.
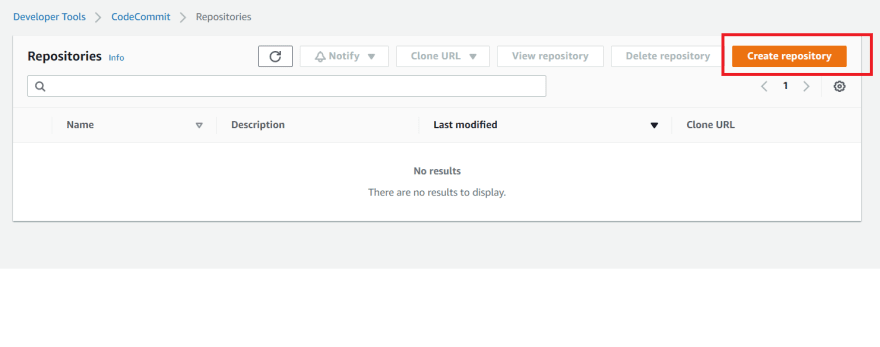
In Repository Name, enter amplify-website.
Enter an appropriate description.
Choose Create.

It takes a few minutes to create the repository.
Set up and deploy a sample website
In the AWS Cloud9 IDE, return to your browser and place your cursor in the lower terminal window of the IDE.
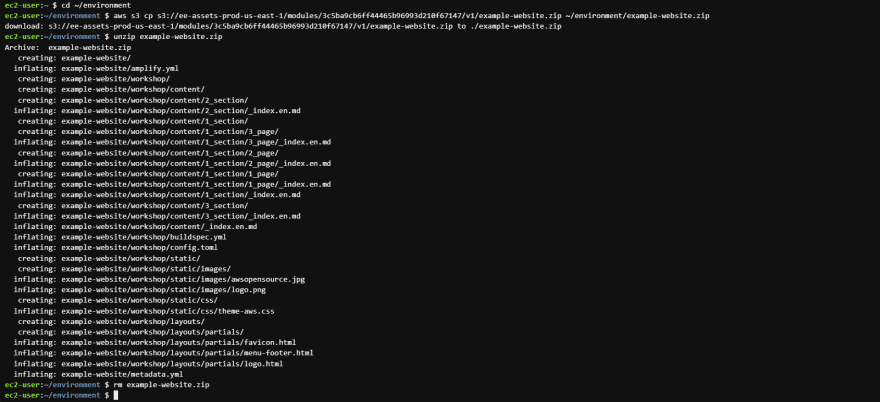
Enter the following code to download and unzip the existing example website saved as a .zip file.
cd ~/environment
aws s3 cp s3://ee-assets-prod-us-east-1/modules/3c5ba9cb6ff44465b96993d210f67147/v1/example-website.zip ~/environment/example-website.zip
unzip example-website.zip
rm example-website.zip
The following screenshot shows the result.
- Then run the command to create a directory to host and start the website by copying the files from the example website.
mkdir ~/environment/amplify-website/
cd ~/environment/amplify-website/
- Next, create a new default branch on your AWS Cloud9 instance called local master. Then copy the files from the example website.
git init
git remote add origin codecommit::us-east-1://amplify-website
git remote -v
git checkout -b main

- Adding and committing locally commits all changes to the remote Amazon Codecommit repository.
cp -rp ~/environment/example-website/* ~/environment/amplify-website/
git add *
git commit -am "first commit"
git push -u origin main
- In the Amplify console, Choose Get Started.
- Choose Amplify Hosting and Click Get Started.

- On the Getting Started with Amplify Console page, choose AWS CodeCommit as your source code repository.
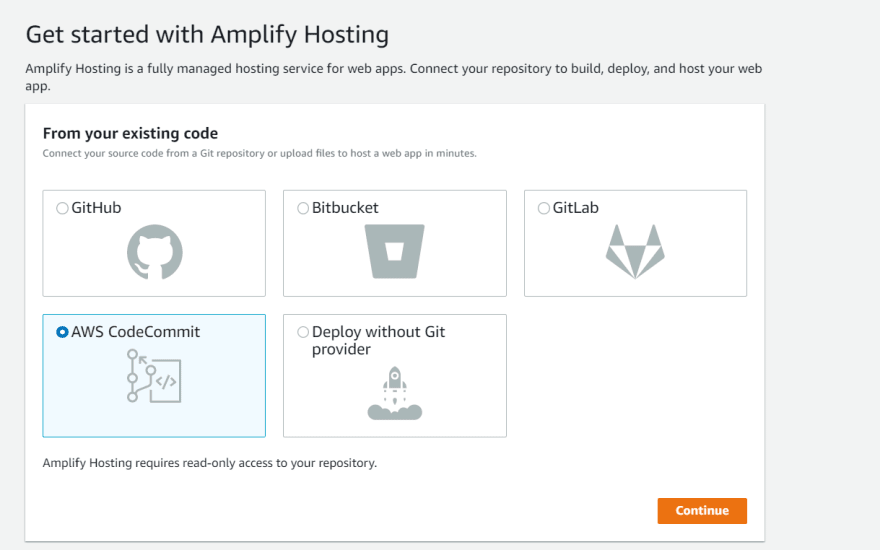
Select Continue.
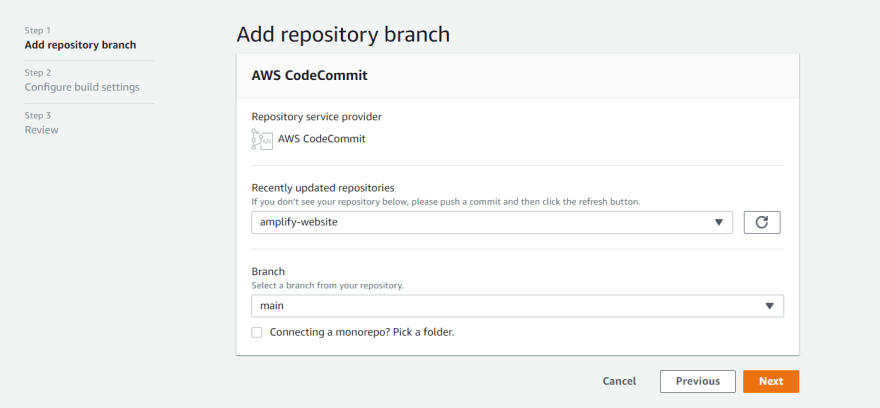
On the Add Repository Branch page, select the repository for the recently updated repository.
For Branch, select Main.
Choose Next.
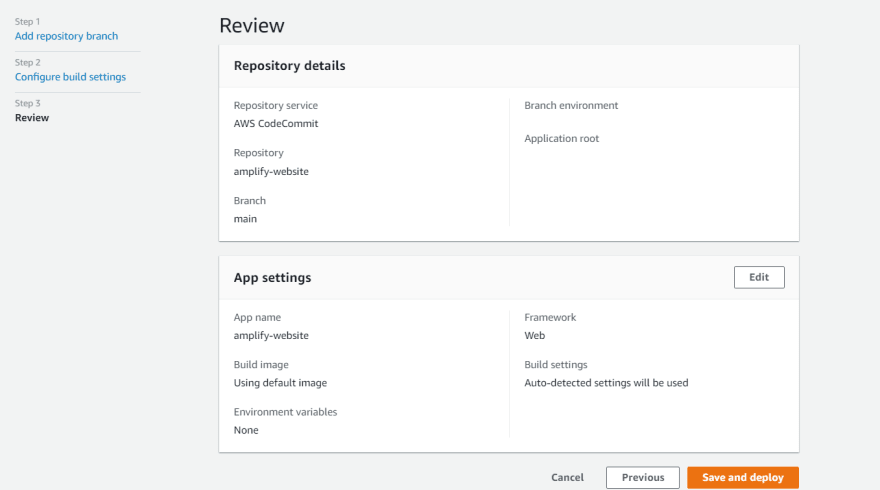
- Choose Next.

- On the review page, choose Save and Deploy.
Amplify builds and deploys your Amplify site in minutes and shows you the progress.
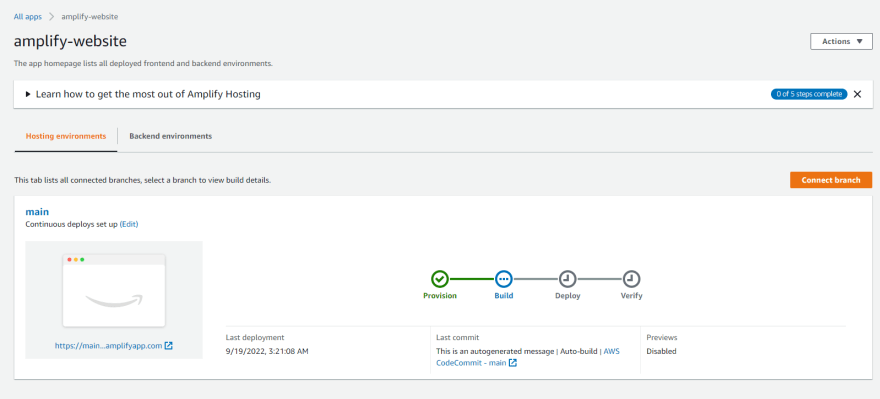
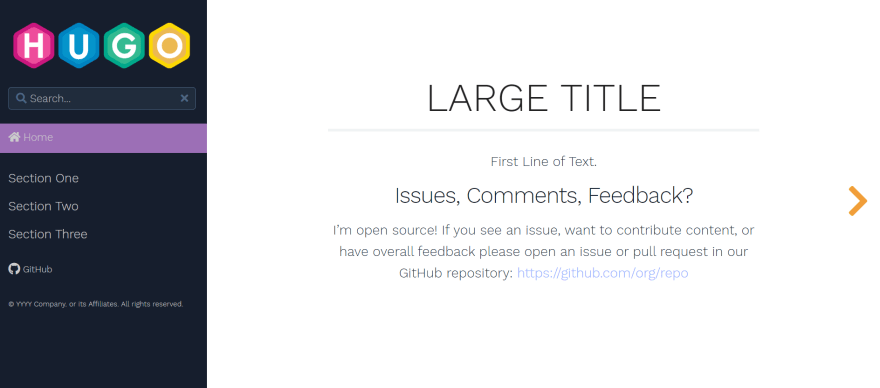
After the implementation is complete, you can visit our website to see sample content.
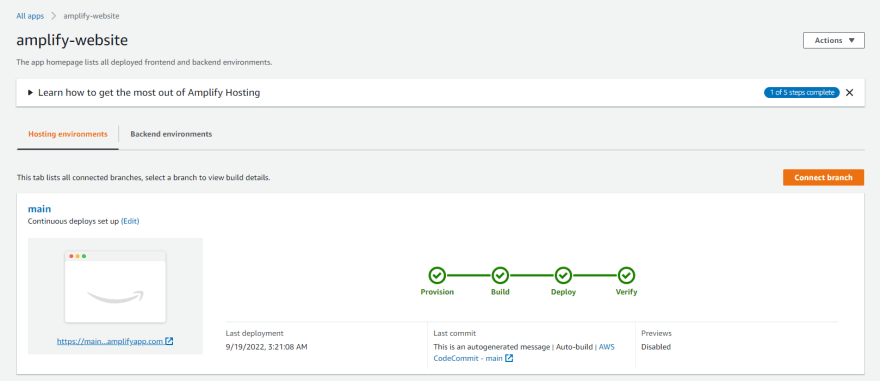
The following screenshot shows an example website.
Performing Changes to the website
You can now update the text string on the home page and commit and publish this change.
In the AWS Cloud9 IDE, return to your browser and place your cursor in the lower terminal window of the IDE.
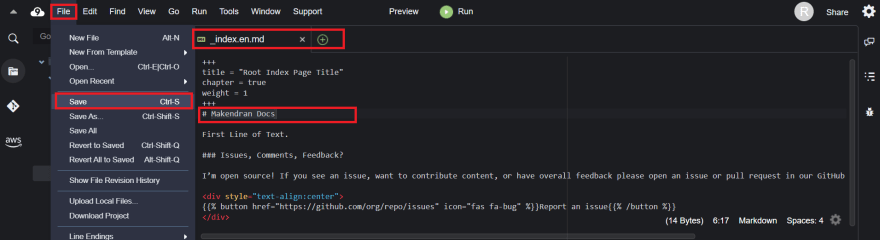
In the navigation pane, choose
~/environment/amplify-website/workshop/content/_index.en.md.

The contents of the file will open in a new tab in the top panel.
Change the LARGE TITLE to Makendran Docs.
Save the changes to
_index.en.mdby choosing Save from the File menu.
- In AWS Cloud9, run the following command in the lower terminal window to commit the changes.
git add *; git commit -am "homepage update"; git push origin main
- Return to the Amplify console to see how automatically detects changes.

Amplify walks you through the steps to make changes to your website.
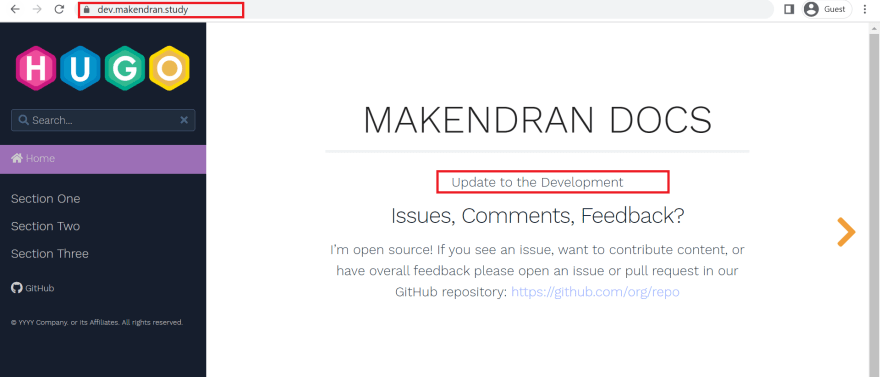
- After this update is complete, visit the website URL to see if the LARGE TITLE on the home page has changed.

You can repeat this process to make automatic, source-based changes to your website.
Add a custom domain
By adding custom domains to your Amplify setup, your customers can easily access your content. You can register new domains through Amazon Route 53 , or if you have domains registered outside of AWS, you can integrate with Route 53 and Amplify.
For our use, the domain www.makendran.study is a domain name registered by a third party registrar. Route 53 allows you to manage DNS configuration for domains registered outside of AWS.
Start by setting up a public zone on Route 53.
In the Route 53 console, choose hosted zone.
Choose Create Hosted Zone.
Enter
makendran.studyas the domain name.Enter an appropriate description.
Under Type, select Public Hosted zone.

Choose Create Hosted Zone.
Save the addresses of name servers that respond to clients DNS lookups for your domain.

In a separate browser, access the DNS registrar console.
Configure custom DNS name server settings in the remote domain name registration console. This configuration points to the Route 53 destination name servers as the authoritative DNS for your custom domain. For this purpose, this change notice may take up to 48 hours.

- Use https://who.is to verify that your AWS nameservers are listed correctly for your custom Internet client domain.
You can now set up custom domains in Amplify.
Amplify allows you to configure DNS and configure SSL for any custom domain you want.
- In the Amplify console, under App Settings , select Domain Management.

Choose Add domain.
Enter a custom domain name for your domain (makendran.study).

- Choose Configure Domain.

- For subdomain, set www and choose to exclude custom domain root.
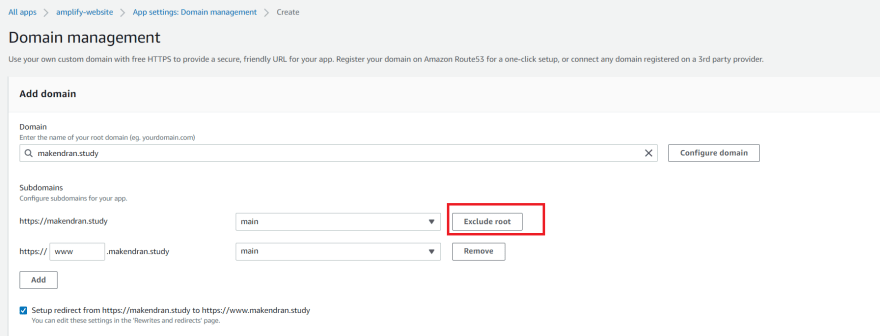
- Choose Save.

Amplify starts the SSL certificate creation process. After a while, you'll be taken to your SSL configuration and see a domain verification in progress.
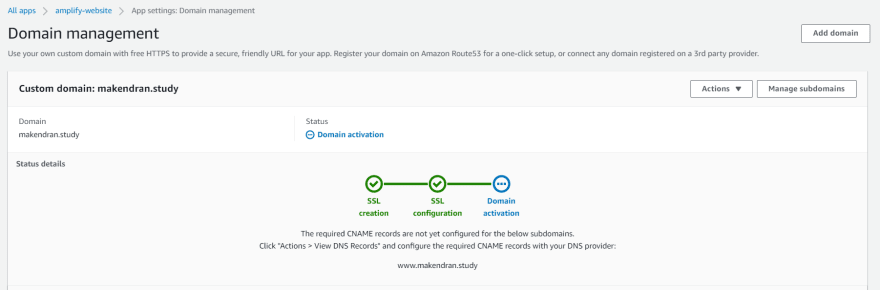
Amplify verifies domain ownership by creating an example CNAME record in the host zone file. Once ownership is verified, your domain is deployed to Amazon CloudFront distributions managed by Amplify and domain activation is complete.

Customers can now access the website with a custom domain name www.makendran.study.

Setting up a subdomain for development
To align with CodeCommit's development code branch, Amplify creates a development website so you can test changes before they go into production.
- Go to the AWS Cloud9 IDE and type the following command to create a development branch using the terminal.
git checkout -b development
git branch
git remote -v
- Modify a content to push the changes to CodeCommit using the current content from the master branch.
git add *; git commit -am "first development commit";
git push -u origin development
- Open and edit the file
~/environment/amplify-website/workshop/content/_index.en.mdand change the update path for the website to something else.

- Capture and push the changes with the following code.
git add *; git commit -am "second development commit"; git push -u origin development
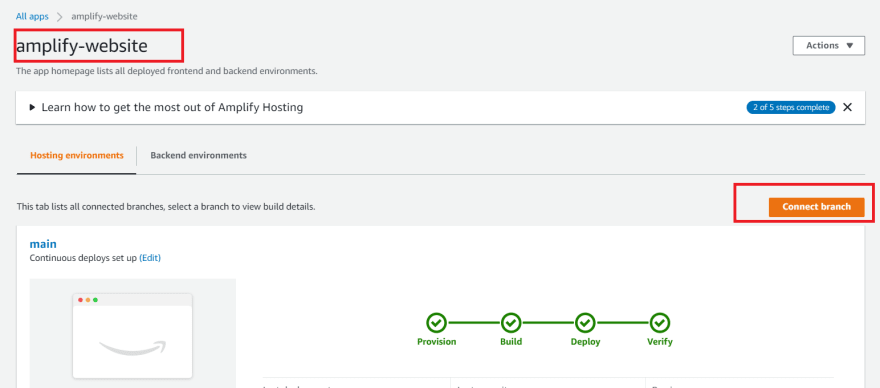
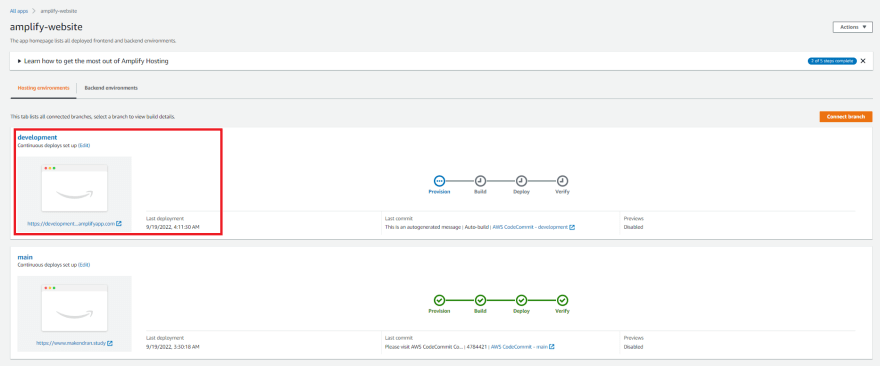
Go back to the amplify-website app.
Select Connect Branch.
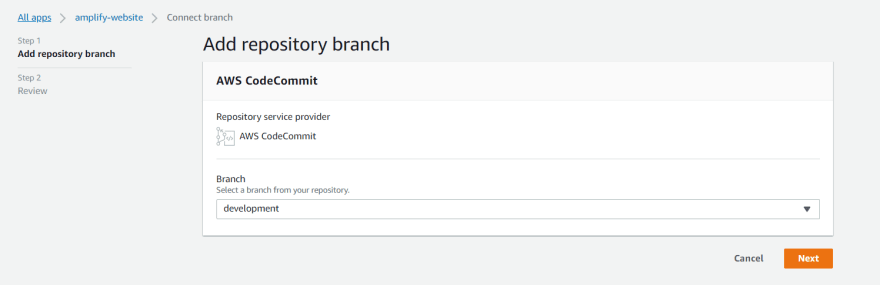
- For Branch, select the development branch you created.
- Choose Next and Click Save and Deploy.
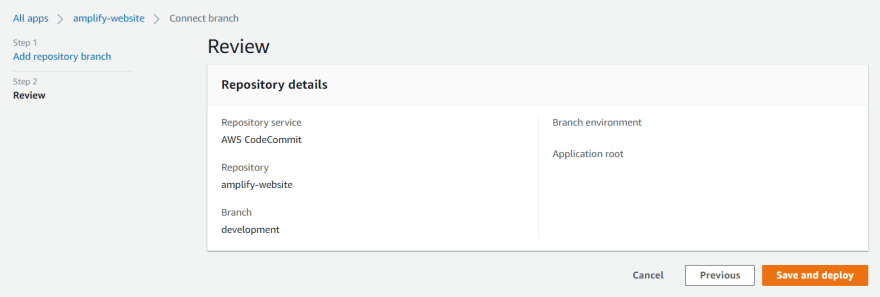
Amplify will create a second website based on the content of the development branch. In the Amplify console, you can view instances of your website that correspond to the development code tree.
In Amplify, access the Domain Management menu item to add a custom subdomain.
Edit the domain and add a subdomain entry with the desired name.
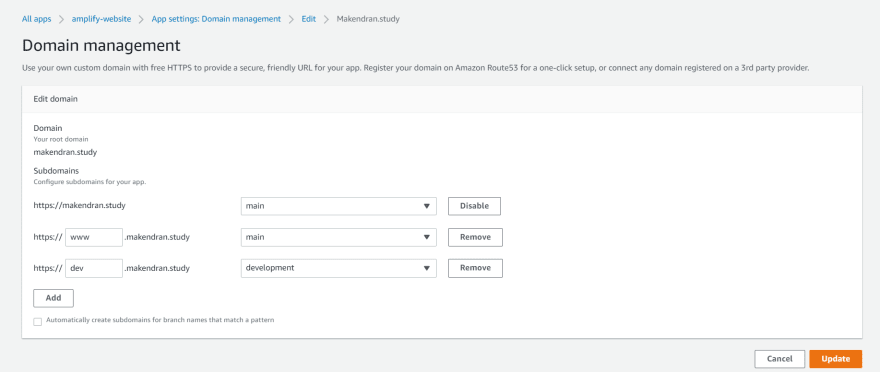
Commit to the development branch with committed code and content changes.
Choose Update.
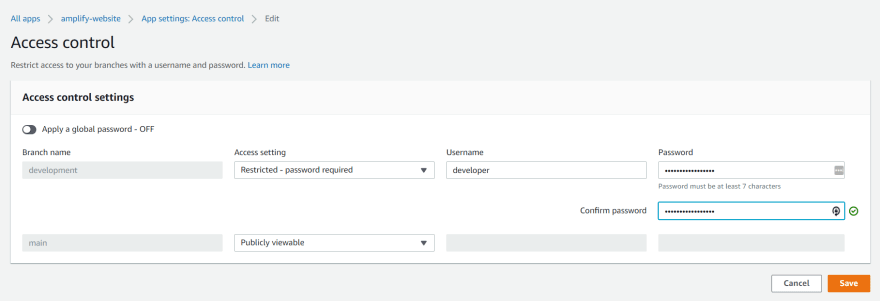
Control access to development
New content is hosted on the development site, so you can restrict access.
In the Amplify console, select Applications.
Select Access Control.
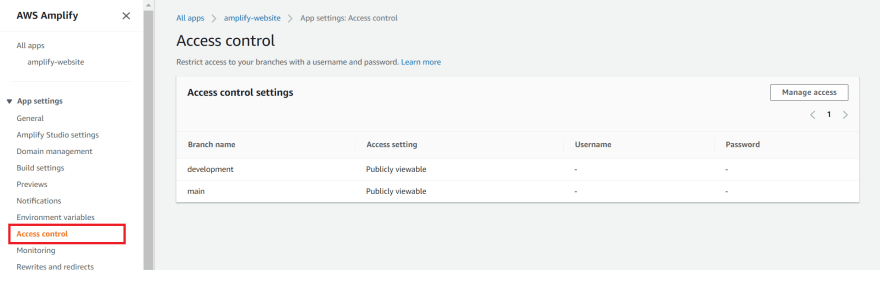
- Under Access control settings, select the desired settings. You have the option to restrict access globally or per site.

Cleaning Up
Select the application you created in the Amplify console and Select Delete App from the Actions drop-down menu.
In the CodeCommit dashboard, choose the repository you created and Choose Delete.
Select the IDE you created in the AWS Cloud9 dashboard and Choose Delete.
BONUS
Kindly watch the below video to see full demo.
Conclusion
Hugo is a powerful tool for quickly delivering content in a variety of formats, including image portfolios, online resume presentations, blogs, and technical articles. Amplify Console offers a convenient, easy-to-use static web hosting service that dramatically speeds up the delivery of static content. Hugo and Amplify Console work together to quickly deploy a website in minutes with features like easy-to-use URLs, code-level experiences, and encryption (SSL).

Top comments (0)