
In this article, I show how to deploy a Cloud Native Node.js application to Amazon EKS via the AWS CLI. Amazon Elastic Container Registry(ECR) is used to store the built docker images.
Prerequisites
To better follow along with this article, you would need the following:
Node.js 12 or above
NPM
AWS CLI configured on your local machine
An AWS account
Docker installed on your local machine
Knowledge of Kubernetes
Amazon EKS
Amazon Elastic Kubernetes Service (EKS) is a managed Kubernetes service to run Kubernetes in the AWS cloud and on-premises data centers. As an AWS-managed service, it makes it easy to use Kubernetes on AWS without needing to install and operate the Kubernetes control plane.
We would make use of EKS to deploy the cloud-native app we use in this article.
Setting up the Project
Here we set up the project, dockerize it and run it locally to make sure everything works as expected.
Basic Node.js project
We would proceed to clone an already existing application found here. It spins up an express server that serves some dummy content.
# Clone this repository
$ git clone https://github.com/kkohtaka/webapp-nodejs.git
# Go into the repository
$ cd webapp-nodejs
Containerizing the project
To containerize the project, we would make use of Docker. First, we create a Dockerfile for the application.
In the root folder, create a file named Dockerfile and add the following content within it:
FROM node:14
WORKDIR /app
COPY package.json ./
RUN npm install
COPY . .
EXPOSE 3000
CMD ["npm", "start"]
Next, create a .dockerignore file:
node_modules
To build the docker image for the application run the following command
docker build -t demo/webapp-nodejs .
To verify the image is built well, spin up a container to test by running the built docker image:
docker run -p 3000:3000 demo/webapp-nodejs
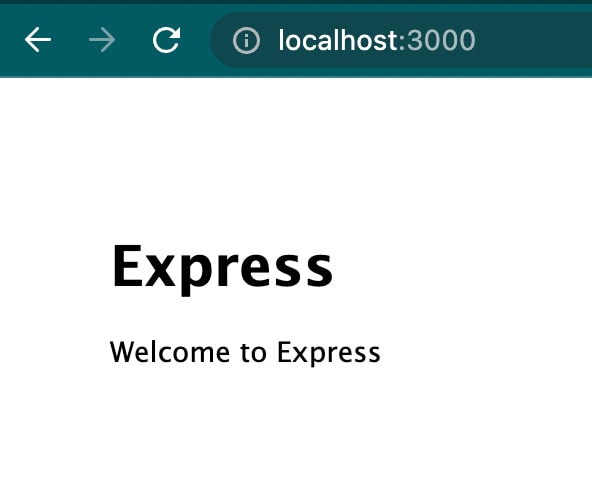
This command above enables us to test the application in a local browser by visiting http://localhost:3000. The image below confirms it works as expected.
Pushing image to Amazon Elastic Container Registry(ECR)
In other to make the built docker image publicly available, we need to push it to a central repo. We would make use of Amazon ECR to store the image.
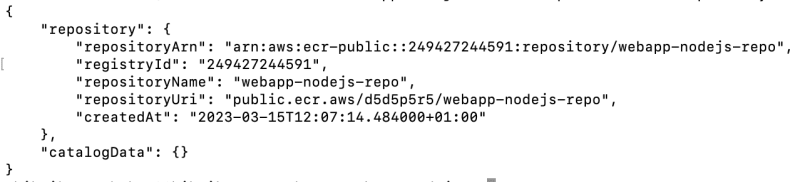
First, create the Amazon ECR registry where we would store the image. Run the command below to do that
aws ecr-public create-repository --repository-name webapp-nodejs-repo --region us-east-1
The command connects to AWS using the default AWS profile we have configured and creates the repository. It outputs a JSON-like response containing the details of the newly created repository:
Next, authenticate our local machine docker client to the Amazon ECR registry. This gives access to the registry for up to 12hrs, read more about this here
aws ecr-public get-login-password --region us-east-1 | docker login --username AWS --password-stdin public.ecr.aws
Proceed to tag the local docker image with the ECR Registry.
Replace REPO_URI with Repository URI gotten from ECR when the registry was created. In my case it is: public.ecr.aws/d5d5p5r5/webapp-nodejs-repo
docker tag demo/webapp-nodejs:latest <REPO_URI>:latest
Finally, push the image to the ECR repository:
docker push <REPO_URI>

Note: We can also configure the Default region name using aws configure for the default profile to be us-east-1 instead of having to include it in every command.
Provisioning an EKS Cluster
Now that the image has been deployed to ECR, creating an EKS cluster where the app would be deployed is the next thing to do.
We make use of the eksctl CLI to create the cluster in EKS, eksctl which is a simple command-line tool for creating and managing Kubernetes clusters on Amazon EKS.
First, we need to install this CLI to be able to use it, head over to this page to learn how to install it based on your device. After, run the command below to confirm if you have it all set up.
eksctl version
If you get a version shown, then all is well, else go back to the referenced page to identify any step you may have missed.
Now we have configured eksctl, we now provision our first cluster(creating the cluster in the us-east-2 region):
eksctl create cluster --name webapp-nodejs-cluster --region us-east-2

Finally, configure kubectl to enable it to connect to the EKS cluster by updating the kubectl config (update-kubeconfig) with the cluster endpoint.
aws eks update-kubeconfig --name webapp-nodejs-cluster --region us-east-2
Deploying to EKS Cluster
At this stage, we have an image in ECR and an empty EKS Cluster running, the last step is to run the application within this EKS Cluster.
To deploy the application, create a Deployment.yml file containing the deployment details. The deployment creates a Pod, where the application runs in a single container using the Docker image.
Replace the image “public.ecr.aws/d5d5p5r5/webapp-nodejs-repo” with your ECR URI:
apiVersion: apps/v1
kind: Deployment
metadata:
  name: webapp-nodejs
spec:
  replicas: 2
  selector:
    matchLabels:
      app: webapp-nodejs
  template:
    metadata:
      labels:
        app: webapp-nodejs
    spec:
      containers:
      - name: webapp-nodejs
        image: public.ecr.aws/d5d5p5r5/webapp-nodejs-repo:latest
        ports:
          - containerPort: 3000
Next, apply the deployment to create it:
kubectl apply -f Deployment.yml
To verify if it works, run the command below:
kubectl get deployments

We now need to expose the pods running within the cluster to the outside world to be accessible. To do this we need to create a Service with the type of Load Balancer to expose the port the application is listening to.
kubectl expose deployment webapp-nodejs --port=80 --target-port=3000 --type=LoadBalancer
To verify if it works, run the command below:
kubectl get services

Testing
Finally, to confirm everything works as expected, copy the exposed **EXTERNAL-IP **address shown in the previous command and visit a browser:

Great! it works as expected!
Conclusion
In this article, you learned how to Dockerize a Node.js application, push the built image to Amazon Elastic Container Registry (ECR), created an Amazon Elastic Kubernetes Service (EKS) cluster, deployed the application within the cluster, and finally exposed the deployment so we could test it.
Amazon EKS makes it easy and super fast to deploy cloud native applications, try using it for your next deployment!

Top comments (0)