Amazon WorkSpaces configuration
Amazon WorkSpaces configuration
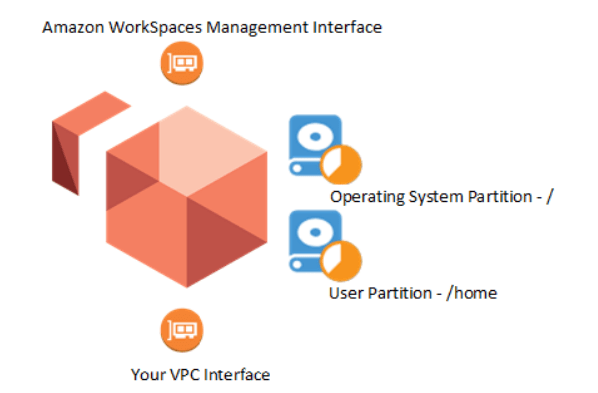
Each Amazon WorkSpace comes with two disks. With an Amazon Linux WorkSpace, the system disk (/
dev/nvme0n1) mounts as the root folder. You can select a starting size for this drive of 80 GB, or 175
GB. A second disk stores user data and applications; /dev/nvme1n1 mounts as /home. You can select a
starting size of 10 GB, 50 GB, or 100 GB.
A best practice is to minimize the size of the user drive, which reduces the cost of running the
WorkSpace. You can allow users to increase the volumes as necessary, up to 2000 GB each.
You can encrypt either the root, or the home volume before WorkSpace creation. If you encrypt an
Amazon WorkSpace partition, that encrypted cannot create future WorkSpace images.
The Amazon WorkSpaces service scans all WorkSpaces for health states every 12 hours, and takes
snapshots of both root and user volumes when WorkSpaces are in a healthy state. Amazon WorkSpaces
has a restore function that recreates both of the WorkSpace’s root and user volumes based on the most
recent snapshot pair taken when the WorkSpace reports healthy from the last scan. After restore, all
changes made to the WorkSpace after the snapshot time are lost.
When the user ‘rebuilds’ a WorkSpace, the WorkSpace restores the most recent image of the bundle
used to create the WorkSpace on the system disk. The service restores the user data disk from the last
healthy automatic snapshot taken of the data drive. In addition, the primary Elastic Network Interface is
re-created. The rebuilt WorkSpace receives a new private IP address from the pool of addresses available
for the Virtual Private Cloud (VPC) that the WorkSpaces are connected to.
Best practices for Amazon WorkSpaces images and bundles
When preparing an image, consider how you will manage updates in a production environment. You may
employ all or some of the following best practices.
To best manage at scale, create a custom bundle (or bundles), and deploy your Amazon WorkSpaces
from the bundle (or bundles) you create. When creating a custom bundle, ensure that the WorkSpaces
for your users have everything that they need installed. If you must perform software updates or install
additional software on your WorkSpaces, you can update the image assigned to the bundle and rebuild
your WorkSpaces.
All organizations should have a documented process for provisioning to ensure consistent creation and
recreation of images. When determining what to include in a Linux WorkSpace image, consider the
following design best practices:
• Avoid embedding passwords, private keys, or other sensitive information in the image.
• Avoid hardcoding application license details in the image to ensure that you do not deploy WorkSpace
instances that contravene your application license requirements.
• Create a library of reusable, modular application packages or scripts that you can programmatically
assemble to create different types of WorkSpace images.
• Instrument images with a standard bootstrapping capability to allow the instance to reference runtime
information at launch.
• Develop a consistent strategy for tagging images to allow for easy organization and identification of
the images and their contents.
You can create a custom WorkSpace bundle from the image you create. After the bundle is available, you
can launch Amazon WorkSpaces from your custom bundle.
For more information on Amazon WorkSpaces images and bundles, refer to the WorkSpace bundles and images documentation.
Example WorkSpace image and bundle tagging structures
You can assign tags to your metadata to help you manage your images. The most common tags follow.
Technical tags
• Name – A simple identifier for individual instances.
• Version – An identifier to help distinguish between Images with different versions.
• Software – A list of software included in the image.
• Role – The role of an instance launched from this bundle (for example, web server, message broker).
• System – The IT or application environment into which this image supports. This is especially useful
for fully baked images that have to embed system-specific configuration information.
Business tags
• Project – One or more specific projects for which this bundle was created for.
• Cost center/business unit – The cost center or business unit associated with the bundle.
• Stage – The development stage of the bundle to help identify if it is appropriate for production use.
Security tags
• Confidentiality – An identifier for the specific data-confidentiality level of the bundle/image. This is
useful for organizations that want to embed additional security controls in WorkSpaces that process
particular levels of classified data.
• Compliance – An identifier for images/bundles designed to adhere to specific compliance requirements.
Process for Amazon Linux image creation
The process to prepare a default WorkSpace instance for a custom image is as follows:
- Select the base image. This may be a default bundle supplied by Amazon Web Services, or an existing Linux WorkSpace image in your account. Note To optimize costs, select a minimum disk size for the system drive (minimum is 0 GB) and for the user data drive (minimum is 10 GB).
- Validate that the most recent operating system patches are applied.
- Download the required software to a shared drive/data location.
- Install the required features and updates into the image from the shared drive/data location.
- Install drivers where applicable.
- Reboot.
- Test the build.
- Clean down the image (remove temporary install files, logs, user accounts).
- Create/update a version control file on the image. 10.Reboot. 11.Create a new image and create/update tags.
Operating system patch updates
It is a best practice to build your images using the most up-to-date operating systems, packages, and
software. The Amazon Linux 2 WorkSpace image is updated on a regular basis. It is a best practice to
check that the installed software is up to date before committing your image.
To check the image:
sudo yum check-update
To update the image:
sudo yum update
For more details refer whitepaper


Top comments (0)