I’ve always wanted a better way to keep up with friends and family by wishing them a happy birthday. Most people post something short and sweet when they see the notification on Facebook while they’re surfing the feed for a fresh dopamine hit. Yes, I’m one of those people who doesn’t use their Facebook anymore.
So for those of you who are like me (don’t use Facebook and want to wish others a happy birthday via text) keep reading to see how I built a little platform to help me accomplish this.
The Goal — Create a Birthday Bot 🤖
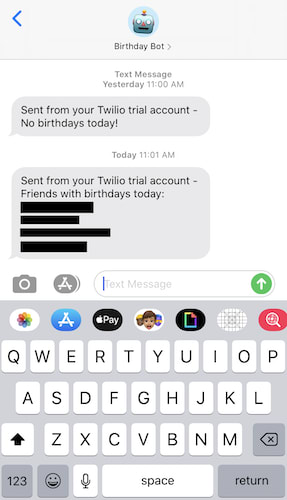
The goal is to receive a text message every day with the list of names of people whose birthday is on that day or a message that reads “No birthdays today!”. To start, I want it to be sent at 11 am PST. Let’s build a little “bot” (that will be hosted on Heroku) to help us out 🤖.
The bot will work as follows in 3 simple steps:
Every day, the bot will run and read birthdays from a Google Sheet.
If the bot finds birthdays that are on the current date, it will text me with a list of names of each person whose birthday it is. Otherwise, it will text me “No birthdays today!”.
The bot will then update the birthdate of each of these people to one year in the future.
The Process
Getting the data/list of birthdays
The first step is to somehow get the data we need to supply our bot. As I mentioned above, Facebook used to be how I managed birthdays. But they somewhat recently removed the ability to export birthdays from Facebook. To be fair, it was in the name of privacy so I can’t really complain about that.
So we need another way to get the data. As referenced in the article, someone built a nice workaround. By following the steps in the README, I was able to get all of the data I need.
Here’s what I did:
Clone the repo
git clone git@github.com:mobeigi/fb2cal.git.Rename
config/config-template.initoconfig/config.ini.In
config/config.iniadd your Facebook email and password. Setupload_to_drivetoFalse. Setsave_to_filetoTrue.Run
pip3 install -r requirements.txt.Run
python3 ./src/fb2cal.py.
Once you do this, you’ll see a .ics file was created in your /src directory (or whatever directory you set in your config.ini file).
I did it quick and dirty this way to just get the data locally. If you wanted to take this project to the next level, you could set up this Python script to run routinely, store the data on Google Drive, and then have our bot routinely read from that. For the sake of this post, I’m not going to do that since I don’t plan on continuing to use Facebook and therefore won’t have new birthdays to add.
Later on in this post, I’m going to move the data to Google Sheets where our Bot will read from. That way, I can quickly add birthdays to the sheet from my phone and the Bot will take the new data into account.
Disclaimer: the workaround does require a little bit of development background. The project is active, so if you have any questions or issues, try posting on the project first. I’m also happy to try and help as well — leave a comment below!
Importing the data into the 🤖
Now we’ll want to format this data in a way that our bot can easily import. I initially tried to use the icalendar gem to import the data from our birthdays.ics file. I wasn’t able to get this to work. Another option is to convert the .ics file to a .csv file using one of many free online converters. Depending on how you feel about security, this may be a suitable option for you.
With the gem not working and me not wanting to use a converter, I decided to write a quick little Ruby script to parse the .ics file. I don’t plan on doing this repeatedly and the .ics file is essentially a .txt file in a specific format, so we can grab the data we need by parsing out the file as one big string.
Create a folder to house all of our work and navigate into it:
mkdir birthday_bot
cd birthday_bot
Again, I know this code is cringy, at best. I just wanted a quick and dirty way to do this initial upload one time.
So now we have all of our birthdays in an Array of Hashes with keys of name and date.
The next thing we’re going to do is export this parsed data to Google Sheets. You could also just export the data to .csv at the end of the above script and copy it to a Google Sheet, but since we’ll be interacting with Google Sheets with our bot to read birthdays anyways, it’s not that much more work to export it programmatically here.
Twilio has a great guide on how to do this, including a nifty gif of a screen share walking through the steps. I’ll include the same steps below.
Go to the Google APIs Console.
Create a new project.
Click Enable API. Search for and enable the Google Drive API.
Create credentials for a Web Server to access Application Data.
Name the service account and grant it a Project Role of Editor.
Download the JSON file.
Copy the JSON file to your
birthday_botdirectory and rename it toclient_secret.json.
Those are the credentials your application will need. They represent a user that can update spreadsheets on your behalf. We still need to give this user access to the spreadsheet we want to use though. Create a spreadsheet on your Google Drive named birthday_bot.
Open client_secret.json and find and copy the client_email. In your spreadsheet click the “Share” button in the top right and paste the email, giving your service account edit rights.
Once you have done this, we can get started on putting our birthdays into a Google Sheet.
Start by creating a Gemfile in your root birthday_bot/ directory and paste in the following:
source "https://rubygems.org"

gem "google_drive"
Then run bundle install.
Now we can use the Array of Hashes stored in a variable named birthdays from above and upload them to our Google Sheet:
So now we have all of our exported birthdays from Facebook in Google Sheets. Log into your Google Drive and check out your birthday_bot spreadsheet, you should see all the birthdays uploaded.
Building the Birthday Bot 🥳🤖
Now let’s get to feeding our bot! If you look back at the 3 steps mentioned above as to how the bot will work, the first is:
Every day, the bot will run and read birthdays from a Google Sheet.
We’ll worry about the daily interval later — for now let’s get the bot reading from our Google Sheet.
The next step is:
If the bot finds birthdays that are on the current date, it will text me with a list of names of each person whose birthday it is. Otherwise, it will text me “No birthdays today!”.
To send the text message, we’ll need the help of Twilio to send text messages. Sign up for Twilio and create a project. You can find a guide on how to do this or watch a video to get you started. It’s very quick.
Once you’ve done that, make sure to take note of 3 things:
Your Twilio phone number
Account SID
Auth Token
Once you have these 3, you can easily send a text of the current day’s birthdays by doing:
And, finally, the last step is:
The bot will then update the birthdate of each of these people to one year in the future.
Setting the bot to run daily
You can deploy this script to a free dyno on Heroku and schedule this to run daily. For more on this, check out this repo where I packaged up this bot into a more organized Ruby project with some extra “nice to haves” like logging and error handling.
Summary
There you have it — now your bot is up and running. You can run the cronjob locally on your machine or deploy it to something like Heroku so that it runs in the cloud. What do you think? Will you use this to help wish your friends and family a more personalized happy birthday?
Here is all the code. Feel free to submit a pull request, issue, or fork it and add your own needs!
Why should you listen to me? You shouldn’t — do your research 😉
If you want to learn more about me you can check out my Twitter and my website.


Top comments (0)