
In this post, I will quickly walk you through the steps to deploy Angular app to Google App Engine right from your machine using Google Cloud SDK.
What is Google App Engine?
Google App Engine (often referred as GAE) is a platform as a service from Google Cloud for developing and hosting Web applications in Google managed data centers.
Why GAE?
- Fully managed serverless application platform.
- Supports popular languages like Node, Python, PHP etc.,
- Just deploy code, everything else GAE takes care.
- Pay only for what you use.
Alright let's go ahead and work on the below steps to deploy Angular app to GAE. Excited?
Step 1: Create Angular app:
You can either create new Angular app or clone the app that I developed (Pounds to Kilograms converter) 👇🏻.
PoundsToKg
This project was generated with Angular CLI version 9.0.6.
Development server
Run ng serve for a dev server. Navigate to http://localhost:4200/. The app will automatically reload if you change any of the source files.
Code scaffolding
Run ng generate component component-name to generate a new component. You can also use ng generate directive|pipe|service|class|guard|interface|enum|module.
Build
Run ng build to build the project. The build artifacts will be stored in the dist/ directory. Use the --prod flag for a production build.
Running unit tests
Run ng test to execute the unit tests via Karma.
Running end-to-end tests
Run ng e2e to execute the end-to-end tests via Protractor.
Further help
To get more help on the Angular CLI use ng help or go check out the Angular CLI README.
Step 2: Create app.yaml under the project:
Let's create app.yaml under the Angular project. The app.yaml file is a configuration file that let knows App Engine how to map URLs to your static files.
Copy the below configuration to app.yaml you just created. It basically adds handlers that will load dist/pounds-to-kg/index.html when someone visits your website, and all static files will be stored in and called from the dist/pounds-to-kg directory.
runtime: python27
api_version: 1
threadsafe: true
handlers:
- url: /
  static_files: dist/pounds-to-kg/index.html
  upload: dist/pounds-to-kg/index.html
- url: /
  static_dir: dist/pounds-to-kg

skip_files:
  - e2e/
  - node_modules/
  - src/
  - coverage
  - ^(.*/)?\..*$
  - ^(.*/)?.*\.json$
  - ^(.*/)?.*\.md$
  - ^(.*/)?.*\.yaml$
  - ^LICENSE
Step 3: Google Cloud Platform - Setup & Configuration
Hope you have Google Cloud Platform account with you, otherwise create a Free tier account and avail the Free credit worth $300.
Step 3.1:
Goto Google Cloud Platform console and Click on "New project".

Step 3.2:
Enter your Project name and Click on "Create" button.

Step 3.3:
Create App under Google App Engine. You can either search for "App engine" in the search bar in GCP console or hit this URL

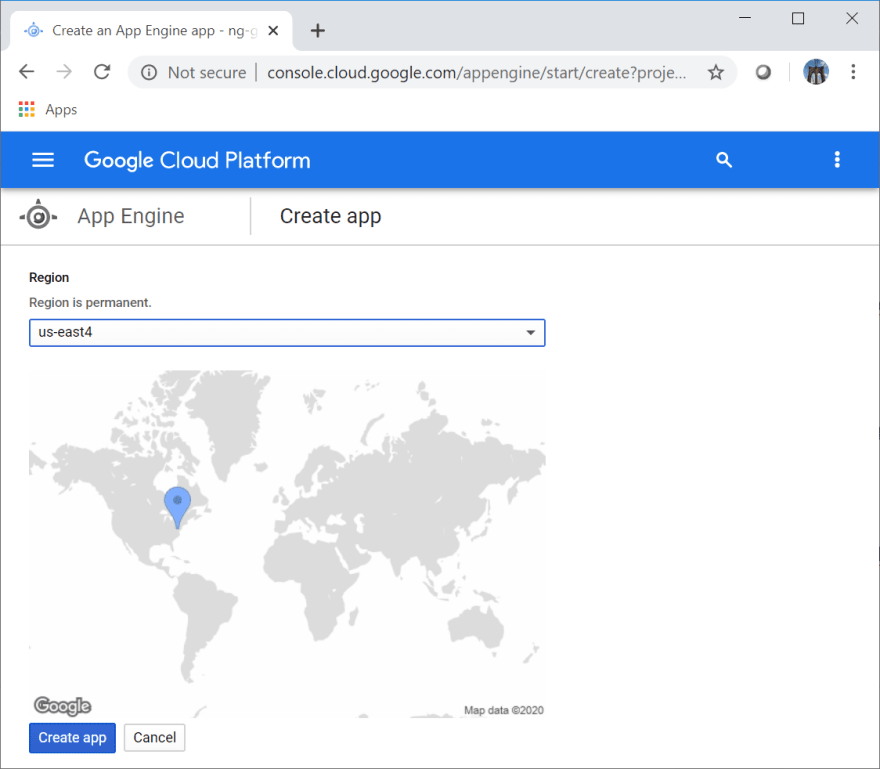
Step 3.4:
Choose Region, just note that Region is permanent.
Step 3.5:
Choose language as Other (This step is optional).

Step 3.6:
All set. You have successfully created App in Google App Engine. Just note that, this app is empty and has nothing to serve.
Step 4: Deploy app using Google Cloud SDK
Before you begin with below steps, you need to download Google Cloud SDK.
Step 4.1:
Login to your Google Cloud Platform account by running below command from Command prompt / Terminal.
gcloud auth login
Step 4.2:
Once you successfully login to GCP, goto the folder where you have your Angular project and run below command.
Make sure you update Project Id with the Project name you created in Step 3.2
gcloud app deploy --project=[Project Id]
You should be able to see your App URL once the app is deployed, as shown below:
F:\AngularHive\Code\pounds-to-kg>gcloud app deploy --project=ng-gae-app
Services to deploy:

descriptor:      [F:\AngularHive\Code\pounds-to-kg\app.yaml]
source:          [F:\AngularHive\Code\pounds-to-kg]
target project:  [ng-gae-app]
target service:  [default]
target version:  [20200319t142108]
target url:      [https://ng-gae-app.appspot.com]


Do you want to continue (Y/n)?  Y

Beginning deployment of service [default]...
╔════════════════════════════════════════════════════════════╗
╠═ Uploading 10 files to Google Cloud Storage               ═╣
╚════════════════════════════════════════════════════════════╝
File upload done.
Updating service [default]...done.
Setting traffic split for service [default]...done.
Deployed service [default] to [https://ng-gae-app.appspot.com]

You can stream logs from the command line by running:
  $ gcloud app logs tail -s default

To view your application in the web browser run:
  $ gcloud app browse --project=ng-gae-app

F:\AngularHive\Code\pounds-to-kg>
Demo
Yay, app is up and running! Hit https://ng-gae-app.appspot.com, you will be able to see Pounds-to-Kg app deployed and served from Google App Engine.
Oh yeah, you made it. You learned how to deploy Angular app to GAE, it's just awesome right? Thanks for sticking around. ✌🏼😊
Please share your experience of deploying your app to GAE with me in the comments below. You are also welcomed to post any questions you have related to this article!
Stay tuned for more such articles coming soon. You can check my blog for other posts on Angular.

Top comments (0)