Hi there! This post teaches you how you can deploy your Amplication Server to Digital Ocean. You can request to the api, create or delete data, get data and so on.
Setting up Digital Ocean droplet
Now, in order to run our server, we will need to have a virtual machine, which Digital Ocean provides.
- Move to the digital ocean's cloud website. Click the create dropdown in topbar and click Droplets.

- Choose the specifications for your droplet
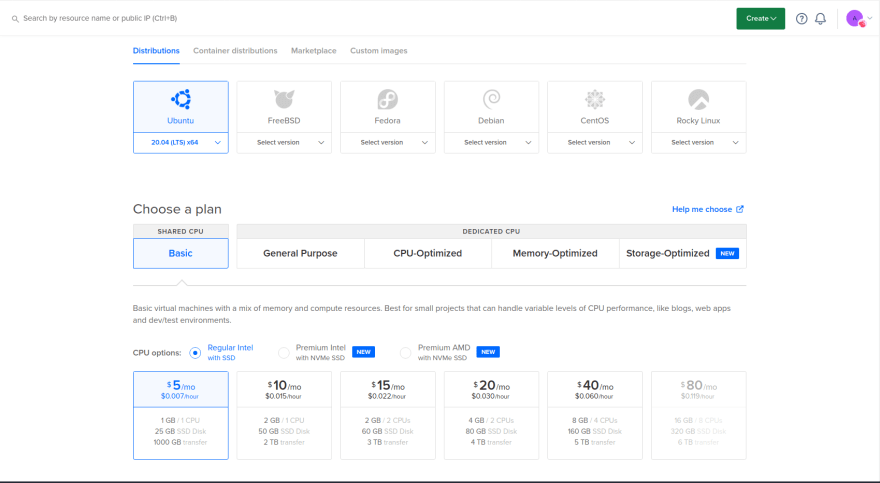
We will use Ubuntu as our disk image. Then, choose a plan according to your requirement.
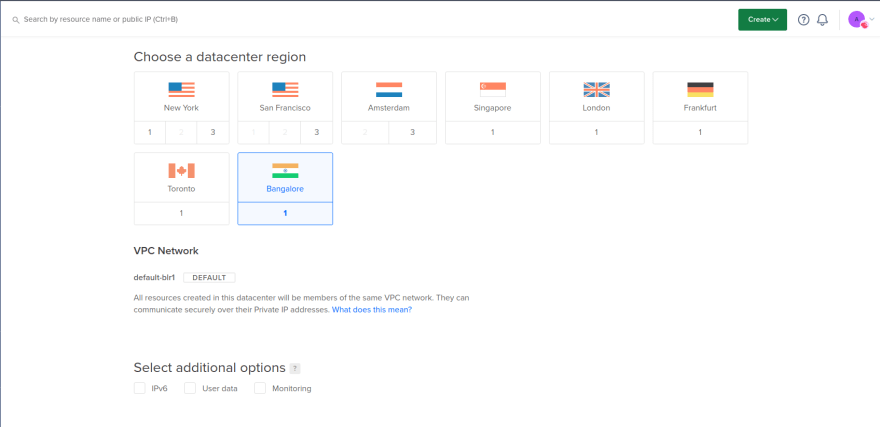
Next, choose the data center. I would recommend you to choose the center nearest to you.

I would always recommend you to use SSH Key Authentication. It is secure and better than Password Authentication
Lastly, click the Create button to create the droplet. It may take 30 sec to 1 min for the droplet to become ready.
Setting up the droplet
Now that your droplet is created, we need to install required packages. The steps for setting up the droplet is:
Open a terminal
Run
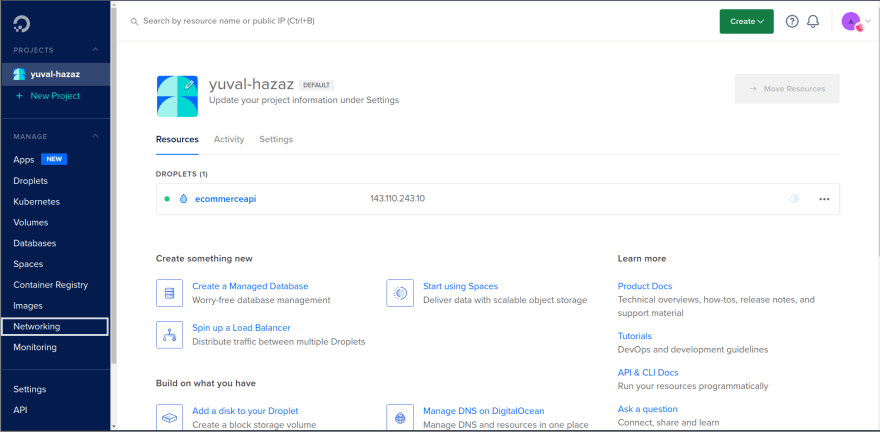
ssh root@<host>where host is the ipv4 of your droplet. You can get this IP from your droplet by going to the droplet menu.Now you should see that we have successfully connected to the droplet.
Curl the latest version of node -
curl -sL https://deb.nodesource.com/setup_14.x | sudo -E bash -
Install nodejs by running this command -
sudo apt-get install -y nodejsInstall docker compose with the following command:
apt install docker-composeInstall pm2 -
npm install -g pm2
Setting up the project
Now that you have installed nodejs, follow these steps:
Clone your repository - Clone your repository using git at the home directory or any other directory -
git clone <repository_url>Change directory to the directory where your source code is -
cd <folder_name>Optional: You can actually delete the admin ui folder because we are just deploying our server.
Change directory to the server folder -
cd serverInstall the required dependencies -
npm installWait for the installation to complete
Generate prisma client -
npm run prisma:generateStart the database -
npm run docker:dbInitialize the database -
npm run db:initNow change the port from 3000 to 80. You must be wondering why to do this? Well, we should not allow users to go to specific post to access the api. Since the default port of the browser is 80, we changed the port. This way, the user has to go to
http://<host>/instead of going tohttp://<host>:3000/. I hope this makes sense.
Open up the nano editor by running nano src/main.ts (make sure that you are at server/ directory). You must find a line with this content - const { PORT = 3000 } = process.env;. Change this to const { PORT = 80 } = process.env;
Press Ctrl + X then Y then Enter
- Lastly build the application for the production use -
npm run build. This should create a folderdist.
You can actually test if your server is working fine. Run node dist/main.js and go to this website - http://<host>/graphql, where the host is the ipv4 of your droplet.
If you terminate your running code, you will see that the site hangs, keeps on loading and you get this error -
<url> took too long to respondNow, to run this code in background, use this command -
pm2 start dist/main.js. Now, if you again go ahead to the site, you should see it rendering. Amazing!
Creating a domain
Now, of course you will not provide access to the API through the IP address of the droplet. So, we use domains. Go ahead and buy a domain (I buyed the domain for free from the site https://www.freenom.com/en/index.html).
Setting up the domain
Follow these steps:
- Click the domains option in left bar of Digital Ocean's Home
- Next, you should see a input box saying "Enter Domain". Enter the domain there.

Then click "Add Domain"
- Create records
Next, click on the A button in the menu under "Create new record"
You can create a subdomain which represents what that domain does. Like we are deploying the api, we can use api.ecommerce.ml. Use "@" if you dont want to create subdomains. Next, Under "Will Redirect To", choose your droplet. The click "Create Record"

- Add NameServers
Now, different domain providers have different locations for setting up the name servers. Under "DNS Records, you will wind three nameservers (It would be in a ns<number>.digitalocean.com). Copy them and add to the servers (You can find out how to do so by following tutorial on that specific domain provider).
- Adding CNAME
Move to CNAME option in the menu. Enter the host name as www and @ under the "Is An Alias of". Then click "Create Record"
Note: It may take some time for your droplet to start on the domain.
Done! You have successfully deployed your server to Digital Ocean!
Testing Our API
Now that we have successfully deployed our server, its time to test the server. We will make some requests, and check the output.
- Simple GET request for users
import fetch from "node-fetch"

fetch("http://<your_website>/api/users" , {
    method: "GET",
    headers: {
        "Authorization": "Basic YWRtaW46YWRtaW4="
    }
}).then((res) => res.json())
.then((data) => console.log(data))
If you run the above code, you should see the list of users available.
Ending
I hope that you have understood how you can deploy your app server to Digital Ocean.
Conclusion
I, not only want to thanks Yuval Hazaz for this amazing project, but also for helping me to make this tutorial.

Latest comments (2)
💜
Thanks :)