
by Sarah Okolo
In today's dynamic web development realm, implementing powerful search functionality is a key feature that can greatly enhance user experience and make navigating large datasets a breeze. If you want to add live search capabilities to your website or web application, you've come to the right place. This comprehensive article will explore the ins and outs of implementing live search functionality using JavaScript.
Whether you're a seasoned developer or just starting your coding journey, this article is designed to provide you with the general coding knowledge and tools necessary to incorporate live search into your projects. By the end of this guide, you'll have a solid understanding of the concepts and techniques involved, allowing you to create responsive and interactive search functionality that dynamically updates as users type.
To effectively follow along with this guide, it is recommended that you have a solid understanding of HTML, CSS, and JavaScript fundamentals. Familiarity with DOM manipulation and event handling will be beneficial as we dive into the implementation details. However, even if you're relatively new to JavaScript or web development, the guide is structured to provide clear explanations and step-by-step instructions, making it accessible to learners at various skill levels.
Now, to better understand the importance and usage of this functionality, we are going to be creating a very basic project as an example; more specifically, a movie application as shown below:
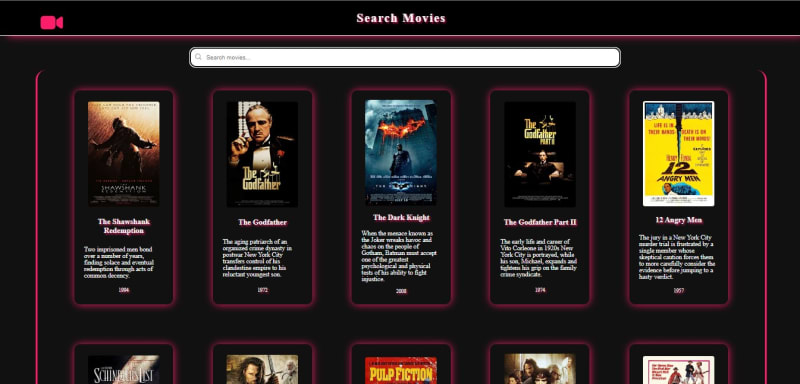
You can check out the live implementation here.
In this project, we will leverage the live search functionality to search through the list of movies from a movie database. I know you are excited to dive right in; we are getting there. But first, let's get to know a little bit more about what a live search functionality is and its importance.
The Importance of Live Search Functionality
Live search functionality has become vital in today's digital landscape, catering to the need for efficient information retrieval and enhancing the overall user experience. By enabling real-time search updates as users type, live search offers immediate feedback and facilitates quick access to relevant information. This dynamic and interactive search feature brings numerous benefits, benefiting users and website owners.
Improved User Experience: Live search significantly enhances the user experience by providing a seamless and intuitive search process. As users begin typing their query, the search result is updated in real time, offering instant feedback and eliminating the need for manual submissions or page reloads. This interactive nature saves users valuable time and effort, resulting in a more efficient and satisfying search experience.
Faster Information Retrieval: With live search, users can quickly find the desired information without navigating multiple pages or waiting for search results to load. As they type, the search results narrow down instantly, displaying relevant suggestions and eliminating the need to enter the full search query. This speed and responsiveness empower users to find what they're looking for in a fraction of the time it would take with traditional search methods.
Increased Engagement and Conversion: Live search's seamless and responsive nature encourages users to engage more actively with the website or web application. Providing instant feedback and relevant suggestions keeps users engaged, minimizing the likelihood of bounce rates or frustration. This increased engagement can lead to improved conversion rates, as users are more likely to explore the site further and convert their search intent into actions.
Enhanced Filtering and Refinement: Live search functionality often includes additional features like filters, suggestions, and auto-complete options. These features aid users in refining their search and narrowing down the results, allowing them to find what they're looking for. By providing these tools, live search improves the search experience but also assists users in discovering related content or products they may not have initially considered.
Valuable Insights for Website Owners: Live search functionality can provide valuable insights into user behaviour and preferences. By analyzing the search queries and patterns, website owners can better understand what their users are looking for, identify popular trends or topics, and make informed decisions regarding content creation, product offerings, or user interface enhancements. These insights enable website owners to tailor their offerings to better meet user needs, resulting in improved customer satisfaction and business growth.
Setting Up the HTML Structure
Now that we have a full understanding of what a live search functionality is and its importance let’s dive into how you can implement one in your own project as well.
Firstly, let us set up the project’s structure. For this project, we will need just three files, that is, the HTML, CSS, and JavaScript files.
Now let's begin with setting up the HTML structure of our project:
Inside the HTML file, we first need to include our standard HTML boilerplate, including the link and script to our CSS and JS files:
<!doctype html>
<html lang="en">
 <head>
   <meta charset="UTF-8" />
   <meta name="viewport" content="width=device-width, initial-scale=1.0" />
   <link rel="stylesheet" href="./live-search.css" />
   <title> </title>
 </head>
 <body>
   <script src="./live-search.js"></script>
 </body>
</html>
Now in the body tag, we include the header and main semantic tags. Inside the header tag is where we set up the header section of our project, which in this case is just the application’s name and a video icon.
<header>
 <ion-icon name="videocam"></ion-icon>
 <h1>Search Movies</h1>
</header>
Before we move on to the main tag, at the end of the body tag, let us include the required script tags in other to be able to make use of the icons:
<script
 type="module"
 src="https://unpkg.com/ionicons@7.1.0/dist/ionicons/ionicons.esm.js"
></script>
<script
 nomodule
 src="https://unpkg.com/ionicons@7.1.0/dist/ionicons/ionicons.js"
></script>
You can find the icons at the Ionicons website.
Now, inside the main tag, we are going to include our first div tag, and this is going to be our search bar container, and inside it, we place our search input tag and a search icon:
<div id="search-container">
 <ion-icon name="search-outline"></ion-icon>
 <input type="search" id="search-bar" placeholder="Search movies..." />
</div>
Then, we will create another div tag below this' div'. This is going to hold all of the movie data results:
<div id="results-container"></div>
We would leave it empty for now, as its contents will be generated in the JavaScript section.
Lastly, in the main tag, we would include a p tag. This tag is simply to display the error or empty message response to the user later.
<p id="movie-unavailable-txt"></p>
That is all for the HTML file, and the overall code should look like this:
<!doctype html>
<html lang="en">
 <head>
   <meta charset="UTF-8" />
   <meta http-equiv="X-UA-Compatible" content="IE=edge" />
   <meta name="viewport" content="width=device-width, initial-scale=1.0" />
   <link rel="stylesheet" href="./live-search.css" />
   <title>Live Search Functionality</title>
 </head>
 <body>
   <header>
     <ion-icon name="videocam"></ion-icon>
     <h1>Search Movies</h1>
   </header>

   <main>
     <div id="search-container">
       <ion-icon name="search-outline"></ion-icon>
       <input type="search" id="search-bar" placeholder="Search movies..." />
     </div>

     <div id="results-container"></div>

     <p id="movie-unavailable-txt"></p>
   </main>

   <script src="./live-search.js"></script>
   <script
     type="module"
     src="https://unpkg.com/ionicons@7.1.0/dist/ionicons/ionicons.esm.js"
   ></script>
   <script
     nomodule
     src="https://unpkg.com/ionicons@7.1.0/dist/ionicons/ionicons.js"
   ></script>
 </body>
</html>
Now that we are done implementing the project’s HTML structure let us add a few styles to the page.
Adding styles to the page
In this section, we would add basic styling to the various parts of the page. So let's dive right in.
First, let's add some general styles to the overall section of the page:
html{
 scroll-behavior: smooth;
 background-color: #111;
 color: whitesmoke;
}

*{
 margin: 0;
 padding: 0;
 box-sizing: border-box;
}
Now let's add some styles to our header section and its contents:
header{
 display: flex;
 justify-content: center;
 padding: 25px;
 letter-spacing: 2px;
 position: sticky;
 top: 0%;
 z-index: 2;
 border-bottom: 2px solid ;
 background-color: black;
 text-shadow: 3px 3px 5px #fd1d6b;
 box-shadow: 10px 10px 20px -10px #fd1d6b;
}

header > ion-icon{
 color:#fd1d6b;
 font-size: 60px;
 position: absolute;
 left: 5%;
}
Next, we move on to styling the search container and its contents:
#search-container{
 display: flex;
 justify-content: center;
 padding: 20px;
 margin-bottom: 20px;
 position: sticky;
 top: 100px;
}

#search-bar{
 border: none;
 width: 60%;
 padding: 15px;
 padding-left: 40px;
 border-radius: 15px;
 font-size: 15px;
}

#search-container>ion-icon{
 color: gray;
 position: relative;
 left: 30px;
 top: 13px;
 z-index: 3;
 font-size: 19px;
}
After that, we go ahead to style the results-container that would house all the movies we would be fetching from the movie database later:
#results-container{
 border-right: 5px solid #fd1d6b;
 border-left: 5px solid #fd1d6b;
 border-radius: 25px;
 display: flex;
 justify-content: center;
 flex-wrap: wrap;
 width: 90vw;
}
Next, we add styles to the movie-unavailable-txt while setting the display to none because we don't want it to be visible just yet:
#movie-unavailable-txt{
 text-align: center;
 letter-spacing: 2px;
 display: none;
 margin-top: 15%;
 text-shadow: 3px 3px 5px #fd1d6b;
}
Next, we will add some styles to a few elements that haven't yet been declared but we would create with javascript. It is the movie card that would display the movie details, housing both the movie image and title:
.movie-cards{
 padding: 25px;
 max-width: 250px;
 border-radius: 15px;
 display: grid;
 place-items: center;
 box-shadow: 1px 1px 20px -1px #fd1d6b ;
 margin: 50px;
}

.title{
 margin: 20px auto;
 text-align: center;
 font-size: 1.2rem;
 text-shadow: 3px 3px 5px #fd1d6b;
}

.date{
 margin-top: 15px;
 font-size: 0.8rem;
 text-shadow: 3px 3px 5px #fd1d6b;
}

.movie-image{
 width: 90%;
 max-width: 400px;
 object-fit: contain;
 border-radius: 5px;
}
Now that we are done styling the page let's move on to the most interesting and important section, the Javascript implementation.
Sending Asynchronous Search Requests to Movie Database API.
In this section, we will make API calls to the movie database API of our choice to populate our page with various movies. In this case, I am going to be making use of the IMDb Top 100 Movies free movie API in the RapidAPI Hub. In the API page, we select the particular data you want to make use of and then go ahead to copy the javascript(fetch) code that is provided on the right side of the page for that data, as shown below:

But first off, before you can use the API, subscribe to it first(no credit card required), so an API key can be generated for you. You can do so on the pricing page of the API.
Moving on, we head into our empty javascript file and paste the code we copied in there:
const url = "https://imdb-top-100-movies.p.rapidapi.com/";
const options = {
 method: "GET",
 headers: {
   "X-RapidAPI-Key": "YOUR GENERATED API KEY",
   "X-RapidAPI-Host": "imdb-top-100-movies.p.rapidapi.com",
 },
};

try {
 const response = await fetch(url, options);
 const result = await response.text();
 console.log(result);
} catch (error) {
 console.error(error);
}
Now that we have gotten the API from the movie database into our project, we can use its data. So next up, we are going to declare a few variables that we would need and place them just above the try block in the code we copied:
const searchBar = document.getElementById("search-bar");
const resultsContainer = document.getElementById("results-container");
const movieUnavailableTxt = document.getElementById("movie-unavailable-txt");
let movieList;
let searchValue;
let searchedMovies;
We are getting to the purpose of these variables we just created, hang in there.
Next, we make some changes to the try block from the copied code, as we want to fully integrate it with our project. So first up, we would need to create an asynchronous function:
const fetchMovies = async () => {
 // try catch block goes in here.
};
Inside this function, we will place the entire try catch block from the code we copied, so we can make asynchronous API calls.
Inside the try block, we are going to get rid of the console.log(result) line and change the result variable to the movieList variable we declared previously, and change the response.text() in that same line to response.json(). This is so that the data we received from the API call is presented in a JSON format, which we need. So that line should look like this now:
movieList = await response.json();
Now that we have successfully fetched the movie from the API and returned our JSON dataset, we need to populate that data into our page. For that, we will call the renderMovies() function and set the argument to the data obtained from our API call. Don't worry, we will be creating the function soon:
renderMovies(movieList);
Let us now create the renderMovies function which we just called in the fetchMovies() function, this function would be what we would use to create our dynamic movie card template for which we set the styles to earlier in our CSS file, and in each of the elements in the template, we are going to set their contents to the data we got from the API, that would enable us to render different movies with the same template. We would then place the movie card inside the resultsContainer element. Each time the function is called, we would need to clear the resultsContainer, and also set the moviesUnavailableTxt to display="none" because we want the text to not be visible when we render the movies unto the page, as well as clearing the moviesReturnedOnSearch array, before setting the new data returned from the search input field into it:
const renderMovies = (movies) => {
 resultsContainer.innerHTML = ""; // Clear the existing movies
 movieUnavailableTxt.style.display = "none"; // Hide the "No movies found" message
 moviesReturnedOnSearch = []; // Clear the movies returned on search array

 movies.forEach((movie) => {
   resultsContainer.innerHTML += `
     <div class="movie-cards">
       <img src="${movie.image}" alt="movie image" class="movie-image" />
       <h2 class="title">${movie.title}</h2>
       <p class="plot">${movie.description}</p>
       <p class="date">${movie.year}</p>
     </div>
   `;

   moviesReturnedOnSearch.push(movie); // Add the movies that are a result to the search input value
 });
};
Session Replay for Developers
Uncover frustrations, understand bugs and fix slowdowns like never before with OpenReplay — an open-source session replay suite for developers. It can be self-hosted in minutes, giving you complete control over your customer data.

Happy debugging! Try using OpenReplay today.
Capturing User Input and Displaying Real-Time Search Results of Movies
Now that we have loaded all the movie data onto our page, here comes the really fun part, where we implement the live search functionality, so, without wasting time, let's dive right in.
To capture the user input, we will be using the input event listener and linking it to the searchBar element. We use this particular event listener because it captures every single activity inside the search box, from typing to clearing to pasting, which is exactly what we want. So let's go ahead and create that:
searchBar.addEventListener("input", (event) => {
 // live functionality code
});
Okay, so now we have linked the input event listener to the search bar to listen to any input from the user. In the second parameter, we have added the event handler, which is the function that will be called whenever a single input is made to the search bar. Now inside that function, we will create the code that handles the live search.
The first thing we need to do inside the search function is to edit the input value gotten from to user and set it to all lowercase as well as get rid of any unnecessary whitespace:
searchValue = event.target.value.trim().toLowerCase();
After that, we proceed to filter the movie on the page by title, based on the user's search input, by checking if the movie title entered by the user includes any of the movie titles in the movieList data while also setting the titles of the movies to lowercase to match the input from the user:
const filteredMovies = movieList.filter( (movie) => movie.title.toLowerCase().includes(searchValue) );
Next, we are going to display the real-time search results of the movies by rendering whatever movie title matches the characters the user has typed in the search bar by calling the renderMovies() function once more and setting the arguments to the value of the filtered Movies variable.
renderMovies(filteredMovies);
By calling this function, it renders unto the page only the movies whose titles matched with whatever characters were typed into the search bar using the movie card template provided in the function while also adding each of the movies that matched into the moviesReturnedOnSearch array, so we can keep track of how many movies matched the search value on each character input. This would be useful when handling the empty response errors, which we would be getting into now.
Handling Empty or Error Responses
In any application, handling empty or error responses effectively is crucial. In this case, these scenarios can occur when the search query does not yield any results or there are issues with the API request.
To handle errors or empty responses, it is essential to provide clear feedback to the user. That said, as this is a pretty light application, we don't have to worry about that much error, as we would only be dealing with errors arising from the API. For instance, the API services could be temporarily down, or the application might have just exceeded its request limit. To handle that error, we just have to set the movieUnavailableTxt element's display to block and set the innerHTML to display the error message to the user and place it inside the catch block of the fetchMovies() function. So now the catch block looks like this:
catch (error) {
 movieUnavailableTxt.innerHTML = 'An error occurred while fetching movies. <br /> Please try again later.';
 movieUnavailableTxt.style.display = "block";
 console.error(error);
}
Now that we are done handling the error response let's move on to handle the empty response. If the movie the user searches for does not match any of the movies on the page, we would have to alert the user that the movie searched for is unavailable. To do so, first, we need to check the content of the moviesReturnedOnSearch array, which we declared earlier, and if the length of the array is less than or equal to 0, we then set the movieUnavailableTxt element's display to block and set the innerHTML to the empty response message we want to display, as shown below:
if (moviesReturnedOnSearch.length <= 0) {
 movieUnavailableTxt.innerHTML = "OOPS! <br/><br/> Movie not available";
 movieUnavailableTxt.style.display = "block"; // Show the "No movies found" message if no movies match the search
}
We will then place this if block just before the closing bracket of the searchBar event handler.
Improving Search Performance with Caching
When implementing live search functionality with an API, one effective technique for enhancing performance is caching. Caching involves storing previously fetched search results and reusing them when the same search query is requested again. This can significantly reduce the number of API calls which would be helpful to prevent exceeding the API's request limit and overall improve the responsiveness of the search feature, as well as the website's load time.
To implement caching in our project, first, we need to identify what item needs to be cached, and in this case, that would be the value of the movieList variable, which is the data we got back from our fetch API request in JSON format. By caching this item, we would be able to make use of the API's data without making a single extra fetch request, even on page reload. But for this project, we will be setting an expiration time for our cached data of 6 hours, meaning the page would only make the API request once every 6 hours rather than on each page reload. This is so the page can keep its data fresh and up to date while maintaining the API request to a minimum.
Heading back into our code, what we need to do now is store the JSON data in the browser's local storage, but to do that, we need to turn it into a string first and set a key name that would be used to identify the data in the local storage. Let's just set it to movieData as shown below:
localStorage.setItem("moviedata", JSON.stringify(movieList));
The next thing we need to do is store the current date and time in the local storage as well:
localStorage.setItem("cacheTimestamp", Date.now());
This stores the current date and time in milliseconds, with the Key name of cacheTimeStamp.
We will place these two lines of code inside the try block of the fetchMovies() function, just right below the movieList variable.
Next, outside the fetchMovies() function, just below the renderMovies() function, we are going to set our cached data's expiration time to 6 hours in milliseconds:
const expirationDuration = 21600000; // 6 hours in milliseconds
After that, we need to get back the cacheTimestamp we set in the local storage earlier:
const cacheTimestamp = localStorage.getItem("cacheTimestamp");
Now, we will check if the cached data has expired or isn't available, meaning it hasn't been stored yet. If that is the case, we will make a new fetch request to the API by calling the fetchMovies() function. On the other hand, if the cached data is present and hasn't expired yet, we will use it to render the movies on the page rather than making a new fetch request again. We do this by retrieving the cached movie data and parsing it back into JSON format to be used, and then calling the render function with the argument set to the data gotten from the cache.
// Check if cache has expired or data is not available
if (
 !cacheTimestamp ||
 Date.now() - parseInt(cacheTimestamp) > expirationDuration
) {
 // Cache expired or data not available, fetch movies again
 fetchMovies();
} else {
 // Use cached movie data
 movieList = JSON.parse(localStorage.getItem("moviedata"));
 renderMovies(movieList);
}
In the if statement, the !cacheTimestamp checks if the cacheTimestamp variable is falsy, meaning it is either null, undefined, 0, false, or an empty string. If cacheTimestamp is false, it indicates no existing cache timestamp is stored. The Date.now() - parseInt(cacheTimestamp) calculates the time difference between the current timestamp and the parsed Integer value of cacheTimestamp. This is simply us saying, "The value of the current time minus the value of the time we previously stored in the cache, is it greater than the expiration time we set? if yes, go ahead to fetch the movies from the API again, and if not, just make use of the cached data."
And there you have it; that is how we cache the data to be reused, rather than making the fetch request on each user input or each page reload. As you can see, this would greatly optimize the application's performance, as it prevents slow movie rendering, which could occur due to a slow network.
We are done implementing all the features in our little movie application that demonstrate how the live search functionality works. Below is the overall javascript code for this application:
const url = "https://imdb-top-100-movies.p.rapidapi.com/";
const options = {
 method: "GET",
 headers: {
   "X-RapidAPI-Key": "Your Generated API Key",
   "X-RapidAPI-Host": "imdb-top-100-movies.p.rapidapi.com",
 },
};

const searchBar = document.getElementById("search-bar");
const resultsContainer = document.getElementById("results-container");
const movieUnavailableTxt = document.getElementById("movie-unavailable-txt");
let movieList;
let searchValue;
let moviesReturnedOnSearch;

// Function to fetch movies from the API
const fetchMovies = async () => {
 try {
   const response = await fetch(url, options);
   movieList = await response.json();

   // Storing the Movie Data in browser storage
   localStorage.setItem("moviedata", JSON.stringify(movieList));
   localStorage.setItem("cacheTimestamp", Date.now()); // Update cache timestamp

   // Render the movies on the page
   renderMovies(movieList);
 } catch (error) {
   movieUnavailableTxt.innerHTML =
     "An error occurred while fetching movies. <br /> Please try again later.";
   movieUnavailableTxt.style.display = "block";
   console.error(error);
 }
};

// Function to render movies on the page
const renderMovies = (movies) => {
 resultsContainer.innerHTML = ""; // Clear the existing movies
 movieUnavailableTxt.style.display = "none"; // Hide the "No movies found" message
 moviesReturnedOnSearch = []; // Clear the movies returned on search array

 movies.forEach((movie) => {
   resultsContainer.innerHTML += `
     <div class="movie-cards">
       <img src="${movie.image}" alt="movie image" class="movie-image" />
       <h2 class="title">${movie.title}</h2>
       <p class="plot">${movie.description}</p>
       <p class="date">${movie.year}</p>
     </div>
   `;

   moviesReturnedOnSearch.push(movie); // Add the movies that are a result to the search input value
 });
};

const cacheTimestamp = localStorage.getItem("cacheTimestamp");
const expirationDuration = 21600000; // 6 hours in milliseconds

// Check if cache has expired or data is not available
if (
 !cacheTimestamp ||
 Date.now() - parseInt(cacheTimestamp) > expirationDuration
) {
 // Cache expired or data not available, fetch movies again
 fetchMovies();
} else {
 // Use cached movie data
 movieList = JSON.parse(localStorage.getItem("moviedata"));
 renderMovies(movieList);
}

// Event listener and handler for search bar input
searchBar.addEventListener("input", (event) => {
 searchValue = event.target.value.trim().toLowerCase();

 // Filter movies based on search input
 const filteredMovies = movieList.filter((movie) =>
   movie.title.toLowerCase().includes(searchValue),
 );

 // Render the filtered movies on the page
 renderMovies(filteredMovies);

 if (moviesReturnedOnSearch.length <= 0) {
   movieUnavailableTxt.style.display = "block"; // Show the "No movies found" message if no movies match the search
 }
});
Conclusion
In this guide, we have explored the implementation of live search functionality in JavaScript using an API. By following the steps outlined, you can create a dynamic search experience that provides real-time results as users type in the search bar.
By implementing live search functionality to your website, you can enhance user engagement and improve the usability of your website or application. Users will appreciate the ability to find relevant information quickly and conveniently, all without the need for page reloads.
With the knowledge gained from this guide, you are well-equipped to implement live search functionality in JavaScript effectively. Embrace the power of dynamic searching and create a seamless user experience that will leave a lasting impression.
Happy coding!

Top comments (1)
Can you elaborate on how to implement Escape Road game mechanics?