
Are you an Ajax fan? Well… if not… you should be! No, I am not talking about the Greek Trojan War hero, or the Dutch soccer team (pronounced Aye-ax in Dutch 😎), or even the dish soap 🧼; I’m, of course, talking about the best thing that has ever been introduced to web development, in my humble opinion, and one of the greatest tools for user experience enhancement you can use — Asynchronous JavaScript and XML (AJAX).
In this tutorial, I will show you how you can pair AJAX with the Alpas web framework to create a ‘show more’ (or ‘load more’, whichever nomenclature you’d like to use) button that loads more results from a database and appends results to the page without reloading. 💪🏽
‘Show More’ Example Repository
The code for this example is on GitHub. Feel free to clone, run, and follow along!
Step 1 — Create a database and add data
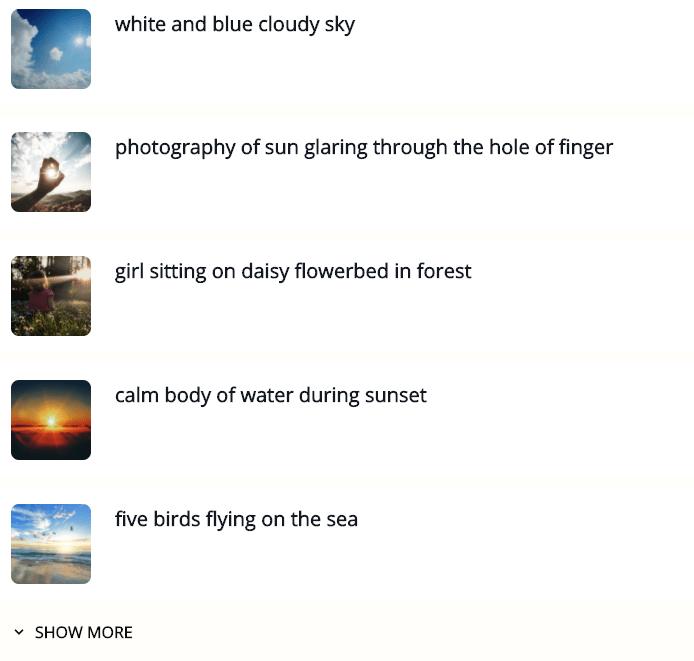
In this example, I found some images and their corresponding descriptions on Unsplash and hard-coded them to the DatabaseSeeder.kt file.
Go ahead and clone the project, create a MySQL database on your local named ‘showmore’, then run the following command on the project’s root: ./alpas db:migrate && ./alpas db:seed. This will add the image table to your database and then seed with the sample data.
After you run the commands to complete the database and seed with data, you can then run the project and see the ‘Show More’ button in action. The following steps will provide some more insights into the code.
Step 2—Add Route
In routes.kt, add the following route to RouteGroup.
post("/showdata", WelcomeController::showmore).name("showmore")
Step 3 — Update Welcome Controller
In WelcomeController.kt, let’s call an initial 5 results from the database and send results to the “welcome” Pebble template. The welcome.peb file will iterate through the initial 5 results from the database. No AJAX action on the initial page load.
fun index(call: HttpCall) {

val images = Images
        .latest()
        .take(5)
        .toList()

call.render("welcome") {"images" to images}
}
Next, let’s build out what happens when the “showmore” route is called. This will look for the Ajax call, query 5 more results, and then iterate through results while creating HTML as a string that will then be sent back to the front end and appended to the results list.
fun showmore(call: HttpCall){
if(call.isAjax){
        // id,num is the last result, so we know what the start point is
 for calling new data
        var num: Int = call.intParam("id") as Int

        val images = Images
            .latest()
            .drop(num)
            .take(5)
            .toList()

var content = ""
        var last_id = num + 5

        if (num < 15){
              for (image in images){

                  content += """
                    <li class="p-4 bg-white rounded-lg mb-3 flex flex-st">
                        <div class="flex">
                          <div class="self-center">
                              <a href="${image.src}" target="_blank">
                                <img class="h-20 w-20 object-cover rounded-lg" src="${image.src}">
                              </a>
                          </div>
                          <div class="ml-6 pr-4 flex-1">
                            <div class="text-xl font-bold text-gray-900"> ${image.name} </div>
                          </div>
                       </div>
                     </li>
                """.trimIndent()
            } content += """
                <button type="button" name="show_more_button" class="font-semibold uppercase py-2 px-4 rounded-lg inline-flex" data-id="_${_last\_id_}_" id="show\_more\_button">
                  <svg class="fill-current h-4 w-4 mr-2 mt-1" xmlns="http://www.w3.org/2000/svg" viewBox="0 0 20 20"><path d="M9.293 12.95l.707.707L15.657 8l-1.414-1.414L10 10.828 5.757 6.586 4.343 8z"/></svg>
                  <span>Show More</span>
                </button>
            """.trimIndent()

        }_
         else {
             content = "🏙 That's all! 👋"

         }
     call.reply(content)
    }
}
If the last id is greater than 15, then we return an end-of-the-line string. There are only 15 items in the database — so, of course, you can update logic accordingly for your implementation
Step 4— Update Welcome template
Lastly, let’s update the welcome.peb file to add some basic HTML and AJAX!
For the HTML and Pebble tags, add in the following:
<ul class="" id="image_list">
{% for image in images %}
<li class="p-4 bg-white rounded-lg mb-3 flex flex-st">
    <div class="flex">
      <div class="self-center">
          <a href="{{ image.src }}" target="_blank">
            <img class="h-20 w-20 object-cover rounded-lg" src="{{ image.src }}">
          </a>
      </div>
      <div class="ml-6 pr-4 flex-1">
        <div class="text-xl font-bold text-gray-900"> {{ image.name }}
        </div>
      </div>
    </div>
  </li>
{% endfor %}
<div id="load\more w-full">
{% csrf %}
<button type="button" name="show_more_button" class="font-semibold uppercase py-2 px-4 rounded-lg inline-flex" data-id="5" id="show\more\button">
      <svg class="fill-current h-4 w-4 mr-2 mt-1" xmlns="http://www.w3.org/2000/svg" viewBox="0 0 20 20"><path d="M9.293 12.95l.707.707L15.657 8l-1.414-1.414L10 10.828 5.757 6.586 4.343 8z"/></svg>
      <span>Show More</span>
    </button>
  </div>
</ul>
And, at the end of the page, we’ll add some JQuery (I am using the Google JQuery API in my example) and our AJAX call.
This script works by watching for the page to be ready, and then listens to if the “Show More” button has been clicked. If clicked, then it opens and AJAX connection to request data, once received, the ‘Show More’ button is removed and data is appended to the unordered list.
<script>
$(document).ready(function(){
  $(document).on('click', '#show_more_button', function(){
    var id = $(this).data('id');
    $('#show_more_button').html('Loading more images...');
    $.ajax({
         url:"{{ route('showmore') }}",
         method:"POST",
         headers: {
          'X-CSRF-TOKEN': '{{ _csrf }}'
          },
         data:{id:id},
         success:function(data)
         {
            $('#show_more_button').remove();
            $('#image_list').append(data);
         }
    });
 });
});
</script>
You will notice the ‘X-CSRF-TOKEN’: ‘{{ _csrf }}’ line. This is necessary to protect against Cross Site Request Forgery. Alpas will automatically validate CSRF token in web calls; you will just need to pass the token along in the request header. See CSRF Protection documentation for more info on CSRF.
When you run the app, this is what you will see:
And that’s how you can get AJAX rolling with Alpas!
I hope this helps you implement some great AJAX functionality with your Alpas project. Here’s to making your user’s experience awesome! 🍻

Top comments (0)