Do you prefer writing your blogs in a IDE/notepad rather than a website where you can open youtube in the next tab and spend a millenia procrastinating?
Well now you can... You could have for a while, but now for sure.
Credits to Maxime who created the dev-to-git tool that takes your markdown files and publishes them in dev.to and Bram Borggreve for creating a tutorial using Github Actions.
How to do it
Step 1 - DEV.TO API Key
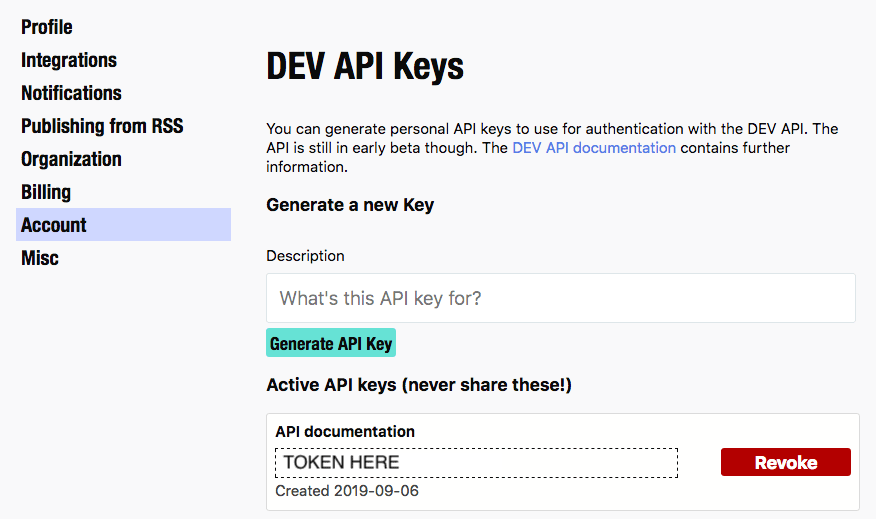
Log in to your dev.to account, go into settings. You will find a DEV API Keys section under the Account tab. Give it a description if you want to, it's nice to know what you used it for if you have multiple keys. Click on Generate to generate your key.
When generated, the key will show up under active keys dropdown and will have a set of random characters with it. This is your token that you can use to access any of the dev.to API.
We will be needing this key when we set up the Github Actions workflow.
Step 2 - Create your Github Repository
Here, it is all upto you. You want to create a repo for each blog post or a mono repo with all dev.to blog posts. You can start from scratch and add a package.json and a workflow yaml or you can use Maxime's dev.to template. The template is really helpful if you don't want to spend time setting things up. You can simply clone it and start writing. Maxime's template works for Travis CI so, we will start from scratch this time and refer to beeman's blog for github actions.
Create an empty repository.
Add the following package.json for setting up dependencies.
{
  "name": "dev.to",
  "repository": {
    "type": "git",
    "url": "https://github.com/ariskycode/dev.to-blogs.git"
  },
  "scripts": {
    "prettier": "prettier",
    "embedme": "embedme blog-posts/**/*.md",
    "prettier:base": "yarn run prettier \"**/*.{js,json,scss,md,ts,html,component.html}\"",
    "prettier:write": "yarn run prettier:base --write",
    "prettier:check": "yarn run prettier:base --list-different",
    "embedme:check": "yarn run embedme --verify",
    "embedme:write": "yarn run embedme",
    "dev-to-git": "dev-to-git"
  },
  "dependencies": {
    "dev-to-git": "1.1.0",
    "embedme": "1.11.0",
    "prettier": "1.18.2",
    "yarn": "^1.22.10"
  }
}
You would now need to create a dev-to-git.json file in the root directory of your repository. The dev-to-git tool would be using this file to publish your blogs.
It is a simple array to hold all the blogs you want and each json object has two fields: id and relativePathToArticle. We will see how to retrieve this id when we create our first blog post.
[
  {
    "id": 502153,
    "relativePathToArticle": "./blog-posts/first-post-and-its-automated/first-post-and-its-automated.md"
  }
]
We have used two dependencies; prettier and embedme. Prettier is for linting and can automatically fix issues in your repo. Embedme is used for embedding source code snippets into readmes, you simply provide the path and run embedme.
So before we push anything we can run yarn run prettier:check to check for linting issues and automatically fix them with yarn run prettier:write and run embedme yarn run embedme:verify to check if all paths are correct and yarn run embedme to create the embeded readme.
We will be adding these commands to the workflow so that builds would break if anything is out of place and nothing incorrect is published.
We are ready with the basic repository setup, now on blog writing.
Step 3 - Add your first automated post
Now to create your first post. Currently Maxime and Bram are working automating creation of new posts, so you would have to create one manually.
Login to your dev.to account. Click on Write Post button in the nav bar. You would only need to create a draft, so add a title and click on save draft.
Once your draft is saved, an id would be generated from dev.to for your post. We would be using this id as a reference to this post.
To retrieve the id, you can run the following command in your browser console.
+$("div[data-article-id]").getAttribute("data-article-id");
You can use this id and add it to dev-to-git.json.
The package structure is completely upto you, but remember to give the correct path in relativePathToArticle. Here I have the directory blog-posts and will create folders for each blog post.
In your blog-name.md, you would need to add certain tags that would help you maintain everything from the repository itself.
---
published: true
title: "First post and IT'S AUTOMATED"
cover_image: ""
description: Create a post that is version controlled in Github and auto-published using Github Actions
tags: devto, publication, blogpost, continuousdeployment, github
series:
canonical_url:
---
This is awesome as you can directly publish updates without visiting dev.to. This tool also allows you to keep all you images locally and then their links would be converted to remote links before publishing, so now even images are version controlled.
To make sure that all your images are linked correctly, make sure your package.json has the correct repository-url.
Step 4 - Set up workflow
Setting up the Github Actions workflow is very simple.
Github Actions is basically a CI/CD tool that allows you to build, test and deploy your code as per steps defined in your workflows folder.
Create a .github directory in the root directory and within that create a workflows folder.
In the workflows folder, we will now define a yaml that will contain the steps the pipeline will run.
name: Publish

on:
  push:
    branches:
      - main
  pull_request:
    branches-ignore:
      - main

jobs:
  build:
    name: Publish
    runs-on: ubuntu-latest
    steps:
      - name: Checkout Repo
        uses: actions/checkout@master

      - name: Setup Nodejs
        uses: actions/setup-node@v1
        with:
          node-version: "12.x"

      - name: Install dependencies
        run: yarn install

      - name: Run Prettier
        run: yarn run prettier:check

      - name: Run Embedme
        run: yarn run embedme:check

      - name: Deploy to dev.to
        run: DEV_TO_GIT_TOKEN=${{ secrets.DEV_TO_GIT_TOKEN }} yarn run dev-to-git
This is a simple workflow that will checkout your repository, install the dependencies, run prettier and embedme and then run the dev-to-git tool which will publish your posts to dev.to.
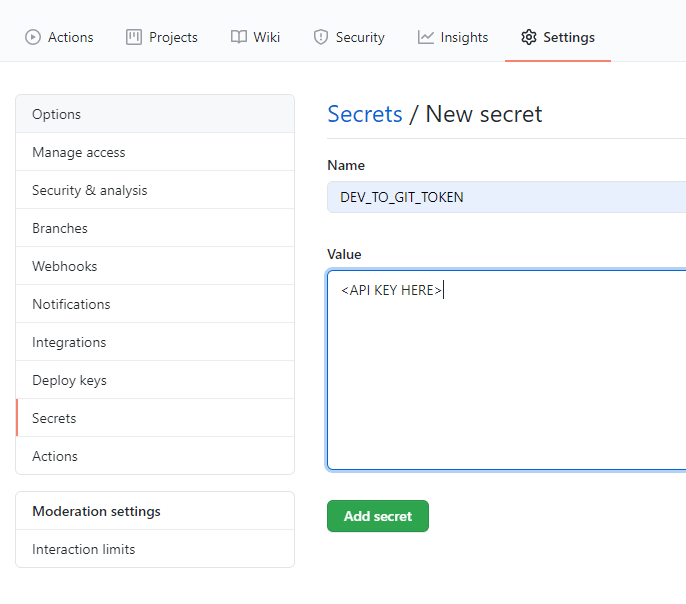
You would notice there is secrets.DEV_TO_GIT_TOKEN parameter in the dev-to-git step. You can add secrets to your repository so that no one else uses the API token you created in step 1. To add this to your repository, go into your repository settings. You will see a Secrets section. Add your API Key as a new secret and save it.
Now we are all done! All that is left is commit and push to your local repository!
Step 5 - Publish your first post
Once you push your these changes to your master/main branch, Github Actions will automatically detect the presence of a workflow and start executing that for you.
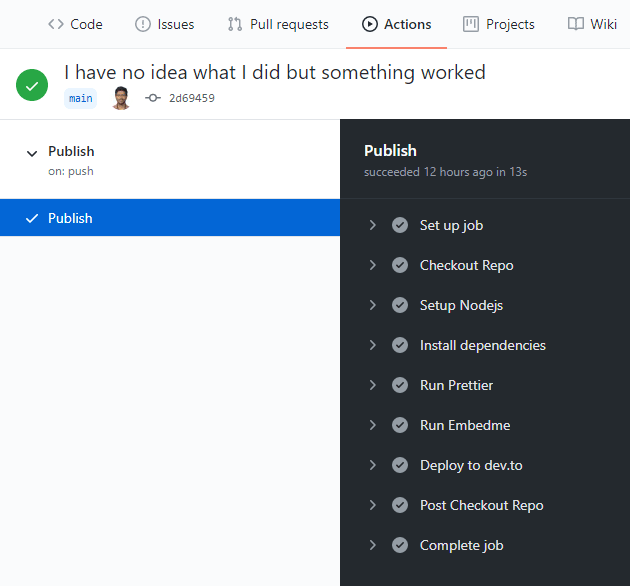
If you want to see how your last deployment went or any previous history you can visit the Action tab on your Github repository
If we click on the workflow we can see all the steps and their logs.
If any of these steps fail we can see the logs here and fix the issues.
Your blog is now and you're all done!
Step 6 - Profit?
Another neat trick I learnt on dev.to is dev.to allows monetizing your blog posts. Though this is only a beta feature, but the hype is catching on.
Web Monetization is making its move direct to content creators, Monetization Providers allow you to create a payment pointer(like a paypal id and all money will redirected there) that is linked to you wallet.
All you need to do is sign up with a provider, link your wallet and add this little snippet to all your sites.
<meta name="monetization" content="your payment pointer" />
You can checkout Hack Sultan's explanation of Web Monetization to understand it better and it also has steps on signing up for this.
Dev.to handles the meta tags for you. To set this up in Dev.to, go into your Settings and in the Misc Section you can add your payment pointer.
Voila! No ads and you still earn!
Thank you for reading!
Thank you for reading and be sure to checkout the sources, they have created some other amazing stuff as well.
If you see any mistakes, you can raise a PR to my dev.to blog repository with the neccessary changes and we can get them added to the post!


Top comments (0)