
Coolify is a self-hosting platform designed to simplify the deployment and management of containerized applications, databases, and other applications.
Cloud hosting platforms like Vercel and Netlify offer convenience. Coolify gives developers control and flexibility. The Coolify minimum server specs are 2 CPUs and 2GB memory which means the entry cost on most VM providers is only $10-$20/m - a pretty cheap way to host all your side projects.
If you have a lot of apps then compared to the big cloud providers it can be significantly more cost effective to self-host when you pay for a beefy server.
So if you're looking to explore self-hosting, reduce long-term costs for certain applications, or simply want more control over your infrastructure, Coolify is worth playing around with.
However, it's important to note that self-hosting comes with added security responsibilities. In this guide I’ll show you how to protect your Coolify instance using Tailscale. Tailscale enables you to restrict access to a private network accessible only from your authorized devices, while still selectively exposing specific applications to the public internet.
I’ll use Next.js as an example because it’s what we use at Arcjet to build the dashboard for our developer security SDK. But this approach will work for any application.
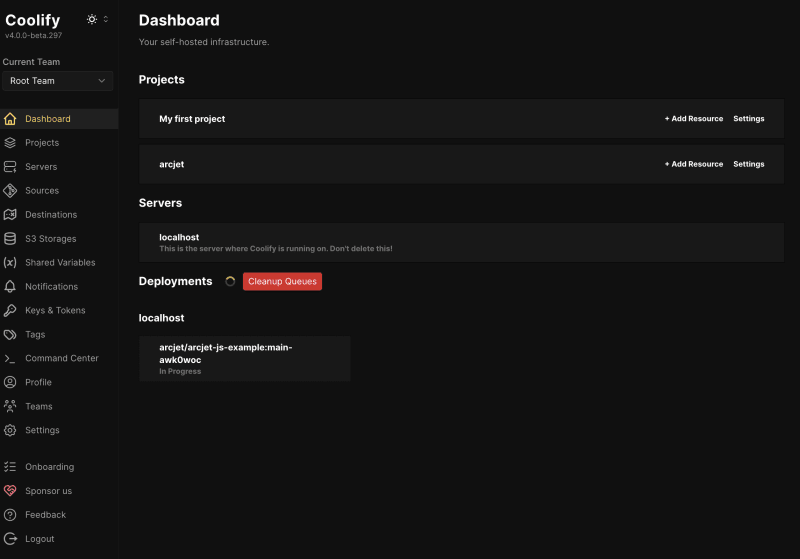
Screenshot of the Coolify dashboard with a Next.js application deployment in progress.
Set up Tailscale
Before diving into Coolify's setup, I always prioritize security by installing Tailscale first. This approach allows us to establish a secure private network and limit access to your Coolify instance, minimizing the chance of compromise during the initial configuration.
Install Tailscale
Tailscale can be easily installed on your server. If you're using Ubuntu Linux (like we are in this guide), SSH into your machine and execute the following command:
curl -fsSL https://tailscale.com/install.sh | sh
Set up Tailscale with SSH
Enhance your SSH security by leveraging Tailscale SSH. This feature delegates authentication to your existing Tailscale identity provider (e.g., Google or GitHub), eliminating the need to manage separate Linux users and SSH keys.
Start Tailscale with the --ssh flag:
sudo tailscale up --ssh
Obtain your server’s Tailscale IP address:
tailscale ip
Now, you can SSH into your server securely over the Tailscale network from any device with the Tailscale client installed:
ssh ubuntu@IP
# e.g. ssh ubuntu@100.103.39.84
Harden Coolify instance
With Tailscale up and running, we'll utilize Ubuntu's built-in firewall (UFW) to lock down all public access to your server. This is recommended by Tailscale and ensures that your server is only reachable via your private Tailscale network.
Later in this guide we’ll open up a Next.js app publicly.
Configure UFW
Here we will enable UFW, deny all incoming traffic by default, then allow all traffic on the Tailscale private network:
# Enable UFW
sudo ufw enable
# Disable all incoming traffic by default
sudo ufw default deny incoming
sudo ufw default allow outgoing
# Allow traffic from Tailscale
sudo ufw allow in on tailscale0
# Restart
sudo ufw reload
sudo service ssh restart
Verify that your server is no longer accessible via its public IP, but remains reachable through its Tailscale IP. You can check the status with:
sudo ufw status
Status: active

To Action From
-- ------ ----
Anywhere on tailscale0 ALLOW Anywhere
Anywhere (v6) on tailscale0 ALLOW Anywhere (v6)
With your server secured, you're now ready to proceed with the Coolify installation.
Install Coolify
With your server now protected behind Tailscale, it's time to install Coolify. Thankfully, Coolify provides a convenient installation script that simplifies the process.
SSH into your server (using its Tailscale IP) and run the following command:
curl -fsSL https://cdn.coollabs.io/coolify/install.sh | sudo bash
This script takes care of everything:
- Installing necessary dependencies
- Setting up the Docker environment
- Downloading and configuring Coolify
- Starting the Coolify services
The installation might take a few minutes, depending on your server's resources and network speed.
Before logging into Coolify for the first time we need to allow local Docker network access.

Allow local Docker network access
Our UFW firewall, while essential for security, is currently blocking all network traffic - including communication within local Docker networks that Coolify relies on. To ensure Coolify operation, we need to selectively open access within these networks.
1. Identify Coolify's Docker Networks
First, let's identify the Docker networks used by Coolify:
sudo docker network ls
NETWORK ID NAME DRIVER SCOPE
f9f624e3952d bridge bridge local
4c09c9a40d16 coolify bridge local
396a298f37ee host host local
e6f3a7930e66 none null local
Look for networks with names bridge and coolify
2. Inspect Network Subnets
Inspect the relevant networks to determine their subnet configurations:
sudo docker network inspect bridge
[
    {
        "Name": "bridge",
        "Id": "f9f624e3952d9eeacc21db2ead24d740a734921edc56655b0b2a7833e8268d3b",
        "Created": "2024-06-13T10:52:49.606104698Z",
        "Scope": "local",
        "Driver": "bridge",
        "EnableIPv6": false,
        "IPAM": {
            "Driver": "default",
            "Options": null,
            "Config": [
                {
                    "Subnet": "172.17.0.0/16",
                    "Gateway": "172.17.0.1"
                }
            ]
        },
        "Internal": false,
        "Attachable": false,
        "Ingress": false,
        "ConfigFrom": {
            "Network": ""
        },
        "ConfigOnly": false,
        "Containers": {},
        "Options": {
            "com.docker.network.bridge.default_bridge": "true",
            "com.docker.network.bridge.enable_icc": "true",
            "com.docker.network.bridge.enable_ip_masquerade": "true",
            "com.docker.network.bridge.host_binding_ipv4": "0.0.0.0",
            "com.docker.network.bridge.name": "docker0",
            "com.docker.network.driver.mtu": "1500"
        },
        "Labels": {}
    }
]

sudo docker network inspect coolify
[
    {
        "Name": "coolify",
        "Id": "4c09c9a40d16ec6202b18dd85a536c879c2f19d420f5413a6d66366534ea3868",
        "Created": "2024-06-13T10:52:52.510128783Z",
        "Scope": "local",
        "Driver": "bridge",
        "EnableIPv6": false,
        "IPAM": {
            "Driver": "default",
            "Options": {},
            "Config": [
                {
                    "Subnet": "172.18.0.0/16",
                    "Gateway": "172.18.0.1"
                }
            ]
        },
        "Internal": false,
        "Attachable": true,
        "Ingress": false,
        "ConfigFrom": {
            "Network": ""
        },
        "ConfigOnly": false,
        "Containers": {
            "0071d9b6e720ec28b9a7a32c3fb9736f2ace51e5cd3daae6d2171a94fe9ca5f5": {
                "Name": "coolify-realtime",
                "EndpointID": "b7863020b5319d6cd669e131f20a33be7a7d3b3774c2f3a43efa1027b310e841",
                "MacAddress": "02:42:ac:12:00:02",
                "IPv4Address": "172.18.0.2/16",
                "IPv6Address": ""
            },
            "1ad1cca2fb66254c909d57633d624ffe11b9da7d3e09c21926800fdc9492f044": {
                "Name": "coolify-db",
                "EndpointID": "e7517f0581f31aebacf9260421caca385d84f878464b0dc89a2f9b536c52554c",
                "MacAddress": "02:42:ac:12:00:04",
                "IPv4Address": "172.18.0.4/16",
                "IPv6Address": ""
            },
            "2606f4508daea32e7345702b57247765a5fe355d53ab131103bb294d87ffed66": {
                "Name": "coolify",
                "EndpointID": "447719644fee1fd4d454fc3a46d9538ac69becfa82a70b2f58d40e4ca3a95e43",
                "MacAddress": "02:42:ac:12:00:05",
                "IPv4Address": "172.18.0.5/16",
                "IPv6Address": ""
            },
            "3213da72e033c1654264c31024bca7f64a196d54345b98ab8196184cfb35880a": {
                "Name": "coolify-redis",
                "EndpointID": "7a1eb17a69638cfe5e8dfd583593bc5e3fdef2d2c32f00633087083ba7473e8d",
                "MacAddress": "02:42:ac:12:00:03",
                "IPv4Address": "172.18.0.3/16",
                "IPv6Address": ""
            },
            "59cbd2f7fde6af53fe03e20c93f777c507ff333fada31275e6f34daa7909af3e": {
                "Name": "coolify-proxy",
                "EndpointID": "78c4a9ccc6aa1d05695fc8347e6d2a5935413b82f2adf2c4a92d350fbb79d636",
                "MacAddress": "02:42:ac:12:00:06",
                "IPv4Address": "172.18.0.6/16",
                "IPv6Address": ""
            },
            "d02b0ba69828e0ebf0ede84ea74395a2aa34bc97cc95a0b17e05dd7daac85af4": {
                "Name": "jcoggcw-112048497577",
                "EndpointID": "1e21ac8d6025f50b4e6560dd3ddfd61de7fc9023d73b7fee56e0fcd4dbc646c3",
                "MacAddress": "02:42:ac:12:00:08",
                "IPv4Address": "172.18.0.8/16",
                "IPv6Address": ""
            }
        },
        "Options": {},
        "Labels": {}
    }
]
Within the output, locate the Subnet field under IPAM -> Config. You'll see something like 172.17.0.0/16 or 172.18.0.0/16
3. Allow Local Network Traffic
Now, let's update UFW to allow traffic within these subnets:
sudo ufw allow from 172.18.0.0/16 to 172.17.0.1
sudo ufw allow from 172.17.0.0/16 to 172.17.0.1
These commands allow communication from containers within the specified subnets to the default Docker host (172.17.0.1). Which will give us this final set of UFW rules:
sudo ufw status
Status: active

To Action From
-- ------ ----
Anywhere on tailscale0 ALLOW Anywhere
172.17.0.1 ALLOW 172.22.0.0/16
172.17.0.1 ALLOW 172.18.0.0/16
Anywhere (v6) on tailscale0 ALLOW Anywhere (v6)
Complete Coolify setup
Load the Coolify setup web UI from http://your_server_tailscale_ip:8000 and follow the instructions to register an account. The onboarding wizard will ask you to create the default configuration with a localhost server.
If you have skipped this process or you get an error you can manually create a server after existing the onboarding with the IP Address/Domain of host.docker.internal

Screenshot of the Coolify server settings for localhost.
Deploy Next.js to Coolify
Coolify excels at deploying any containerized application. For this guide, we'll deploy the Arcjet Example Next.js application to illustrate the process. If you already have a Next.js project, you can easily adapt the steps.
1. Create a New Project
- In the Coolify dashboard, click "Projects" -> "Add" and give your project a meaningful name.
- Create a new environment or select an existing one.

Screenshot of creating a new project environment in Coolify.
2. Add a Public Repository Resource
- Click "Add a new resource" -> "Public Repository." (Coolify also supports Dockerfiles, databases, and other resource types.)
- Select the server you created earlier (typically labeled "localhost") and choose "Standalone Docker" as the destination.
- Enter the repository URL of your Next.js project and click "Check repository." For demonstration purposes, we'll use the Arcjet example application: https://github.com/arcjet/arcjet-js-example
- Leave the default build options (Nixpacks, Port 3000, Static Site Unticked) and click "Continue."

Screenshot of creating a new application in Coolify.
3. Configure Network Settings
By default, Coolify assigns a unique domain based on your server's public IP to your app (e.g., http://q84ko8w.44.153.23.63.sslip.io). However, since we've restricted access to the Tailscale network, this won't work. Let's configure Coolify to make your Next.js app accessible within your private network.
- In the "Ports Exposed" field, ensure
3000is listed. - In the "Ports Mappings" field, enter
3000:3000. This maps the internal container port3000to the external port3000.

Screenshot of the Coolify configuration to expose a Next.js application on port 3000 on the private Tailscale network.
4. Set Environment Variables (Optional)
If your Next.js app requires any environment variables, add them in this section. For the Arcjet example, you'd add an ARCJET_KEY variable. You can get a key for free by signing up to Arcjet.
5. Deploy
Click "Save" and then "Deploy." Coolify will build and deploy your Next.js application. The build process may take a few minutes, depending on your server's specifications and the size of your project.

Screenshot of the Coolify application deployment process.
Accessing Next.js on Coolify on a private network
After deployment, you can access your Next.js app by navigating to: http://your_server_tailscale_ip:3000
At this point, your app is only accessible within your private Tailscale network. In the following section, we'll guide you through exposing your Next.js application publicly using Tailscale Funnel, granting access to users outside your private network.
Public Next.js on Coolify
With your Next.js app running privately on your Tailscale network, let's now open it up to the world using Tailscale Funnel.
sudo tailscale funnel 3000
You may be prompted to adjust settings in your Tailscale account to enable Funnel.
Tailscale will then provide you with a unique public URL for your app. Anyone with the public URL can now access your Next.js app securely over HTTPS, even if they are not part of your Tailscale network.
Other security considerations
Now we have the server secured from the network, we may also want to secure the application itself.
While Tailscale Funnel simplifies public exposure, it's crucial to maintain good security practices for your Next.js app. This includes:
- Input Validation: Ensure proper input validation to prevent vulnerabilities like cross-site scripting (XSS) and SQL injection. Use a package like zod or Valibot (or others) to validate data.
- Authentication/Authorization: Implement appropriate authentication and authorization mechanisms to protect sensitive data and restrict access as needed. Consider Clerk (which offers edge-compatible middleware) or NextAuth (soon to be Auth.js)
- Regular Updates: Keep your Next.js app and its dependencies up-to-date to address security patches and vulnerabilities.
You can learn more about how to secure your Next.js application in our Next.js security checklist. Arcjet can also help with rate limiting, bot detection, email validation, and attack protection.
Why did we do this?
Why opt for this setup with Coolify and Tailscale, especially when Coolify offers built-in features for public access and custom domains.
Here's why our approach prioritizes security:
- Defense in Depth: Coolify exposes containers publicly and runs as root by default. A remote code execution vulnerability could lead to server compromise if it was directly accessible on the internet. Our approach adds an extra layer of protection by placing your Coolify instance behind a private Tailscale network. This reduces the attack surface and shields your server from direct exposure to the internet.
- Deliberate Exposure: With Tailscale Funnel, you make a conscious choice about which services to expose publicly. This minimizes the risk of misconfigurations or accidental exposure, ensuring that only the intended applications are accessible from the internet.
- Granular Control: You can easily adjust access controls and permissions within Tailscale, tailoring the level of exposure to your specific needs.
- Network Flexibility: Tailscale allows you to connect to your Coolify instance from any device within your private network, regardless of its physical location.
Ultimately, this approach strikes a balance between functionality and security. It allows you to leverage the convenience of Coolify while minimizing the risks associated with self-hosting. By prioritizing security from the outset, you lay a solid foundation for a resilient and secure self-hosting environment.


Top comments (0)