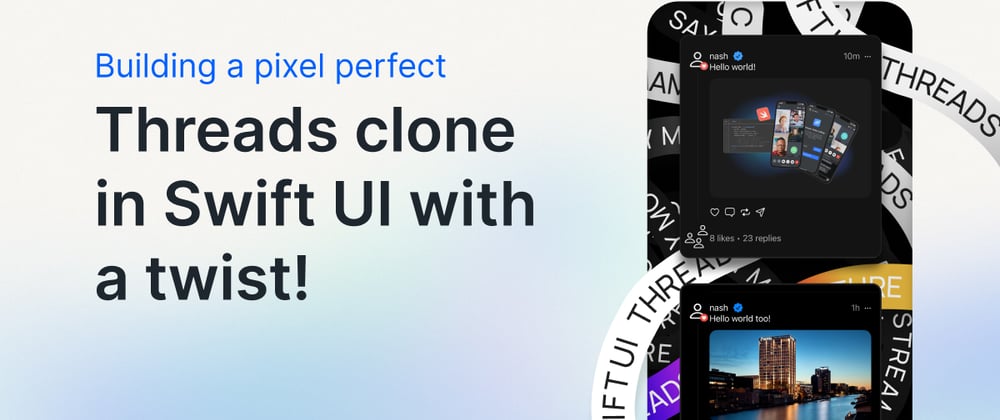
You've probably heard about the new Twitter competitor, Instagram Threads. It launched to great fanfare, but it's missing one crucial feature: DMs! Learn how to make a Threads clone—with a twist!
Whenever a new app arrives, it is a fun exercise to try and recreate its UI to learn exactly how it might be put together.
The Threads app UI is pretty straightforward with a few exceptions. The follower “bubble” and profile tab selection is the most interesting UI feature I’ve found in the Threads app.
In this blog post, we’ll create an Instagram Threads clone in Swift UI and to top it off use Stream’s chat API to add real-time user-to-user messaging. 😎
With the boring stuff out of the way, let’s jump into some code 🛠️
Getting Started
We are going to start by picking apart the Threads UI visually. Once we did that, we will create individual components and put everything together in a semi-working mockup implementation.
When looking at the Threads UI there are some immediately noticable things. The UI has a number of fun elements that both provide a strong Threads brand and look fun to recreate. I like to call those elements the “followers bubble” and the “profile detail tab selection”.
Everything else is a matter of stacking views together using HStacks and VStacks. It still baffles me how flexible these two layout elements are when using SwiftUI.
Threads introductory video
If you would like to follow along as we’re building or explore the project code, it is available on our Github here, don’t be shy, please leave us a 🌟.
The Follower Bubble
Right now we do not even have a project to work with, so let’s start there.
Open up Xcode and click “File” menu and then the entry “Create new Project”. Select “SwiftUI app” and give it any name you like.

We now have our empty project. Let’s rely on Xcode previews while we put together our project.
Create a new SwiftUI View (File -> New -> File -> SwiftUI View), name it “BubbleView”..

Before we can begin, we need some assets. The easiest way to resolve this is to delete the current “Assets” entry from the project and copy in the one from the completed repository. You can either download the project as a zip file or clone it to your machine: https://github.com/GetStream/threads-mock-chat/tree/main.
In this repository, you can find an Assets catalog in the directory “ThreadsChat” from the root of the repository. Drag and drop the Assets directory into your Xcode project.

Make sure the option “Copy items if needed” is checked. Now we have a set of assets available.

When looking at the BubbleView, you might have noticed it has 4 different display styles. Zero, one, two or more followers.


I skipped showing you the option with zero followers, because there is not much to see, just an empty black square.
Let’s define the basics of the BubbleView. Since we are dealing with a variable number of display styles based on follower count, adjust the auto-created BubbleView to look as follows:
struct BubbleView: View {
    var replyCount: Int

    var body: some View {
        Text("Hello, World!")
    }
}

struct BubbleView_Previews: PreviewProvider {
    static var previews: some View {
        BubbleView(replyCount: 0)
        BubbleView(replyCount: 1)
        BubbleView(replyCount: 2)
        BubbleView(replyCount: 3)
    }
}
In the preview area we can now select between 4 different previews of the same view. All looking the same.
Within the body of our new BubbleView, let’s add some code to change that.
        switch replyCount {
        case 0:
            Spacer()
        case 1:
            Image(systemName: "person")
                .resizable()
                .frame(width: 15, height: 15)
                .clipShape(Circle())
                .aspectRatio(contentMode: .fit)
        case 2:
            HStack {
                Image(systemName: "person")
                    .resizable()
                    .frame(width: 15, height: 15)
                    .clipShape(Circle())
                    .aspectRatio(contentMode: .fit)
                Image(systemName: "person")
                    .resizable()
                    .frame(width: 15, height: 15)
                    .clipShape(Circle())
                    .aspectRatio(contentMode: .fit)
            }
        default:
            HStack {
                Image(uiImage: UIImage(named: "jeroen")!)
                    .resizable()
                    .frame(width: 20, height: 20)
                    .clipShape(Circle())
                    .aspectRatio(contentMode: .fit)
                Image(uiImage: UIImage(named: "amos")!)
                    .resizable()
                    .frame(width: 20, height: 20)
                    .clipShape(Circle())
                    .aspectRatio(contentMode: .fit)
                Image(uiImage: UIImage(named: "kimmy")!)
                    .resizable()
                    .frame(width: 20, height: 20)
                    .clipShape(Circle())
                    .aspectRatio(contentMode: .fit)
            }
    }
We add a switch with 4 paths, zero, one, two and a default option. Each relates to one of the possible display styles of the bubble view. Note how we add an image, mark it resizable, choose a size, clip it to a circle.
It all looks great now, except for the default option. When you look at the fourth preview in Xcode, you notice that there are 3 images next to each other, while they should be grouped in a nice cluster.

We can fix that by switching the HStack of the default path to a ZStack and moving the images around a bit by using padding.
        default:
            ZStack {
                Image(uiImage: UIImage(named: "jeroen")!)
                    .resizable()
                    .frame(width: 20, height: 20)
                    .clipShape(Circle())
                    .aspectRatio(contentMode: .fit)
                    .padding(EdgeInsets(top: 0, leading: 0, bottom: -30, trailing: -5))
                Image(uiImage: UIImage(named: "amos")!)
                    .resizable()
                    .frame(width: 20, height: 20)
                    .clipShape(Circle())
                    .aspectRatio(contentMode: .fit)
                    .padding(EdgeInsets(top: 0, leading: 0, bottom: 0, trailing: 30))
                Image(uiImage: UIImage(named: "kimmy")!)
                    .resizable()
                    .frame(width: 20, height: 20)
                    .clipShape(Circle())
                    .aspectRatio(contentMode: .fit)
                    .padding(EdgeInsets(top: 0, leading: 0, bottom: 30, trailing: -20))
            }
The BubbleView now looks exactly as we want it to look. So let’s move to the next component, the “profile detail tab selection”.
The Profile Detail Tab Selection
Since “profile detail tab selection” is quite a mouth full, let’s call this view SegmentedPickerView.
Again we create a new SwiftUI view called SegmentedPickerView.
There are a few tricks we put together for this challenging view, so let’s dive in. Let’s create a view to help with previewing the SegmentedPickerView we are going to create.
import SwiftUI

public struct SegmentedPickerView: View {
    public var body: some View {
        Text("Hello")
    }
}

struct SegmentedPickerViewPreviewHelperView: View {
    @State var selectedIndex: Int?

    var body: some View {
                SegmentedPickerView()
    }
}

struct SegmentedPickerView_Previews: PreviewProvider {
    @State var selectedIndex: Int = 0
    static var previews: some View {
        SegmentedPickerViewPreviewHelperView()
    }
}
This will just create an empty canvas with a single text.

Let’s start building things. Since it is a picker view, we need to be able to add subviews as content which we can select by tapping an area on screen.
After some trial and error, this is what I came up with.
import SwiftUI

public struct SegmentedPickerView<Element, Content, Selection>: View
    where
    Content: View,
    Selection: View {

    public typealias Data = [Element]

    @State private var frames: [CGRect]
    @Binding private var selectedIndex: Data.Index?

    private let data: Data
    private let selection: () -> Selection
    private let content: (Data.Element, Bool) -> Content

    public init(_ data: Data,
                selectedIndex: Binding<Data.Index?>,
                @ViewBuilder content: @escaping (Data.Element, Bool) -> Content,
                @ViewBuilder selection: @escaping () -> Selection) {

        self.data = data
        self.content = content
        self.selection = selection
        self._selectedIndex = selectedIndex
        self._frames = State(wrappedValue: Array(repeating: .zero,
                                                 count: data.count))
    }

    public var body: some View {
        ZStack(alignment: Alignment(horizontal: .horizontalCenterAlignment,
                                    vertical: .center)) {

            HStack(spacing: 0) {
                ForEach(data.indices, id: \.self) { index in
                    Button(action: { selectedIndex = index },
                           label: { content(data[index], selectedIndex == index) }
                    )
                    .buttonStyle(PlainButtonStyle())
                    .background(GeometryReader { proxy in
                        Color.clear.onAppear { frames[index] = proxy.frame(in: .global) }
                    })
                    .alignmentGuide(.horizontalCenterAlignment,
                                    isActive: selectedIndex == index) { dimensions in
                        dimensions[HorizontalAlignment.center]
                    }
                }
            }

            if let selectedIndex = selectedIndex {
                selection()
                    .frame(width: frames[selectedIndex].width,
                           height: frames[selectedIndex].height)
                    .alignmentGuide(.horizontalCenterAlignment) { dimensions in
                        dimensions[HorizontalAlignment.center]
                    }
            }
        }
    }
}

extension HorizontalAlignment {
    private enum CenterAlignmentID: AlignmentID {
        static func defaultValue(in dimension: ViewDimensions) -> CGFloat {
            return dimension[HorizontalAlignment.center]
        }
    }

    static var horizontalCenterAlignment: HorizontalAlignment {
        HorizontalAlignment(CenterAlignmentID.self)
    }
}

extension View {
    @ViewBuilder
    @inlinable func alignmentGuide(_ alignment: HorizontalAlignment,
                                   isActive: Bool,
                                   computeValue: @escaping (ViewDimensions) -> CGFloat) -> some View {
        if isActive {
            alignmentGuide(alignment, computeValue: computeValue)
        } else {
            self
        }
    }

    @ViewBuilder
    @inlinable func alignmentGuide(_ alignment: VerticalAlignment,
                                   isActive: Bool,
                                   computeValue: @escaping (ViewDimensions) -> CGFloat) -> some View {

        if isActive {
            alignmentGuide(alignment, computeValue: computeValue)
        } else {
            self
        }
    }
}

struct SegmentedPickerViewPreviewHelperView: View {

    @State private var selectedColorIndex = 0

    let titles = ["Threads", "Replies", "Reposts"]
    @State var selectedIndex: Int?

    var body: some View {
                SegmentedPickerView(
                            titles,
                            selectedIndex: Binding(
                                get: { selectedIndex },
                                set: { selectedIndex = $0 }),
                            content: { item, isSelected in
                                VStack {
                                    Text(item)
                                        .foregroundColor(isSelected ? Color("primaryThreads") : Color.gray )
                                        .padding(.horizontal, 16)
                                        .padding(.vertical, 8)
                                        .frame(maxWidth: .infinity)
                                    Color.gray.frame(height: 1)
                                }
                            },
                            selection: {
                                VStack(spacing: 0) {
                                    Spacer()
                                    Color.primary.frame(height: 1)
                                }
                            })
                            .onAppear {
                                selectedIndex = 0
                            }
                            .frame(maxWidth: .infinity)
                            .animation(.easeInOut(duration: 0.3), value: selectedIndex)
    }
}

struct SegmentedPickerView_Previews: PreviewProvider {
    @State var selectedIndex: Int = 0
    static var previews: some View {
        SegmentedPickerViewPreviewHelperView()
    }
}
It works in preview and looks really good.

Now we have our BubbleView and SegmentedPickerView, we can start building some real UI.
The biggest base elements are the rows in each List.
Create the ThreadActivityRowView

We start by creating another SwiftUI file called ThreadActivityRowView. The contents of this file should look like this.
import SwiftUI

struct ThreadActivityRowView: View {
    @StateObject
    var model: ThreadActivityRowModel
    var body: some View {
        NavigationLink {
            Text("Replace with the ThreadView(model: model)")
        } label: {
            VStack {
                HStack {
                    VStack {
                        ZStack(alignment: .bottomTrailing) {
                            Image(uiImage: model.avatarImage)
                                .resizable()
                                .frame(width: 30, height: 30)
                                .aspectRatio(contentMode: .fit)
                                .clipShape(Circle())
                            ZStack {
                                Circle()
                                    .frame(width: 15, height: 15)
                                    .foregroundColor(.white)
                                Image(systemName: "heart.circle.fill")
                                    .resizable()
                                    .frame(width: 15, height: 15)
                                    .foregroundColor(.red)
                            }
                            .padding(EdgeInsets(top: 0, leading: 0, bottom: -5, trailing: -5))
                        }
                        if model.isReply {
                            Spacer()
                        } else {
                            HStack {
                                Divider()
                            }
                        }
                    }

                    VStack {
                        HStack {
                            Text(model.username)
                                .foregroundColor(.primary)

                            Image(systemName: "checkmark.seal.fill")
                                .foregroundColor(.blue)
                            Spacer()
                            Text(model.postAge)
                                .foregroundColor(.secondary)
                            Text("···")

                        }
                        Text(model.message)
                            .frame(maxWidth: .infinity, alignment: .leading)
                            .foregroundColor(.primary)
                        if let image = model.image {
                            Image(uiImage: image)
                                .resizable()
                                .aspectRatio(contentMode: .fit)
                                .cornerRadius(15)
                        }
                        HStack {
                            Image(systemName: "heart")
                            Image(systemName: "bubble.right")
                            Image(systemName: "repeat")
                            Image(systemName: "paperplane")
                            Spacer()
                        }
                        .padding(.top, 10)
                    }
                }
                HStack {
                    if model.isReply {
                        Text(model.footer)
                            .frame(maxWidth: .infinity, alignment: .leading)
                            .foregroundColor(.secondary)
                            .padding(.leading, 40)
                    } else {
                        BubbleView(replyCount: model.replyCount)
                            .frame(width: 30, height: .infinity)

                        Text(model.footer)
                            .frame(maxWidth: .infinity, alignment: .leading)
                            .foregroundColor(.secondary)
                    }
                }
                Spacer()
            }
        }
    }
}

struct ThreadActivityRowView_Previews: PreviewProvider {
    static var previews: some View {
        ThreadActivityRowView(model: ThreadActivityRowModel(id: "2", username: "amos", message: "Hello world too!", image: UIImage(named: "Hotel"), likeCount: 51, replyCount: 1, postAge: "1h", replies: []))
    }
}
You can see it is a reasonably straightforward usage of various vertical and horizontal stacks.
We will also need its related model: ThreadActivityRowModel, so let’s add that to the file too.
class ThreadActivityRowModel: ObservableObject, Identifiable {
    init(id: String,
         username: String,
         message: String,
         image: UIImage?,
         likeCount: Int,
         replyCount: Int,
         postAge: String) {
        self.id = id
        self.username = username
        self.message = message
        self.image = image
        self.likeCount = likeCount
        self.replyCount = replyCount
        self.postAge = postAge
        self.replies = []
        self.isReply = true
    }

    init(id: String,
         username: String,
         message: String,
         image: UIImage?,
         likeCount: Int,
         replyCount: Int,
         postAge: String,
         replies: [ThreadActivityRowModel]) {
        self.id = id
        self.username = username
        self.message = message
        self.image = image
        self.likeCount = likeCount
        self.replyCount = replyCount
        self.postAge = postAge
        self.replies = replies
        self.isReply = false
    }

    var id: String
    var username: String
    var message: String
    var image: UIImage?
    var likeCount: Int
    var replyCount: Int
    var postAge: String
    var isReply: Bool
    var replies: [ThreadActivityRowModel]

    private var likeString: String? {
        switch likeCount {
        case 0:
            return nil
        case 1:
            return "1 like"
        default:
            return "\(likeCount) likes"
        }
    }

    private var replyString: String? {
        switch replyCount {
        case 0:
            return nil
        case 1:
            return "1 reply"
        default:
            return "\(replyCount) replies"
        }
    }

    var footer: String {
        let footerStrings: [String] = [likeString, replyString].compactMap { $0 }
        return footerStrings.joined(separator: " • ")
    }

    var avatarImage: UIImage {
        return UIImage(named: username) ?? UIImage(systemName: "person")!
    }
}
The ThreadActivityRow is a view we will be using on almost all other screens.
This is how it looks in preview.

The layout looks a bit off in Preview, but when put in an actual view everything lines up as it should.
Now we can move on with building the underlying ThreadView.
Building the ThreadView
The ThreadView is a drill down from the main navigation in our app to a specific Thread. It reuses the ThreadActivityRowView. So is, again, pretty straightforward to build.

import SwiftUI

struct ThreadView: View {
    @StateObject
    var model: ThreadActivityRowModel

    var body: some View {
        ScrollView {
            VStack {
                HStack {
                    NavigationLink {
                        Text("Replace me with ProfileView()")
                    } label: {
                        HStack {
                            ZStack(alignment: .bottomTrailing) {
                                Image(uiImage: model.avatarImage)
                                    .resizable()
                                    .frame(width: 30, height: 30)
                                    .aspectRatio(contentMode: .fit)
                                    .clipShape(Circle())
                                ZStack {
                                    Circle()
                                        .frame(width: 15, height: 15)
                                        .foregroundColor(.white)
                                    Image(systemName: "heart.circle.fill")
                                        .resizable()
                                        .frame(width: 15, height: 15)
                                        .foregroundColor(.red)
                                }
                                .padding(EdgeInsets(top: 0, leading: 0, bottom: -5, trailing: -5))
                            }
                            Text(model.username)
                            Image(systemName: "checkmark.seal.fill")
                                .foregroundColor(.blue)
                        }
                    }
                    Spacer()
                    Text(model.postAge)
                        .foregroundColor(.secondary)
                    Text("···")

                }
                Text(model.message)
                    .frame(maxWidth: .infinity, alignment: .leading)
                if let image = model.image {
                    Image(uiImage: image)
                        .resizable()
                        .aspectRatio(contentMode: .fit)
                        .cornerRadius(15)
                }
                HStack {
                    Image(systemName: "heart")
                    Image(systemName: "bubble.right")
                    Image(systemName: "repeat")
                    Image(systemName: "paperplane")
                    Spacer()
                }
                .padding(.top, 10)
                Text(model.footer)
                    .frame(maxWidth: .infinity, alignment: .leading)
                    .foregroundColor(.secondary)
                ForEach(model.replies) { reply in
                    Divider()
                        .padding(.horizontal, 0)
                    ThreadActivityRowView(model: reply)
                }
                .listStyle(PlainListStyle())
            }
            .padding()
        }
        .navigationTitle("Thread")
    }
}

struct ThreadView_Previews: PreviewProvider {
    static var previews: some View {
        let model = ThreadActivityRowModel(id: "1", username: "nash", message: "Hello world!", image: UIImage(named: "Swift"), likeCount: 8, replyCount: 23, postAge: "10m", replies: [
            ThreadActivityRowModel(id: "5", username: "kimmy", message: "This is awesome!", image: nil, likeCount: 51, replyCount: 1, postAge: "30mh"),
            ThreadActivityRowModel(id: "6", username: "jeroen", message: "Such a cool feature.", image: nil, likeCount: 51, replyCount: 1, postAge: "10m"),
            ThreadActivityRowModel(id: "7", username: "amos", message: "Let's go!", image: nil, likeCount: 51, replyCount: 1, postAge: "1m")])

        ThreadView(model: model)
    }
}
Go back to the ThreadActivityRowView and replace the line Text("Replace with the ThreadView(model: model)") with ThreadView(model: model)
Next, we need to move to the ProfileView. This is a view we can navigate to from the ThreadView. In the ThreadView we created you might have noticed a Text("Replace me with ProfileView()").
Creating the ProfileView
Create a SwiftUI file called ProfileView. In the ThreadView replace the occurrence of Text("Replace me with ProfileView()") with ProfileView(). Now go back to the ProfileView file.
Paste the following into the ProfileView file, replacing all code currently present in the file. Notice how we again reuse the row view,
import SwiftUI

struct ProfileView: View {

    @State private var selectedColorIndex = 0
    @StateObject private var viewModel = ThreadsViewModel()

    let titles = ["Threads", "Replies", "Reposts"]
    @State var selectedIndex: Int?

    var body: some View {
        ScrollView {
            VStack {
                HStack {
                    VStack {
                        Text("Neevash Ramdial")
                            .frame(maxWidth: .infinity, alignment: .leading)
                        HStack {
                            Text("nash0x7e2")
                            Capsule()
                                .fill(.tertiary)
                                .frame(width: 80)
                                .overlay {
                                    Text("threads.net")
                                        .font(.footnote)
                                        .foregroundColor(.secondary)
                                }
                            Spacer()
                        }

                    }
                    Spacer()
                    Image(uiImage: UIImage(named: "nash")!)
                        .resizable()
                        .frame(width: 60, height: 60)
                        .aspectRatio(contentMode: .fit)
                        .clipShape(Circle())
                }
                Text("Leading #DevRel/Dev Marketing at @getstream_io • @GoogleDevExpert Dart & Flutter • @FlutterComm • Formula 1 fanatic • Striving for excellence")
                HStack {
                    Image(uiImage: UIImage(named: "amos")!)
                        .resizable()
                        .frame(width: 20, height: 20)
                        .aspectRatio(contentMode: .fit)
                        .clipShape(Circle())
                    Image(uiImage: UIImage(named: "jeroen")!)
                        .resizable()
                        .frame(width: 20, height: 20)
                        .aspectRatio(contentMode: .fit)
                        .clipShape(Circle())
                        .padding(EdgeInsets(top: 0, leading: -15, bottom: 0, trailing: 0))
                    Image(uiImage: UIImage(named: "kimmy")!)
                        .resizable()
                        .frame(width: 20, height: 20)
                        .aspectRatio(contentMode: .fit)
                        .clipShape(Circle())
                        .padding(EdgeInsets(top: 0, leading: -15, bottom: 0, trailing: 0))
                    Text("52.321 followers • neevash.dev")
                    Spacer()
                }
                HStack {
                    Button {
                        // TODO
                    } label: {
                        Text("Follow")
                            .frame(minWidth: 100, maxWidth: .infinity, minHeight: 40)
                            .background(Color.primary)
                            .foregroundStyle(.background)
                            .cornerRadius(10)
                            .overlay(
                                    RoundedRectangle(cornerRadius: 10)
                                        .stroke(.gray, lineWidth: 2))
                    }

                    Button {
                        // TODO
                    } label: {
                        Text("Mention")
                            .frame(minWidth: 100, maxWidth: .infinity, minHeight: 40)
                            .background(.background)
                            .foregroundStyle(Color.primary)
                            .cornerRadius(10)
                            .overlay(
                                    RoundedRectangle(cornerRadius: 10)
                                        .stroke(.gray, lineWidth: 2))
                    }
                }
                SegmentedPickerView(
                            titles,
                            selectedIndex: Binding(
                                get: { selectedIndex },
                                set: { selectedIndex = $0 }),
                            content: { item, isSelected in
                                VStack {
                                    Text(item)
                                        .foregroundColor(isSelected ? Color("primaryThreads") : Color.gray )
                                        .padding(.horizontal, 16)
                                        .padding(.vertical, 8)
                                        .frame(maxWidth: .infinity)
                                    Color.gray.frame(height: 1)
                                }
                            },
                            selection: {
                                VStack(spacing: 0) {
                                    Spacer()
                                    Color.primary.frame(height: 1)
                                }
                            })
                            .onAppear {
                                selectedIndex = 0
                            }
                            .frame(maxWidth: .infinity)
                            .animation(.easeInOut(duration: 0.3), value: selectedIndex)

                ForEach(viewModel.activities) { item in
                        ThreadActivityRowView(model: item)
                    }
            }
        }
        .toolbar {
            Spacer()
            Image(uiImage: UIImage(named: "Instagram")!)
                .resizable()
                .frame(width: 20, height: 20)
            Image(systemName: "bell.fill")
            Image(systemName: "ellipsis.circle")
        }
        .padding()
    }
}

struct ProfileView_Previews: PreviewProvider {
    static var previews: some View {
        NavigationStack {
            ProfileView()
        }
    }
}

class ThreadsViewModel: ObservableObject {
    @Published public var activities: [ThreadActivityRowModel] = [
        ThreadActivityRowModel(id: "1", username: "nash", message: "Hello world!", image: UIImage(named: "Swift"), likeCount: 8, replyCount: 23, postAge: "10m", replies: [
            ThreadActivityRowModel(id: "5", username: "kimmy", message: "This is awesome!", image: nil, likeCount: 51, replyCount: 1, postAge: "30mh"),
            ThreadActivityRowModel(id: "6", username: "jeroen", message: "Such a cool feature.", image: nil, likeCount: 51, replyCount: 1, postAge: "10m"),
            ThreadActivityRowModel(id: "7", username: "amos", message: "Let's go!", image: nil, likeCount: 51, replyCount: 1, postAge: "1m")
        ]),
        ThreadActivityRowModel(id: "2", username: "amos", message: "Hello world too!", image: UIImage(named: "Hotel"), likeCount: 51, replyCount: 1, postAge: "1h", replies: []),
        ThreadActivityRowModel(id: "3", username: "kimmy", message: "Hello world! This is going to be a really long message. I want to see what happens with a lond message. Does it work ok?", image: UIImage(named: "React"), likeCount: 5, replyCount: 2, postAge: "2h", replies: []),
        ThreadActivityRowModel(id: "4", username: "jeroen", message: "Hello world! This is going to be a really long message. I want to see what happens with a lond message. Does it work ok?", image: nil, likeCount: 5, replyCount: 0, postAge: "2h", replies: [])

    ]
}

We now have the ActivityRowView, ThreadView, and ProfileView. We only need to alter the entry point of the app and make sure we show a list of Threads.
Let’s create the list of Threads first.
Create the ThreadsView
Create a file called ThreadsView. Notice the plural Threads.
Make sure the content of this file looks as follows and notice how little code we need to write since we did all the work already in previous views.
import SwiftUI

struct ThreadsView: View {

    @StateObject private var viewModel = ThreadsViewModel()

    var body: some View {

        List(viewModel.activities) { item in
            ThreadActivityRowView(model: item)
        }
        .listStyle(PlainListStyle())
    }
}

struct ThreadsView_Previews: PreviewProvider {
    static var previews: some View {
        ThreadsView()
    }
}
Since we would like to have a tab bar at the bottom, we also create a file called ThreadsTabView.
The contents of this file should look as follows.
import SwiftUI

struct ThreadsTabView: View {
    var body: some View {
        TabView {
            NavigationStack {
                ThreadsView()
            }
                .tabItem {
                    Image(systemName: "house")
                }

            Text("")
                .tabItem {
                    Image(systemName: "magnifyingglass")
                }

            Text("")
                .tabItem {
                    Image(systemName: "square.and.pencil")
                }

            Text("")
                .tabItem {
                    Image(systemName: "heart")
                }

            ProfileView()
                .tabItem {
                    Image(systemName: "person")
                }
        }
    }
}

struct ThreadsTabView_Previews: PreviewProvider {
    static var previews: some View {
        ThreadsTabView()
    }
}
Again very little code, but the end result should look something like this.

Putting the ThreadsTabView in the App class
The final thing we need to do is add the ThreadsTabView to the app struct to show our UI when starting the app.
To do that, open up the project’s app file. If you named your project ThreadsChat, the file should be named ThreadsChatApp.
Make its contents look like:
import SwiftUI


@main
struct ThreadsChatApp: App {
    var body: some Scene {
        WindowGroup {
            ThreadsTabView()
        }
    }
}
Now run the project on a simulator.
Adding DMs
We’ve now completed the rebuild of a UI looking like Meta Threads. But we promised to add a DM feature to this project.
To do that we first need to add the Stream Chat SDK to the project.
Select "Add Packages…" in File menu
Paste the URL https://github.com/getstream/stream-chat-swiftui
In the option "Dependency Rule" choose "Branch", in the single text input next to it, enter "main"

Choose "Add Package" and wait for the dialog to complete
Only select "StreamChatSwiftUI" and select "Add Package" again

Now we need to do a few things to load and initialize the Stream Chat SDK.
Open up the App file and change its contents to look like this.
import SwiftUI
import StreamChat
import StreamChatSwiftUI

@main
struct ThreadsChatApp: App {
    @UIApplicationDelegateAdaptor(AppDelegate.self) var appDelegate

    var body: some Scene {
        WindowGroup {
            ThreadsTabView()
        }
    }
}


class AppDelegate: NSObject, UIApplicationDelegate {

    var streamChat: StreamChat?

    var chatClient: ChatClient = {
        var config = ChatClientConfig(apiKey: .init("8br4watad788"))

        let client = ChatClient(config: config)
        return client
    }()

    func application(_ application: UIApplication,
                     didFinishLaunchingWithOptions launchOptions:
                        [UIApplication.LaunchOptionsKey: Any]? = nil) -> Bool {
        // The `StreamChat` instance we need to assign
        streamChat = StreamChat(chatClient: chatClient)

        // Calling the `connectUser` functions
        connectUser()

        return true
    }

    // The `connectUser` function we need to add.
    private func connectUser() {
        // This is a hardcoded token valid on Stream's tutorial environment.
        let token = try! Token(rawValue: "eyJhbGciOiJIUzI1NiIsInR5cCI6IkpXVCJ9.eyJ1c2VyX2lkIjoibHVrZV9za3l3YWxrZXIifQ.kFSLHRB5X62t0Zlc7nwczWUfsQMwfkpylC6jCUZ6Mc0")

        // Call `connectUser` on our SDK to get started.
        chatClient.connectUser(
                userInfo: .init(id: "luke_skywalker",
                                name: "Luke Skywalker",
                                imageURL: URL(string: "https://vignette.wikia.nocookie.net/starwars/images/2/20/LukeTLJ.jpg")!),
                token: token
        ) { error in
            if let error = error {
                // Some very basic error handling only logging the error.
                log.error("connecting the user failed \(error)")
                return
            }
        }
    }
}
Next, we need a view to show a chat interface.
Create a SwiftUI file called ThreadChatView with the following contents.
import SwiftUI

import StreamChat
import StreamChatSwiftUI

struct ThreadChatView: View {

    @Injected(\.chatClient) var chatClient
    @UIApplicationDelegateAdaptor(AppDelegate.self) var appDelegate

    var body: some View {
        ChatChannelView(
            viewFactory: DefaultViewFactory.shared,
            channelController: chatClient.channelController(
                           for: try! ChannelId(cid: "messaging:my-channel-id"),
                            messageOrdering: .topToBottom
                        )
                        )

    }
}

struct ThreadChatView_Previews: PreviewProvider {
    static var previews: some View {
        ThreadChatView()
    }
}
Next, we need to make sure we can get to this new view. To do that we open up the ProfileView and look for the HStack with the empty buttons.
                HStack {
                    Button {
                        // TODO
                    } label: {
                        Text("Follow")
                            .frame(minWidth: 100, maxWidth: .infinity, minHeight: 40)
                            .background(Color.primary)
                            .foregroundStyle(.background)
                            .cornerRadius(10)
                            .overlay(
                                    RoundedRectangle(cornerRadius: 10)
                                        .stroke(.gray, lineWidth: 2))
                    }

                    Button {
                        // TODO
                    } label: {
                        Text("Mention")
                            .frame(minWidth: 100, maxWidth: .infinity, minHeight: 40)
                            .background(.background)
                            .foregroundStyle(Color.primary)
                            .cornerRadius(10)
                            .overlay(
                                    RoundedRectangle(cornerRadius: 10)
                                        .stroke(.gray, lineWidth: 2))
                    }
                }
As the final item in this HStack add a NavigationLink sending the user to the ThreadChatView.
                HStack {
                    Button {
                        // TODO
                    } label: {
                        Text("Follow")
                            .frame(minWidth: 100, maxWidth: .infinity, minHeight: 40)
                            .background(Color.primary)
                            .foregroundStyle(.background)
                            .cornerRadius(10)
                            .overlay(
                                    RoundedRectangle(cornerRadius: 10)
                                        .stroke(.gray, lineWidth: 2))
                    }

                    Button {
                        // TODO
                    } label: {
                        Text("Mention")
                            .frame(minWidth: 100, maxWidth: .infinity, minHeight: 40)
                            .background(.background)
                            .foregroundStyle(Color.primary)
                            .cornerRadius(10)
                            .overlay(
                                    RoundedRectangle(cornerRadius: 10)
                                        .stroke(.gray, lineWidth: 2))
                    }

                    NavigationLink {
                        ThreadChatView()
                            .toolbar(.hidden, for: .tabBar)

                    } label: {
                        Text("Chat")
                            .frame(minWidth: 100, maxWidth: .infinity, minHeight: 40)
                            .background(.background )
                            .foregroundStyle(Color.primary)
                            .cornerRadius(10)
                            .overlay(
                                    RoundedRectangle(cornerRadius: 10)
                                        .stroke(.gray, lineWidth: 2))
                    }
                }
This will result in a new button on the ProfileView.

Tapping that button brings us to the view ThreadChatView.

Notice how the ChatChannelView is created and added to the view hierarchy with minimal effort and the end user can just start chatting when they land on this view.
We have integrated Stream Chat into our Threads-inspired user interface mockup. This not only highlights the seamless integration available by using our Chat SDKs but also offers visually stunning screenshots that showcase the potential look of Meta's Threads, but with an in-app chat feature.
Conclusion
By now you will have noticed how easy it can be to add chat to anything. If you have a suggestion of a mash-up we can add chat to, please reach out through Twitter. We love to hear from you to learn what you feel might be interesting to explore.
This article barely scratches the surface of what our Chat SDK can do. You will probably want to make our chat screens look just like the rest of your app. And that’s where theming and styling come in. Fortunately, we have an excellent quick-start guide about theming available.


Top comments (0)