
Introduction ✍️
In this article, we will explain first how writing UI Test using Xcode, then how we added visual diff and finally how we configured in Bitrise.
Why testing the User Interface (UI)?
For production release, it is painful to test every single use case and be sure there is no regression. You can either forget to test one flow or think that your change will not impact other parts of the code… But sometimes, it does 😣. This is what happened at Appaloosa for our iOS application, where some errors slipped under the radars. For example, when iOS 11 was released, we added constraints in the navigation bar, but this feature was not available in prior versions and the app crashed in iOS 10.
It was quickly identified and fixed, yet that alert encouraged us to have a stronger process to prevent such issues.
UI Test and Unit Test
With unit tests, you test each small piece of code independently and focus on the logical aspects of the code.
With UI tests you simulate user interactions and user flows. Let’s take the example of a user trying to log in your application. It will test the different interactions the user has with our application during the whole process.
Setup 📚
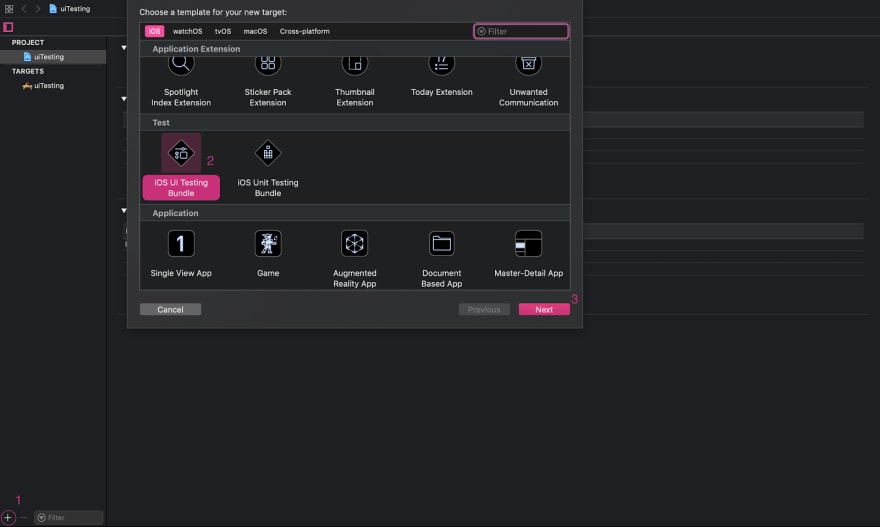
Go to your project on Xcode, click “+” button (see the image below) and add a iOS UI Testing bundle. A new target will be created as well.
You can also add it when you create your project on Xcode.
Sample project
Here is an example project. We want to test multiple user flows and be sure they all work as expected.
You can find the complete code on github.
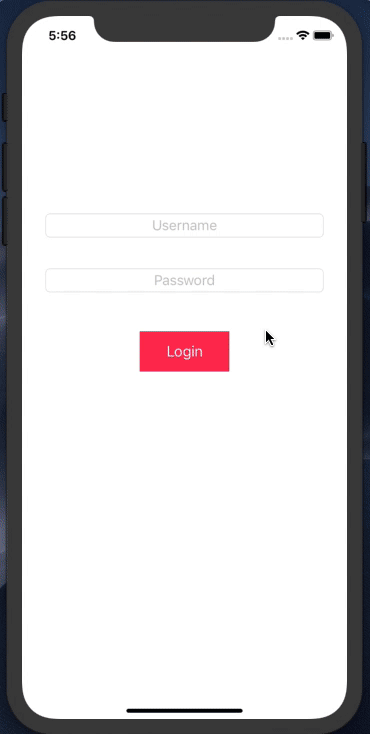
The goal is to make sure our login page shows the right views during the different steps. So we will need to access the different views of the page to evaluate their behaviour during the test.
You have multiple ways to retrieve an element of your application:
You can use the recording button in Xcode, it will generate automatically your code.
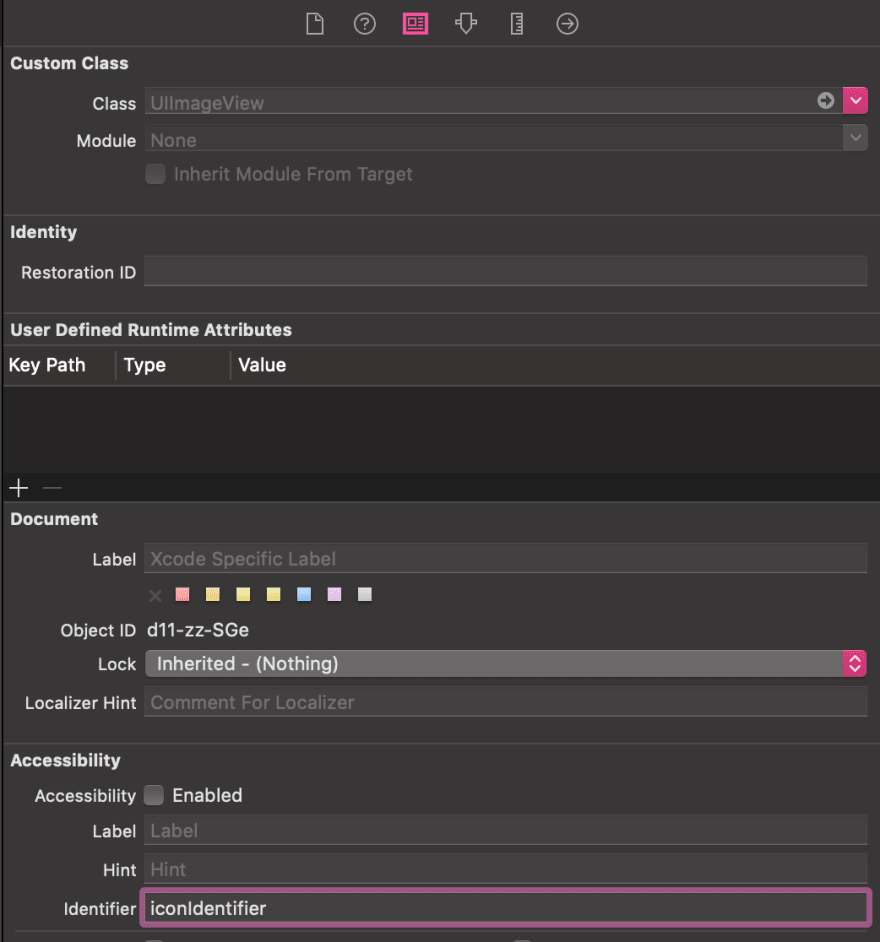
You can add an accessibility identifier on your view to access it more easily.
- You can write your code manually, in that case, you need to know how to access an element. You can print the detailed view hierarchy of the visible screen using the following command in LLDB:
(lldb) po print(app.debugDescription)
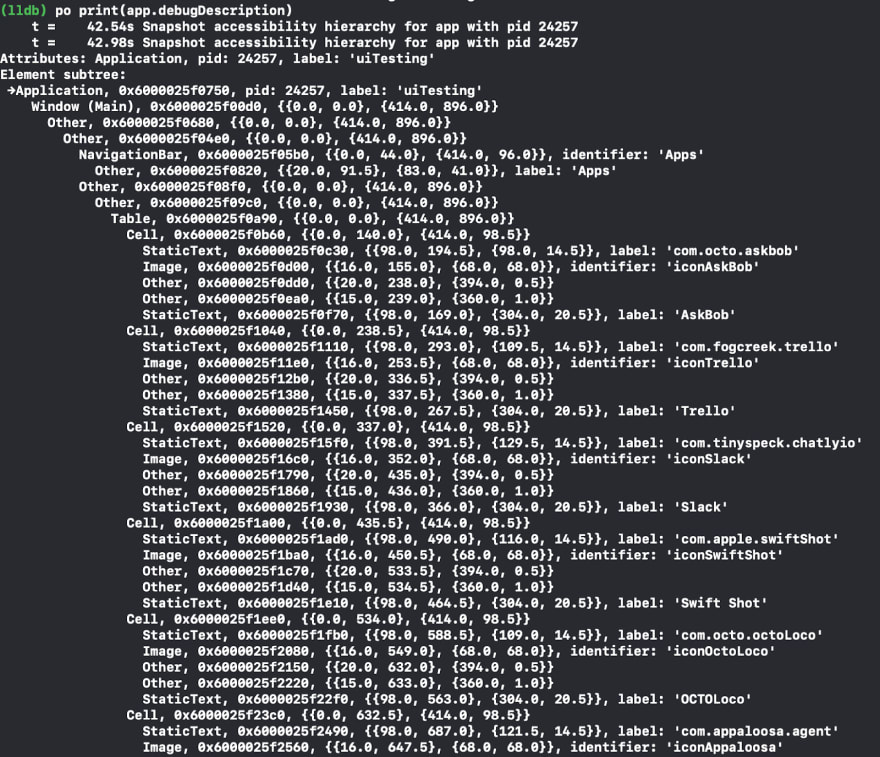
I prefer this last method, the code is more readable.
Writing your first UI test
Login with invalid credentials:
If a user enters invalid credentials, we expect the application to show an error message:

Let’s see how this translates in code.
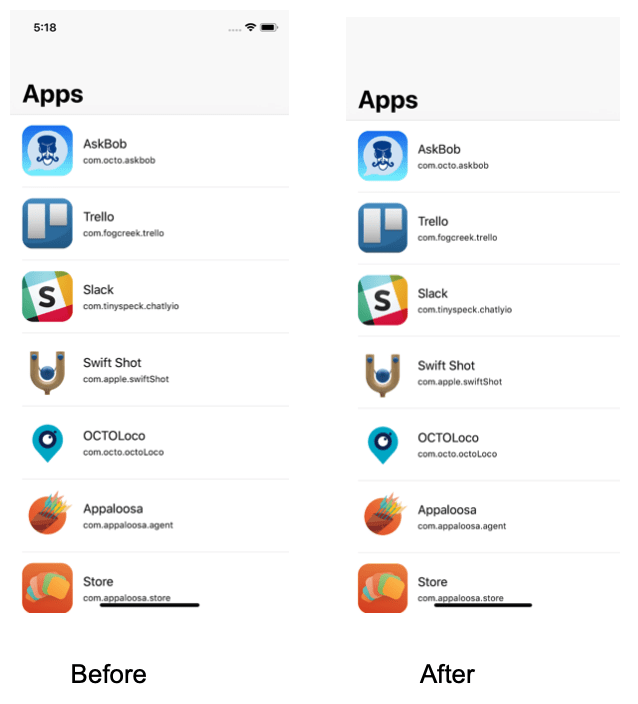
The user wants to display his application list:
Here we are forced to wait for the response of our fake server. We need to tell Xcode to wait until the application finished rendering the view. If we don’t, our test will fail since the view component being targeted has not yet appeared.
To force Xcode to wait, I used an extension to XCTestCase:
The user wants to see the details of an application:
Starting from Xcode 9, we can’t compare strings longer than 128 characters anymore so we are forced to use a predicate:
✌️Now you can add UI tests for various user flows!
Visual Diff
UI tests can’t be used to detect design changes (eg: different text size or text color)
At Appaloosa, the frontend team faced the same issue and, after some research, they found a solution for visual regression test called Percy. So I looked for a similar solution for iOS.
Note: Benjamin, our front end expert wrote an article about Percy.
Using Snap.swift 🎨
Snap.swift is a library that can compare a referent image (a screenshot) to the rendered UIView. This library was inspired by a facebook library, which is now maintained by Uber.
This library is usually used for unit tests, so I had to adapt my UI tests.
Setup:
The first change I needed to make is to hide the status bar. If you don’t do this, your tests will fail every time.
To do this, I added the following line of code:
We then need to generate screenshots for every view in the app using the following command:
isRecording = true in your setup method of your UI test.
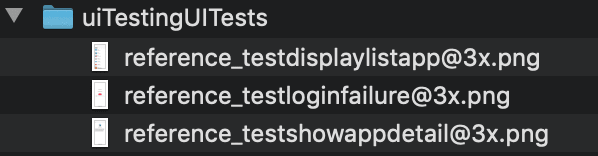
If something changes on the view, Snap.swift will generate two folders:
Diff
Failure
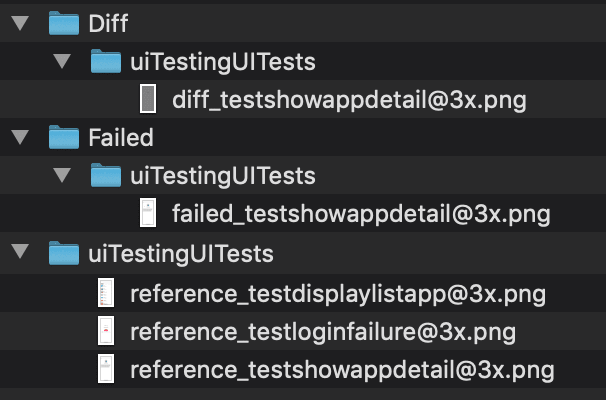
the diff image will show the difference between the failed image and the expected image.

We now have a functional setup to run UI tests locally, and we want to integrate it to our CI.
Bitrise 🤖
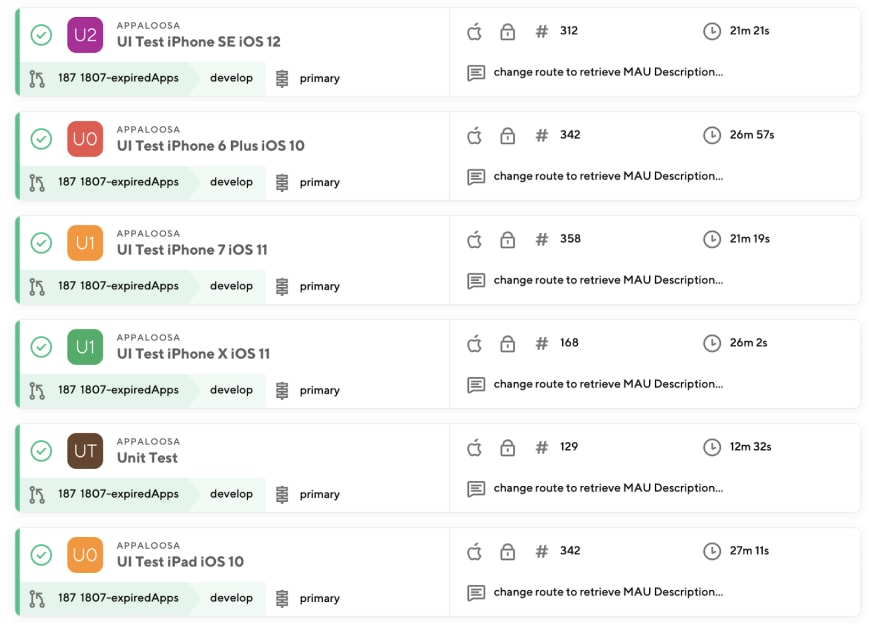
At appaloosa, we use Bitrise for Continuous Integration. Below you can see the flows we use when launching a new production deployment. All flows need to be run successfully for the deployment to be completed.
In order to avoid regression within the application, we decided to run our UITest flow on different screen sizes and iOS versions. At the time of writing, the flow is tested against the iPad, the iPhone 7, the iPhone 6 Plus and the iPhone X on iOS from version 10 to 12.
When UI tests fail, we need to retrieve the screenshots associated to the failed tests (generated by Snap.swift).
To do this, we added a Bitrise flow: Deploy to Bitrise.io — Apps, Logs, Artifacts.
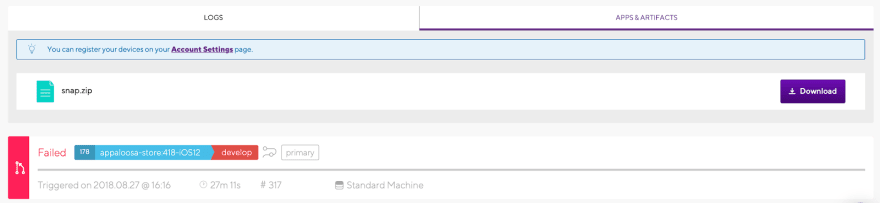
This is also used to create new screenshots or update existing screenshots when a view changes.
Limitations ⏳
Every time the design of the app changes, we need to force tests to fail in order to retrieve the new “valid” screenshots as the new point of reference. This goes against the principles of Continuous Integration but we did not find a suitable alternative (yet).
Thank you for reading! 🙏
If you have any questions or suggestions, please leave a comment we will be glad to answer it!
👋 You should subscribe to our blog to be notified whenever a new article is available!
This article was written by Elise El Beze of Appaloosa’s dev team.

Top comments (0)