
In this part of an article we will create our brand new load balancer. If you are new to this I recommend you to read the first part of this article “Failover Architecture on AWS(Part 1/4)” to be aware of what's going on.
So, let’s go to EC2 service and configure the Load Balancer. On the left menu bar in the section “Load Balancing” you can find “Load Balancers”. Amazon has 3 types of Load Balancers:
- Application Load Balancer
- Network Load Balancer
- Classic Load Balancer
The description each one of them you can find here: https://docs.aws.amazon.com/AmazonECS/latest/developerguide/load-balancer-types.html
Click “Create Load Balancer” and hit “Create” on Classic Load Balancer.
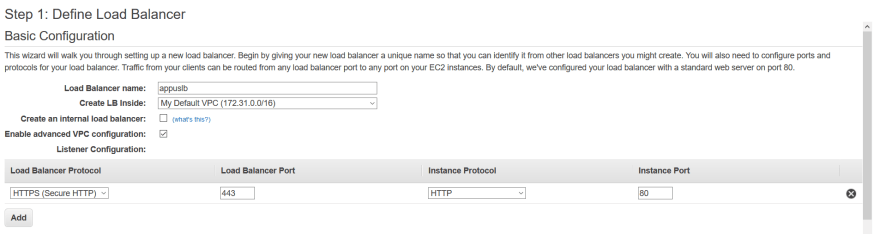
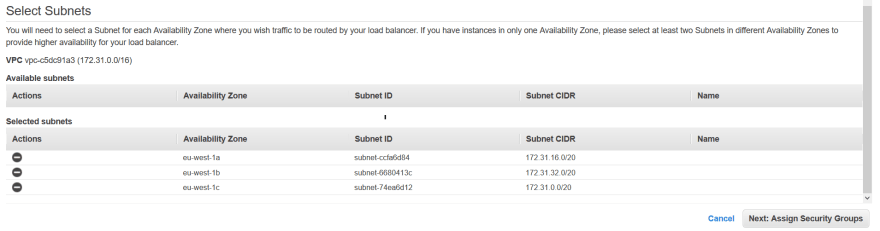
On step 1 we are going to configure Load Balancer’s name, listeners, and VPC configuration. You can give to it any name that you want, add listeners that you need, by the default it is only HTTP port. In our case, we will only open HTTPS port, so I deleted HTTP protocol and add HTTPS protocol to it. So the Load Balancer will listen to port 443 and then forward it to port 80 to instances. Then we are going to enable advanced VPC configuration and add all available subnets because we want a high available system. In my region, it has only three, if your region has more I recommend adding all of them, also you should remember that every zone has a price for it.
On step number 2 we are going to configure a security group. Choose “Create a new security group” give a name to it and a description. I want to open 80, 443, and 22 ports and port 22 allows only for my IP address.
On step 3 we will attach our SSL certificate to Load Balancer. Hit “Choose a certificate from ACM” and in the “Certificate section”, you will see your SSL certificate that requested early. In the Cipher section, I will use the predefined security policy “ELBSecurityPolicy-2016-08”. You can change your security policy but I recommend familiarizing yourself with each of the security policies provided by AWS, also you can create a custom one.
On step number 4 we need to configure health check. It is the part when Load Balancer will ping our instances to make sure they are alive and working. Below you can see my configurations:
So these configurations tell that load balancer will ping port 80 to path “/”, response timeout will be 5 seconds, interval of pinging every 10 seconds, if 5 pings will not have a response that means the instance is not alive and automatically status of it will be “Out of service”, the healthy threshold is 5 times of successful response by instance.
On step 5 you can see all available instances that could be picked by the load balancer, of course, if you have running EC2 instances right now, for now, I will not add any of them because we want it to pick only instances created by the auto-scaling group. All other configurations we will leave it by default.
On step 6 I will create a tag for our load balancer with Key=Name and Value=Appus Studio.
On step 7 review all configurations and click on “Create” button. If you see a green checkmark that tells “Successfully created load balancer” Congrats we have done it!
Next, we will configure launch template and auto-scaling group. All this will be described in the third part of the article.


Top comments (0)