Sandpack is a live coding environment that runs on the browser. It is made by the team behind CodeSandbox. The main objective here is to provide interactive examples to play around with, to users. I see it being widely used in things like blog posts and documentation (in fact the, work in progress, new React Docs is using Sandpack). In this article, we are going to look at how to add Sandpack to a React Application and then we will look at integrating it with Next MDX Remote in a NextJS Application.
Adding Sandpack to our Project
We are going to be adding Sandpack to a react application (made with create react app) thought the process should be quite the same for NextJS or Gatsby.
Create a starter react project and navigate into it -
npx create-react-app sandpack-demo
cd sandpack-demo
Note: Feel free to use the Yarn package manager if that is what you prefer.
Now, let us install Sandpack
npm install @codesandbox/sandpack-react
That is it for dependencies, now let us move on to adding Sandpack to the application.
Go ahead and delete App.css, App.test.js, setupTests.js, and logo.svg. Also remove all the boilerplate code in App.js. It should look like this -
function App() {
  return <div></div>;
}

export default App;
Now, let us import Sandpack in App.js -
import { Sandpack } from "@codesandbox/sandpack-react";
import "@codesandbox/sandpack-react/dist/index.css";
Here, we are also importing a CSS file that contains the styles for the editor and preview.
We should also add the Sandpack component -
<Sandpack />
That is it!!! Now let us start the dev server by running npm start. Navigate to http://localhost:3000/ and this is what you should see -

Custom Templates
The default template that Sandpack uses is vanilla js but we can also use other templates like react, vue, angular, etc. Let us see the react template in action. Just add the template attribute and specify the value as react -
<Sandpack template="react" />
Feel free to go through the Sandpack Custom Content documentation for more templates and information on how to add your custom code.
Custom Theme
We can also customize the theme. Let us look at adding a pre-built theme -
<Sandpack template="react" theme="sandpack-dark" />
This is how the editor should look like -

Feel free to go through the Sandpack Custom UI documentation for more themes and information on building your theme.
At last, this is how our App.js looks like -
import { Sandpack } from "@codesandbox/sandpack-react";
import "@codesandbox/sandpack-react/dist/index.css";

function App() {
  return (
    <div>
      <Sandpack template="react" theme="sandpack-dark" />
    </div>
  );
}

export default App;
Now, that was just getting started with Sandpack but now let us look at it being used in a more real world example. Feel free to go through the Sandpack documentation for more detailed guides and an API reference.
Using Sandpack with Next MDX Remote
Next MDX Remote is a library that parses MDX content (markdown but with support for JSX as well) and helps load them via getStaticProps or getServersideProps in NextJS. It is mainly used for documentation and blog posts. Today, we are going to be adding Next MDX Remote to a NextJS application and customize the code component by replacing it with Sandpack. First of all, let us make a new NextJS application and navigate into it -
npx create-next-app sandpack-next-mdx-remote
cd sandpack-next-mdx-remote
Now, let us delete Home.module.css under the styles directory and remove the boilerplate code in index.js under the pages directory. This is how it should look like -
export default function Home() {
  return <div></div>;
}
Adding Next MDX Remote
The next step is to add and setup Next MDX Remote so let us do that -
npm install next-mdx-remote
Now, let us go to index.js and add the following code -
import { serialize } from "next-mdx-remote/serialize";
import { MDXRemote } from "next-mdx-remote";

export default function Home({ source }) {
  return (
    <div>
      <MDXRemote {...source} />
    </div>
  );
}

export const getStaticProps = async () => {
  const source = "```

html\n<h1>Hello World</h1>\n

```";

  const mdxSource = await serialize(source);

  return { props: { source: mdxSource } };
};
Note that I am just writing down some basic markdown with a code block. Usually, this markdown is sourced from external files and paired with frontmatter but that is not something I am going to go over in this article.
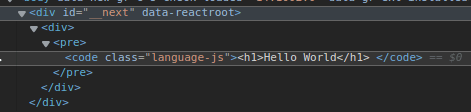
Now let us start the development server by running npm run dev. Upon navigating to http://localhost:3000/, this is what our page should look like -

Note that a simple HTML code element is being rendered now
Now, I could add syntax highlighting to this using remark prism but as we are anyways going to use Sandpack, let us move onto that instead.
Adding Sandpack to Next MDX Remote
First of all, let us install the Sandpack package -
npm install @codesandbox/sandpack-react
Now let us create a directory called components and add a file named CustomMDXCode.js in there. Add the following code to that file -
import { Sandpack } from "@codesandbox/sandpack-react";
import "@codesandbox/sandpack-react/dist/index.css";

const CustomMDXCode = props => {
  return (
    <Sandpack
      template={props.template}
      files={{ [`/${props.filename}`]: props.children }}
    />
  );
};

export default CustomMDXCode;
Here, we are importing Sandpack, making a custom component, which is passed in some props. These props will contain the filename of the file, the template to use, and of course, the code. Note that we are adding a / to the beginning of the filename through string interpolation as it is required by Sandpack.
Now, let us go back to our index.js file and make some changes to leverage the use of the new component -
import { serialize } from "next-mdx-remote/serialize";
import { MDXRemote } from "next-mdx-remote";
import CustomMDXCode from "../components/CustomMDXCode";

export default function Home({ source }) {
  return (
    <div>
      <MDXRemote
        components={{ code: props => <CustomMDXCode {...props} /> }}
        {...source}
      />
    </div>
  );
}

export const getStaticProps = async () => {
  const source =
    "```

js template=react filename=App.js\nexport default function App() {\n  return <h1>Just some text...</h1>\n}\n

```";

  const mdxSource = await serialize(source);

  return { props: { source: mdxSource } };
};
Here, we are adding a custom component for the code attribute (reference for all mdx components - https://mdxjs.com/table-of-components/), which is nothing but the Sandpack component we created earlier. We have also changed the markdown source to javascript, added a template attribute and pointed that to react, added a filename attribute and named the file App.js, and wrote a simple function that displays some text for the code part.
This is how our page should look like now -

Conclusion
That is it for this article. I hope you enjoyed it and learned how to add Sandpack to your react application. Feel free to comment on this post or reach out to me via Twitter in case you have any questions.
Links
Sandpack - https://sandpack.codesandbox.io/
Sanpack Documentation - https://sandpack.codesandbox.io/docs/
Sandpack GitHub - https://github.com/codesandbox/sandpack
Next MDX Remote - https://github.com/hashicorp/next-mdx-remote
All MDX Component - https://mdxjs.com/table-of-components/


Top comments (0)