Index for the post:
- Overview
- Acquire test ETH
- Build and compile smart contracts using Remix
- Deploy to Rinkeby testnet
- Mint NFTs
- Publish on Opensea
This is a quick guide showing you how to publish an NFT you’ve built to a marketplace like Opensea. Opensea will help you auction or transfer the NFTs you own or build.
There are some prerequisites for this tutorial. You must have the Metamask plugin installed on your browser and “Rinkeby testnet” network added to it.
There are two parts to this exercise. First we’ll acquire some test ETH and then we’ll use that to publish our NFT to Opensea.
Acquire some test ETH:
We can get some test ETH from a faucet like the Rinkeby faucet. The instructions on how to acquire them are available on the faucet’s website.
In case the Rinkeby faucet isn't working, try this link. If that doesn’t work as well, reach out to me, i’ll send you some test ETH.
Publish the contract to Ethreum testnet:
For this exercise I’ll be using Remix as our IDE and publishing tool. Remix is a cloud based IDE for solidity smart contracts development. You can use any IDE for web3 development kits for the same. I’ll cover deploying using truffle and hardhat in a future article.
Once you open Remix create a new file (revise-nft.sol) in the contracts folder. Paste the following code in the file.
// SPDX-License-Identifier: MIT
pragma solidity ^0.8.0;
// Let’s start by importing the Openzeppelin ERC-721 template into our file
import "@openzeppelin/contracts/token/ERC721/ERC721.sol";
// Next, let’s add our NFT smart contract and name the NFT token (Dynamic NFT)
contract ReviseNFT is ERC721 {
    string baseuri = "";
    constructor(string memory _baseuri) ERC721("Dynamic NFT", "dNFT") {
        baseuri = _baseuri;
    }
    // Last but not the least, let’s add functions to enable minting and to enable setting the _baseURI().
    function mint(address to, uint256 tokenId) public {
        _safeMint(to, tokenId);
    }
    function _baseURI() internal view override(ERC721) returns (string memory) {
        return baseuri;
    }
}
Let’s start by compiling the smart contract. Hit cmd + s on the Mac or ctrl + s on windows to save the file. You should see a green tick on the compiler.

Click on the “Deploy options” tab. It’s the button just below the “compiler button” (shown in the above diagram).
Choose ReviseNFT from the “contracts” dropdown (it’s usually the last option). Fill the _baseuri property. Paste the baseURI link. The baseURI points to the data within the NFT. This is the data that gets shown in marketplaces like Opensea. You can use Revise to generate the baseURI. Refer to this article for more details.


Set the Environment as Injected Web3 in the “Environment” option (the first option in the page). Make sure “Rinkeby network” is selected in your Metamask wallet. Now hit the Deploy button. This will bring up the Metamask popup. It will ask you confirm the deployment of this smart contract. Once you accept it, the smart contract will be deployed to “Rinkeby testnet”.
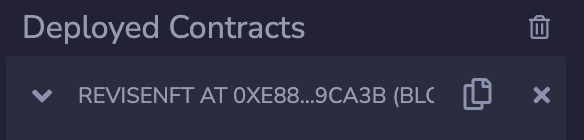
Once the NFT smart contract is successfully deployed we can mint an NFT. Click on “REVISENFT…” in the “deployed contracts” section. You’ll see a bunch of smart contract functions you can call.

Click on the “mint” function and pass it your wallet address and choose 1 as the tokenID (you can choose any number, make sure you use the same number in Revise as the tokenId). This will trigger Metamask and open an popup. Once you hit on “confirm” it will process your transaction and mint the NFT straight to your wallet.
Copy and store the address of the contract you just deployed. You’ll find it under “Deployed contracts”.
Now that our NFT smart contract is deployed on-chain and we’ve minted at least one NFT, we’re ready to publish our collection to Opensea.
Visit https://testnets.opensea.io and click on the wallet button (it’s the last button in the header, right beside the profile button). Choose Metamask and click confirm on the popup.

Once you’re logged in you can go to your profile and your NFT will be listed under “my collections”! If you’re not able to view it there just visit “https://testnets.opensea.io/assets//”, replace the contract address with the address we copied earlier and the token_id with 1 (since that’s what we minted). You’ll be able to see your NFT there.
Congrats on publishing your first NFT collection to Opensea!

Latest comments (0)