
As developers, we all know that it is a good idea to reuse code as much as possible. We all know the DRY mantra - Don't Repeat Yourself. Functions, classes or web components abstract away logic, parameterize data, allow code to be reusable, maintainable and extendable.
With GitLab CI/CD, pipelines are defined in YAML. It's a human-readable data- serialization language (Source), so its focus is clear and concise data delivery rather than efficiency optimization. It's often not obvious how we can go about reusing code in YAML.
Today, we're going to learn how to create CI template library - a library comprised of reusable job templates that can be shared, extended, and overridden by multiple projects 👌
But first, why should I create a CI template library?
If you're a developer working on a side project on GitLab, or if your team is relatively small and your projects are diverse in programming languages and build processes, then it's probably good enough to stick to a single .gitlab-ci.yml file.
On the other hand, as a company grows, it often has standardized testing, building, and deploying processes that are applied to most internal projects. A CI template library increases time efficiency in pipeline development and decreases update and maintenance effort across the ecosystem.
To build a template library, let's first dive into the basic component of it - the job template ⬇️
Job template
A job is a basic building block of a pipeline. It usually has a single purpose, executed in isolation and, most of the time, independent of other jobs.
For example, let's say we have an awesome Node.js app called awesome-node-app and we need a job to install dependencies before building it. The install job would look something like this:
# awesome-node-app/.gitlab-ci.yml

install:
  cache:
    path:
      - node_modules/ # cache node_modules/ in subsequent pipeline
  script:
    # install dependencies in CI mode
    - npm ci
Now, a job template is essentially a job, but it has the following extra properties:
- Generic: It is project-agnostic which means it does not contain any data that pertains to a specific project.
- Importable: It is easily imported and used directly in a project.
- Customizable: It can be extended or overridden.
If we examine the install job above once again, it seems like we could, and should, transform it into a template. We might want to reuse it in another JS application in the future!
It's already generic enough, but not quite importable or customizable. Let's change that.
Making a template
Create and include a template
To create a template, all we need to do is move the job to a new file, install.yml:
# awesome-node-app/install.yml

install:
  script:
    - npm ci
Then, we need to figure a way to "import" and use this job in .gitlab-ci.yml file. Luckily, GitLab has a pretty sweet keyword include that allows us to do exactly that!
💡
includeallows us to include and use content declared in an externalymloryamlfile - either locally or remotely.
We already created install.yml locally, so let's include it at the top of our .gitlab-ci.yml, like so:
# awesome-node-app/.gitlab-ci.yml

include:
  - local: 'install.yml' # path to `install.yml`
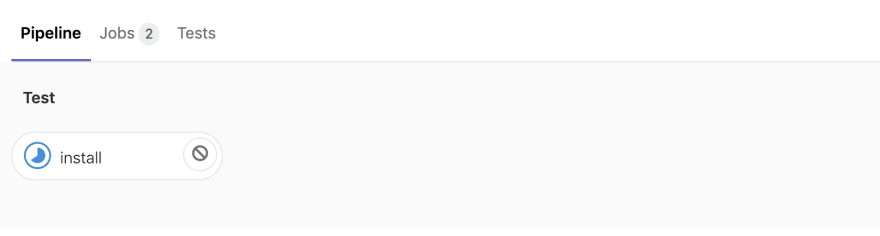
The pipeline now has the job named install that does the same thing:
Using local file here probably won't make sense since we might want to reuse the template in another project and we do not want to just copy and paste the job definition. Remember, keep it DRY.
So let's go ahead and make a new template library that only stores templates! We can then refer to this library whenever we need to install.
Create a new repository ci-templates that's within the same group as awesome-node-app. Then, add install.yml at the root of the project. By now, you would have this:
ci-templates/
  | install.yml
Then, commit and push to master. Cool! Now your library is up and accessible to other repositories.
Let's go back to awesome-node-app/.gitlab-ci.yml, and include install.yml again, this time using include:file directive:
# .gitlab-ci.yml

include:
 # group name is your username if the project is under personal account
  - project: '<my-group>/ci-templates'
    ref: 'master'
    file: 'install.yml'
💡We can modify
refto point to any other branch, commit SHA, or version tag of the file in Git history as we'd like. It's good practice to keep track of version history for your template file.
Great! We just basically told GitLab to "include this file install.yml from ci-templates repo on master branch into the pipeline". We now have install job imported from ci-templates to our awesome-node-app 💪
We can run the pipeline as-is - install is activated automatically without any further configuration.
However, what if we do want to change or add configuration?
Customize a template
Scenario: Right now, install only looks for dependencies declared in the package.json file at the root of a project. What if we have another-awesome-node-app that is a monorepo, and we want to run install multiple times in various locations?
another-awesome-node-app/
  | project_one/
  |__ package.json
  | project_two/
  |__ package.json
We need to parameterize our install template to take in some sort of data that holds information about the location of the package.json file we're looking for.
The most powerful way to parameterize a template is by using environment variables.
Environment variables come in two flavours:
- Predefined environment variables: Variables provided by GitLab out of the box and ready to use without any specification.
💡They are references to branch names, merge request IDs, jobs info, and much, much more.
Predefined environment variables are incredibly powerful. We can do things like conditionally skipping a job in a pipeline, allowing jobs to run on certain branches, leveraging custom variables, and so on.
This topic deserves a separate article of its own, so if you're interested in knowing more about their use cases and real-world implementation, let me know in the comments below 💚
-
Custom environment variables: Variables defined in
.gitlab-ci.yml(you can also define them in GitLab UI and via the API).
⚠️ Make sure to avoid name collision with predefined variables when naming your variable.
Custom environment variables work in great harmony with job templates. The syntax is as follow:
template:
  variables:
    # declare a key/value pair
    MY_VARIABLE: 'hello'
    ... # declare as many variables as you want
  script:
    # call its value, this outputs "hello" in the runner
    - echo $MY_VARIABLE
Notice that the variable is declared within the job scope. This means that the variable is only accessible within the job and inaccessible from pipeline level.
Going back to our example, let's create a new custom variable named INSTALL_DIRECTORY and call it in our install script:
# ci-templates/install.yml

install:
  variables:
    INSTALL_DIRECTORY: '.' # default to root directory
  cache:
    path:
      - $INSTALL_DIRECTORY/node_modules/
  script:
    # cd to the directory of package.json
    - cd $INSTALL_DIRECTORY
    # install dependencies in CI mode
    - npm ci
One more thing before we move on, let's make the job hidden by default by changing the job name from install to .install. I'll explain how this works in just a bit.
# ci-templates/install.yml

.install:
  ...
Cool! Now we're ready to use this template in another-awesome-node-app. Let's include the template again:
# another-awesome-node-app/.gitlab-ci.yml

include:
  - project: '<my-group>/ci-templates'
    ref: 'master'
    file: 'install.yml'
We've just included .install, but this time, it's hidden, which means it's disabled by default. If you try running this pipeline in GitLab, it will not run simply because the pipeline is empty - there is no job!
So how do we use our template then?
Turns out, we can create a new job that extends our template to inherit its configuration.
Let's create two jobs install_project_one and install_project_two that extend .install. After that, we also need to change the default value of INSTALL_DIRECTORY in each job to the expected path:
# another-awesome-node-app/.gitlab-ci.yml

include:
  ...

install_project_one:
  extends: .install
  variables:
    INSTALL_DIRECTORY: 'project_one/'

install_project_two:
  extends: .install
  variables:
    INSTALL_DIRECTORY: 'project_two/'
Awesome! Now both install_project_one and install_project_two inherit the script from .install, but they find the package.json file in two different locations just like we wanted!
⚠️ Had we not specified
installa hidden job earlier, we would have had one extrainstalljob declared in our pipeline that runs in the root directory - where there is nopackage.json. This will fail the pipeline.
📝 To prevent side effects from including external jobs, it's good practice to declare all template jobs hidden and extend them when needed.
Going beyond templates
Mixins
We can also keep any other reusable snippets of configuration in the template library. I'd like to call them mixins.
Some mixin examples:
- Bash scripts
- Pipeline configuration partials
Here's one good example of what I meant by pipeline configuration partial:
.auth_gitlab_registry:
  services:
    - docker:dind
  before_script:
    - docker login -u $CI_REGISTRY_USER -p $CI_REGISTRY_PASSWORD $CI_REGISTRY
  after_script:
    - docker logout $CI_REGISTRY
This mixin logs the user into GitLab Registry before_script and logs them out after_script. However, it does not have script declared, which means that it cannot be run as a job.
💡
scriptis required for job definition.
To use the mixin, all we need to do is extend it the same way we do with regular templates and, most importantly, define what's in script in the new job:
include:
  ...

build:
  extends: .auth_gitlab_registry
  script:
    - docker build $MY_APP_IMAGE
    - docker push $MY_APP_IMAGE
Summary
Here's what we've learned today:
- Properties of a job template: generic, importable and customizable
-
Includeandextenda template - Use environment variables to parameterize templates
- Hide a job to prevent side effects
- Use mixins to further simplify the pipeline
I'm sure there are many other techniques in building a CI template not listed here. Please let me know in the comments what you think of my approach and any suggestions/recommendations for further optimization!
I hope you enjoyed this article 💚
Cover photo by Pankaj Patel on Unsplash


Top comments (11)
Hi, thanks for sharing!
What if I want to re-use a series of scripts in my jobs? I know you could write separate scripts to files e.g.
scripts/deploy.shand call its execution whenever you need it in the.gitlab-ci.ymlfile.The
extends: .my-reusable-jobsentence could be overwritten.Only prints "Hello from testing job". My specific question is if I can use extends without overwriting it later?
Hi Gregori! Thanks for posting your question :)
I think this is an intended feature for
extends. If you want the reusable script to not be overwritten, there's 2 ways I can think of:before_scriptorafter_scriptfor reusable commands so that they're appended before or after the new script:This thus prints "First, hello world" and "Second, hello world, again!"
This will print the same 2 lines just like the first approach.
Let me know if you have any questions!
Thankssssss, it works 🙏🏾🙏🏾🙏🏾🙏🏾
Awesome! 🎉 I'm happy to help :)
Hey Minh, that’s a well written article about GitLab-Ci templates functionality, and the first which is valuable. Why? because it just shows what is hidden by this GitLab term
ci template, it’s like that you can search for this term and you end opening tabs over tabs because you find articles which all talk about this feature - but in a way which is so useless that you just learn „yes that is what I need now, they can do it, it’s existing...“ but they all forget the main point, you want to see how to implement / use it / done real work with it.Please write more - I like your way, to show me „ah okay, we have a Feature...“, „... and here you use it like this“, „do that..“ and you get it explained in one article without thousand additional links which you have to open to see a snippet, additional documentations on GitLab.com which all show you nothing usefully, and in the end you read a lot but you have no clue how to use this feature.
You got it done, in a way I like it very much - to write it down, on just one paper A4/letter which shows me how to implement and work with it.
So thanks, and how I can inspire you to write more articles, because you are do it great.
Thank you Tobias for the kind words! You definitely inspired me to write more :D
I agree with you that articles around CICD is usually limited to being generic & theoretical. The reason, I think, is because it requires the author to have real hands-on experience on the tech (ie: gitlab ci/jenkins/etc) to really understand how to apply it in the real world. There are many implicit components to building a pipeline that only by reading the docs certainly isn't enough.
I'll try to write more "how to..." articles like this one in the future and hope to share my own insights on the subject (which I think is crucial to make an article useful)
If possible, please let me know what topic you'd like to read more from. Thanks!
I have few or one idea, as a follow up article, you could show how to make a a pipeline more generic, for example I have a pipeline for python which is also possible to do specific python projects like django, because there isn't to much difference. I use there often one-liner shell script steps like:
and then also how a reusable template can be used look, and used. For example:
my Project pipeline looks like this:
I have only to overwrite one variable to select the correct directory which is to be used to test. That I have to set the variable has a repository structure semantic, I could also have all python project in the same directory of a new repository, but I do it like this. -because I will use the same template again for the same repository but with a different directory (to release python packages to pypi, we refactored some django-apps into python packages to reuse them).
the interesting thing which I have in mind is maybe this:
Another topic which is often not really clear is how to versioning with a pipeline, how can we trigger a release (manual by API, or by a specific trigger like changed file) in the way that we have not to do a change in the gitlab-ci.yml file (to activate release button, and then deactivate release button)...
Releasing and Versioning is often confusing topic when I look into development teams, mostly they have per project only one package which they "release" what they do is just deploy.
hmm, I could write more and more ideas, as I sit here and write down what I have in mind about what you could write, often topics which I have to cover myself, also.
I created a profile just to comment and ask some questions. First of all, thank you for such a well written guide. There are very few articles on GitLab CI on the internet. Most are utterly theoretical and very few provides actual workable examples.
Coming to my question, I followed this guide to create a template repository. I have some job templates in the repo, and a pipeline config template which includes these locally available job templates. I am using the pipeline config as a template in other projects. One of the job templates is a maven build job, which looks like this:
In the pipeline config template, I have extended this job template as
Finally, in the actual project (project A), I have included the pipeline config template as
However, when I run the pipeline in project A, the build process fails to find the pom.xml path and the build fails. What am I doing wrong?
Hi Avi, thanks for stopping by! It's amazing to see people like you finding the guide useful and actually following it.
I think the problem is that in your project A, you're declaring the variable
POM: 'myfolder/pom.xml'on the pipeline level, and not on the job level. Hence it's perceived as a different variable from the original.compile_commit::variables::POMand GitLab does not parse it into the jobThe easiest way to solve this is to make the template config job to be hidden, and then extend it again in Project A and change the variable POM:
In template config:
In Project A:
Another approach would be to set the POM variable to be at the pipeline level from the beginning (remove it from the job and add it in the pipeline level). Then, override it in your Project A like you did. However, I haven't tested this solution so I can't 100% tell you that it will work. But it's worth trying it out. Let me know if that works also!
Minh
Thank you for sharing this !!! Very useful !
Thanks for reading! :)