In the previous article, we discussed DevOps and also looked into getting started with Azure DevOps. In case you missed please try to go through it before we start, for better understanding.
Here’s the link for the previous article: Azure DevOps! What’s that??
In this article, we will see how we can apply CI/CD to our Angular application, using Azure Pipeline. This will be a quick step by step guide.
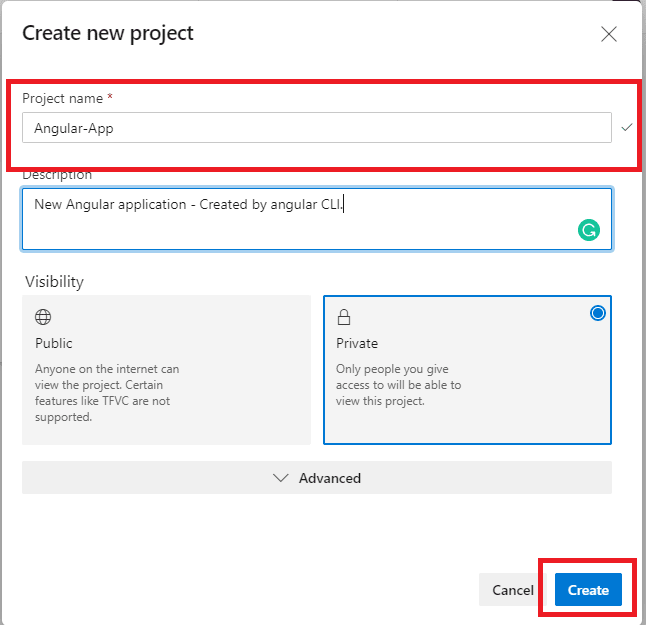
Step 1: After login to Azure DevOps portal, create a new project
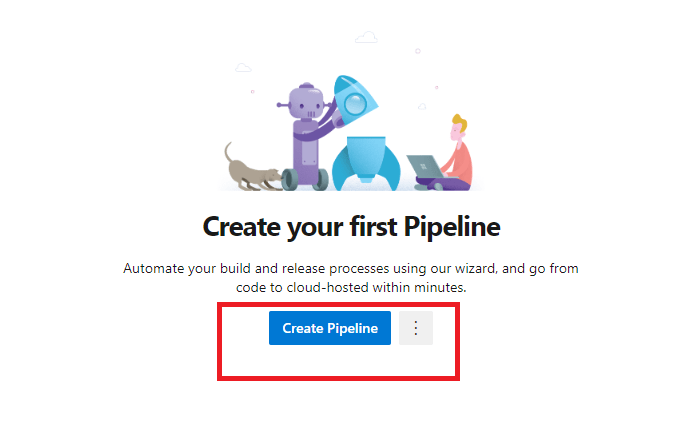
Step 2: Click on Pipelines inside side menu options

Step 3: Now, click on Create Pipeline
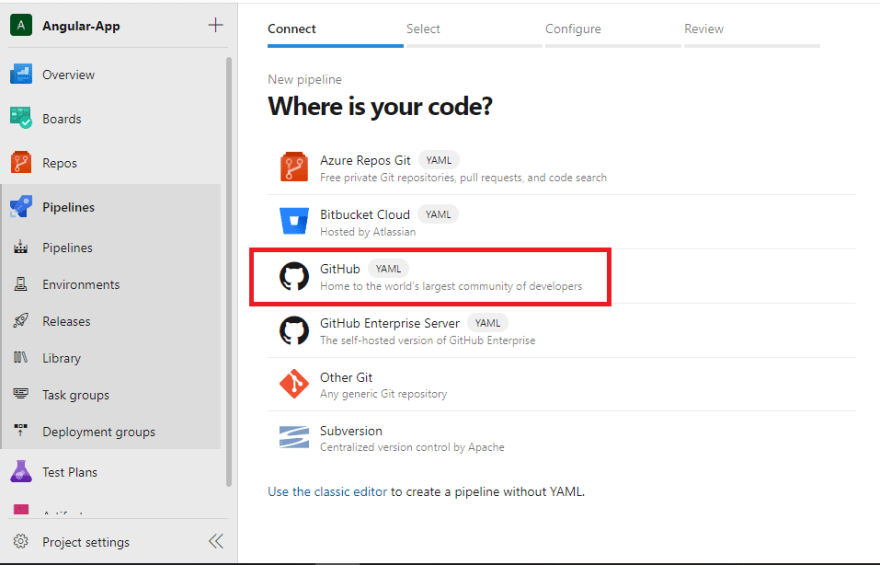
Step 4: Select the source of Repository, as you can see, there are many options
here we’re connecting with GitHub
Step 5: After Authentication, select the repository - you will be able to see all the repositories in your account (Public/Private) — Select the repository

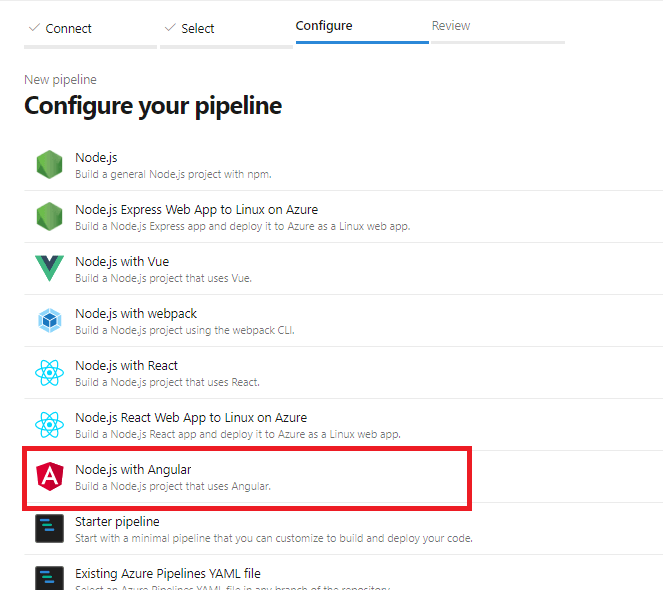
Step 6: In the configuration section, choose the predefined template for Angular
Step 7: After that, you’d be able to see some YAML code — Azure DevOps worked on YAML code
Over here you can see we set a trigger on master branch — so whenever there will be any change in the master branch this pipeline will be triggered
In the scripts section, you can see it’s the same command which we run while creating a production release. (It can be updated accordingly)
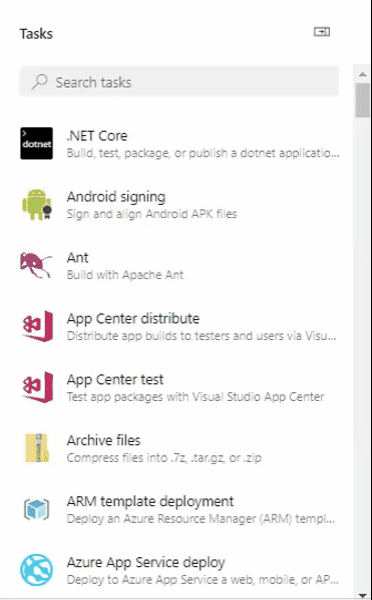
Step 8: You can also add some more tasks in the .yml file from the side Tasks section

There are a lot of actions available in the Tasks section, you just have to choose whatever you required.
Step 9: Click on “Save and Run”.
This .yml file will be saved in your repository itself, you can update it from here or from GitHub anytime as per the requirements.

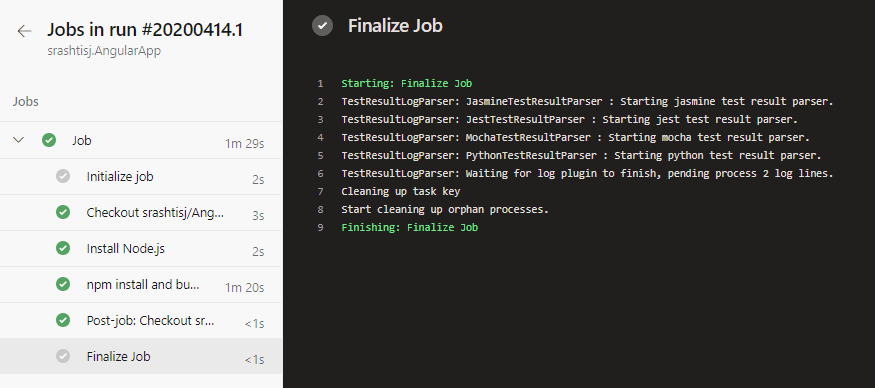
Step 10: Now, you will be able to see this screen
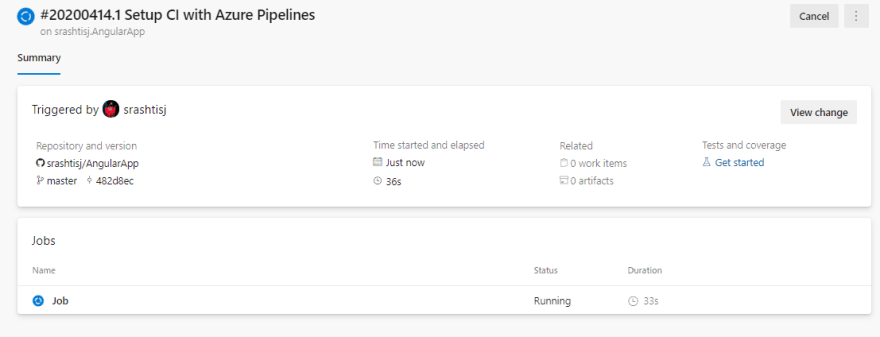
Boom!!! — Here you go, it’s done!
So, this was the basic setup — And I know it was too easy to get started with Azure DevOps Pipeline. 😊
In the upcoming article, we will check how we can add an approval step before deployment. It’s required at the time of production release or will talk more about YAML — please let me know which one you want first, in the comment section. Stay connected!


Top comments (3)
Hello ! The tutorial is cool ! I just want to point out that if you don't use server-side-rendering like angular-universal there is no need to use a NodeJs webapp which is expensive for a small angular project.
You can simply do the build and deploy it on a storage account which is used for static sites and is much cheaper !
Is there a reason you didn't include the testing steps?
Not exactly. I just used the basic template. You can make a pipeline as per your requirements.