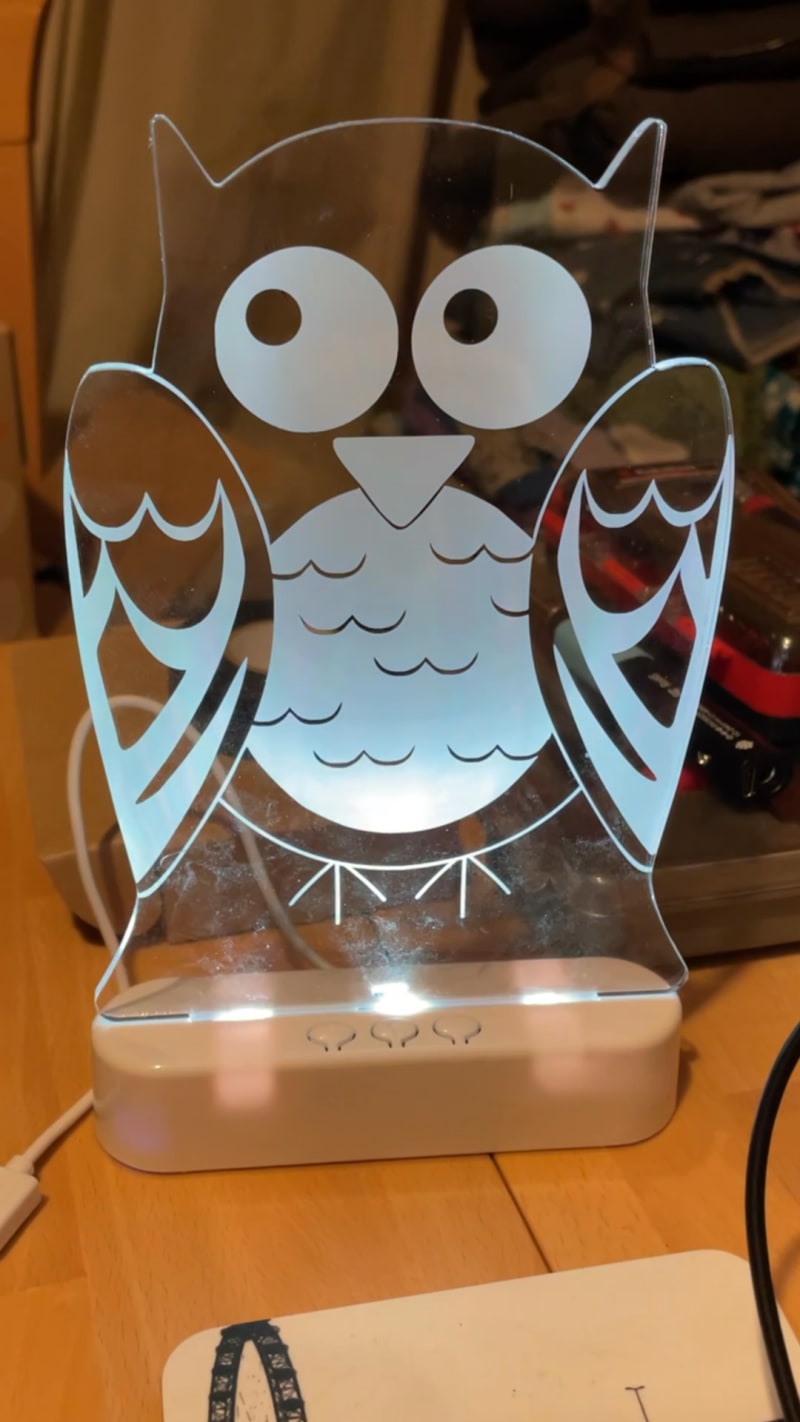
A couple of years ago, I picked up a simple LED nightlight on Amazon, with the intention of hacking it to do “something more interesting”. The lamp could be powered with AAA batteries or a micro-USB connection, and contained multicolour LEDs that shone up into a perspex sheet in the shape of an owl.
It was always my intention to do something “interesting” with this, for example to make it into some kind of notification light attached to my home network, but — as with many side projects — it languished in a box of bits, and I never got around to it.
This weekend, I finally started to exhume some of my old projects and start to re-examine them. As luck would have it, in the case of the owl light, I recently read about an interesting project called WLED (in part due to a series of posts I stumbled across from Tyson Nichols).
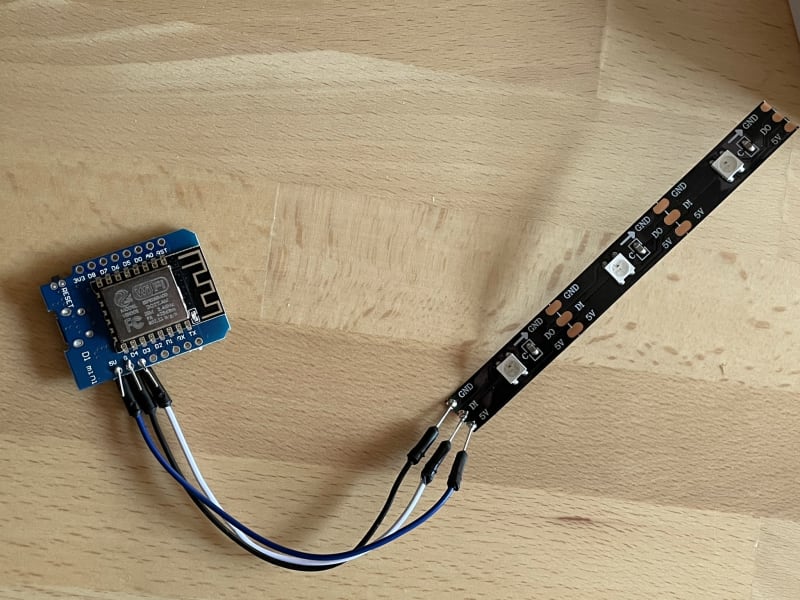
The neat thing about WLED is that it is basically an all-in-one replacement firmware for inexpensive ESP8266 microcontrollers, like the Wemos D1 Mini that I used in this project (many other NodeMCU and related boards are compatible). If you can attach compatible LED strips to the board, you can control them over Wi-Fi. I had a few small microcontrollers sitting in my “bits box”, the only thing I was missing was an appropriate strip of LEDs.
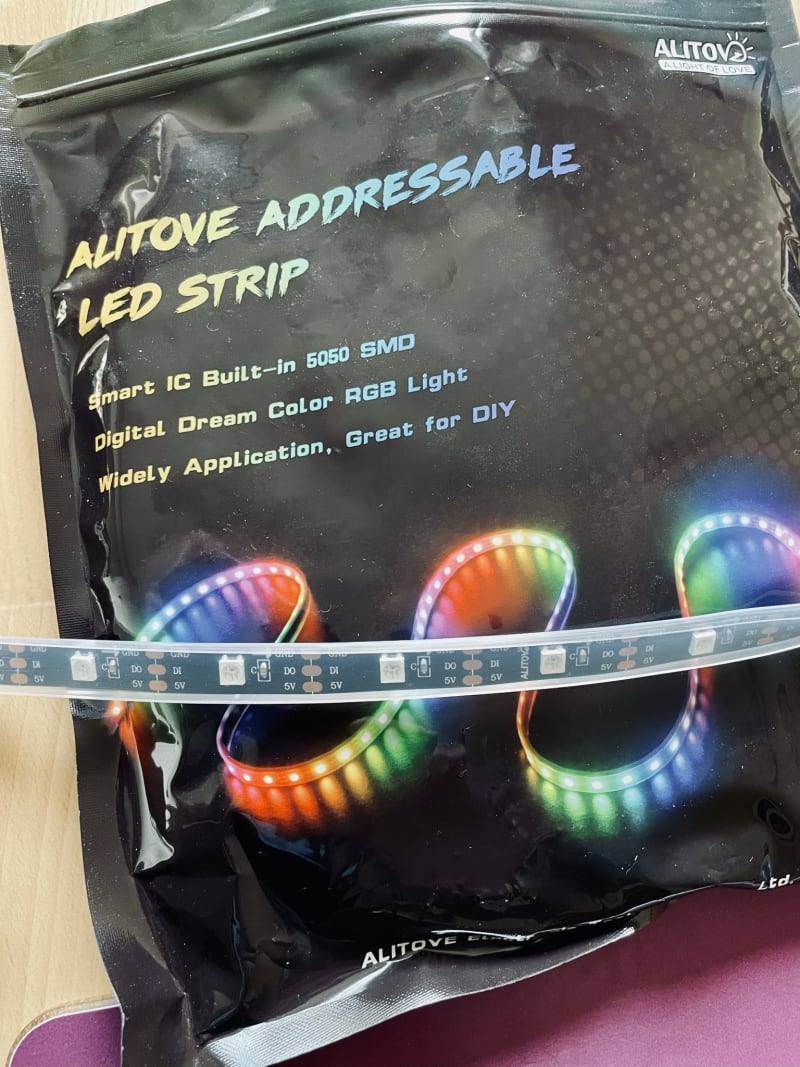
I picked up a 5m pack of Alitove WS2812B weatherproof LEDs.
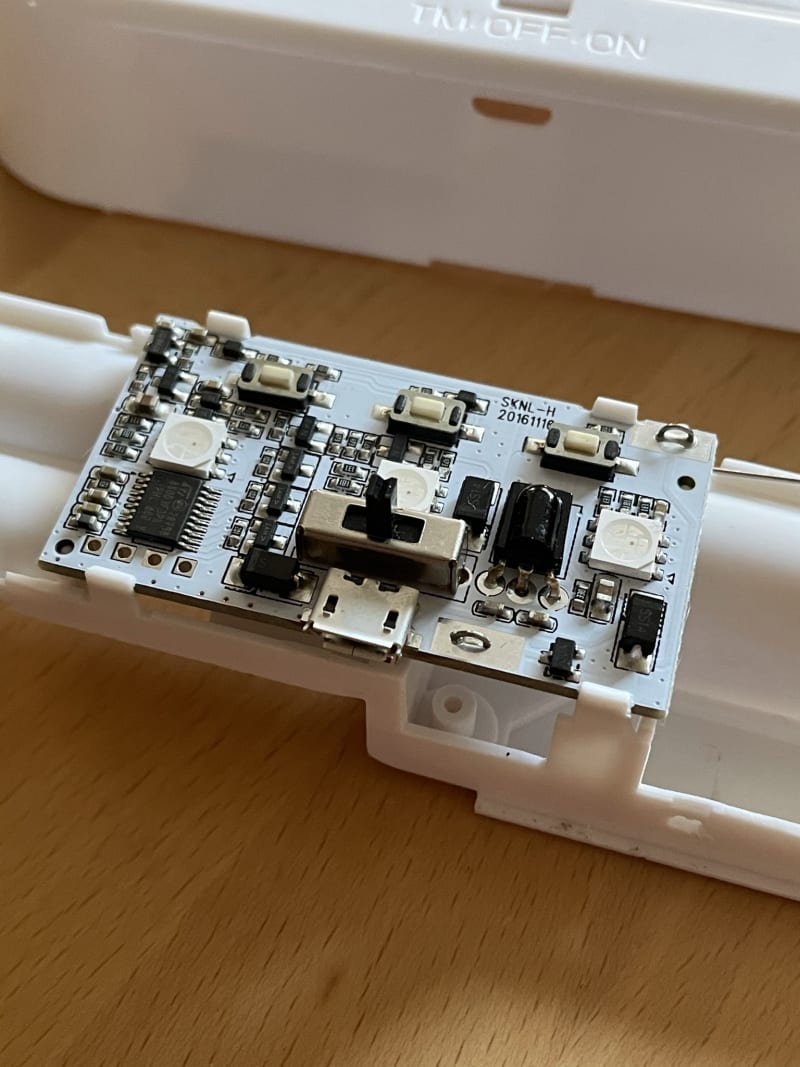
Once I had all the parts available, the next step was to dismantle the lamp and figure out how best to replace the existing innards. With the battery base unscrewed and the plastic clips pried open, a simple circuit board was revealed. This had three buttons to toggle the colour state of the LEDs and increase or decrease brightness; three multicolour LEDs; and a sliding on/off switch. On initial inspection, I considered slotting the Wemos D1 Mini into the same space, but it was just a bit too deep, and the USB connection was on one of the short sides, rather than the long back of the board. I also knew I was not going to run the new lamp from batteries, so this piece could really all go.
I’m a fan of WLED at this point, but I have to say that getting the firmware installed was a lot less straightforward than I had hoped. I’ve been working on building up a Raspberry Pi 400-based setup for coding and general making, and attempting to flash the latest firmware using esptool (before I added any connections) resulted in the board not broadcasting an SSID. I tried the same with another NodeMCU board and saw the same issue. I tried a workaround from one of the related forums, flashing an older version, and still hit a wall. In the end, what worked for me was flashing a 0.8.x firmware using the Thonny editor on Raspberry Pi OS; getting the board onto my home network; and then, using the OTA flash feature to flash the most recent firmware. I can only assume something weird was going on with the esptool options.
Once the board was working with WLED firmware, and I’d soldered on a short strip of LEDs to replace those on the board in the lamp, it was time to get things installed. I used a Dremel to cut a larger hole into the back of the base so that I could feed the micro-USB cable right inside, and used a large amount of black electrical insulating tape to position the LED strip. Some hot glue was applied to keep everything in place, the D1 was folded inside, and the original battery panel clipped in to keep everything in place.
I’m aware that there’s no huge innovation here – the WLED project itself was 90% of the work, all I did was replace the insides of a nightlight with something more interesting. Now though, I can control it via Alexa or Wi-Fi (web and mobile apps), and I’ll be able to MQTT-enable it to hook up to Node-RED for alerting in the future.
I put the process together into a video.

Top comments (0)