
Introduction
A-Frame is essentially a web framework that can be used to create a VR experience on top of your HTML. How cool is that? A-Frame is compatible with most VR headsets including the GearVR and Oculus Go.
Why A-Frame?
- Easy Setup
A-Frame handles all the boilerplate setup to create the 3D experience for you. All you have to do to begin is create an HTML file , add a <script> tag with the A-Frame CDN and then drop <a-scene> tag and voila. Your initial VR scene is ready.
- Its like coding in HTML
So A-Frame follows a concept of declarative HTML and since HTML is easy to read and understand , A-Frame is accessible to everyone.
- Works on multiple devices
Now A-frame like mentioned earlier works on most VR headsets but you also have the comfort of using them on a normal desktop or even a smartphone.
- Entity Component Architecture
While we code on top of HTML that is just one cool feature. The developer simultaneously has access to Javascript , DOM , Three.js , WebVR and WebGL.
- Visual Inspector
Now as a front end developer myself I highly appreciate the use of developer tools to allow me to inspect elements. A-Frame provides a Visual Inspector of its own that allows us to view/inspect the various aspects of the scene. We can open the scene using <ctrl> + <alt> + i or <ctrl> + <option> + i
Lets build our first Scene
Now lets create our first VR scene on A-Frame.
Create an HTML file the following structure
<html>
    <head>

    </head>
    <body>

    </body>
</html>
In the <head> tag add the A-Frame CDN
<script src="https://aframe.io/releases/1.4.0/aframe.min.js"></script>
Inside your body tag add an <a-scene> tag.
Now that the initial setup is done we can start by adding elements to the scene.
Now we need to create an assets section using the <a-assets>. Inside the a-assets section is where we add all our assets like images and videos. Remember to provide each asset with an id attribute as we use this ID to point to the asset wherever we require it.
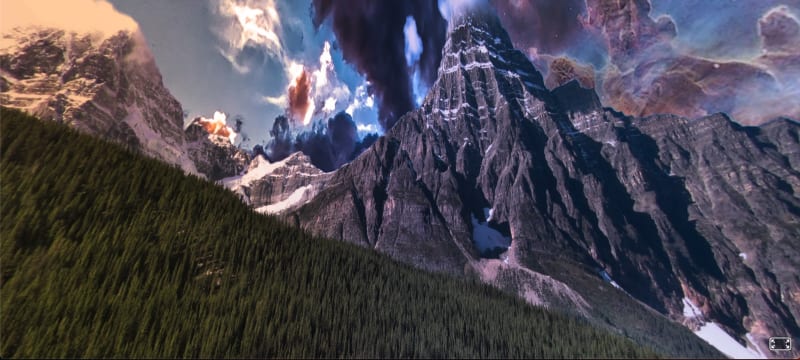
So lets begin with a background image . Let's add a random panoramic Image I found online with the id="background".
Now let's add an a-sky element with src pointing to this image like so.
<a-sky src="#background"></a-sky>
Now once you run the html file your Vr scene should look like this.
and your code will look like this.
<html>
    <head>
        <script src="https://aframe.io/releases/1.4.0/aframe.min.js"></script>
    </head>
    <body>
        <a-scene>
            <a-assets>
                <img src="./background.jpg" id="background"/>
            </a-assets>
            <a-sky src="#background"></a-sky>
        </a-scene>
    </body>
</html>
Now lets add some shapes to the Scene. A-Frame provides use with some primitive elements to use in the scene. For now lets add a box and a sphere. Add the following code
<a-box position="-1 0.5 -3" rotation="0 45 0" color="#4CC3D9"></a-box>
<a-sphere position="0 1.25 -5" radius="1.25" color="#EF2D5E"></a-sphere>
The position attribute determines the position of the element in the scene using x-y-z coordinates.
Now your scene should look like this.

And your final code should look like this.
<html>
    <head>
        <script src="https://aframe.io/releases/1.4.0/aframe.min.js"></script>
    </head>
    <body>
        <a-scene>
            <a-assets>
                <img src="./background.jpg" id="background"/>
            </a-assets>
            <a-sky src="#background"></a-sky>
            <a-box position="-1 0.5 -3" rotation="0 45 0" color="#4CC3D9"></a-box>
      <a-sphere position="0 1.25 -5" radius="1.25" color="#EF2D5E"></a-sphere>

        </a-scene>
    </body>
</html>
Conclusion
You have successfully created your first scene using A-Frame.
I hope this articles helps more front-end developers like me understand how easily a VR scene can be created. Thank You.

Top comments (0)