
First - What on earth is Google Tag Manager? Google Tag Manager (GTM) is a tag management system. A 'tag', in this context, is essentially a relatively small fragment of code. Google Tag Manager allows us to easily add, update, and determine how these fragments of code are used in the measurement of user behavior on a website or app. Measuring user behavior is central to digital marketing for A/B testing, campaign data analysis, conversion tracking, and more. Many tags are built into GTM, allowing non-technical people to make many tracking implementations without the help of a developer. For more complex implementations, custom HTML and JavaScript can be used in GTM.
Here's how to install GTM on your website.
1. Create a GTM account
Before you set up Google Tag Manager (GTM) on your website, you need to make sure you have an account, so go to tagmanager.google.com create one there.
2. Set up a web container
When you’re done, you’ll also need to create a new GTM “container” where all the tags for your site are kept or contained, as the name suggests. In the case of setting GTM up for your website, you’ll want to select “Web” as your target platform. In the menu, you will see other target platform options such as iOS, Android, AMP, and Server, which we will cover in other blog posts.
3. Find the GTM installation snippets and copy
Once you have the container set up, make sure you are on the “Workspace” tab on the upper-left hand side of your GTM interface. When you’re there, you will be able to see a container ID on the right-hand side of the interface in the form of a link, pre-fixed with “GTM-“.
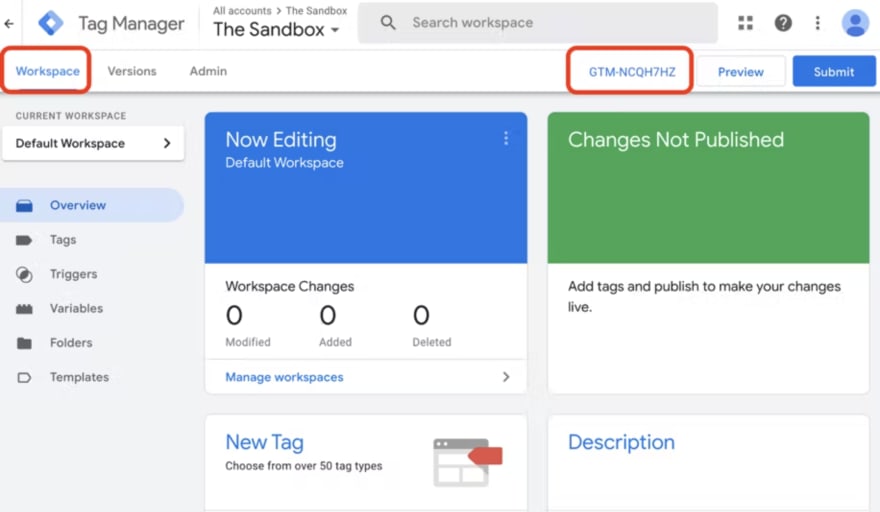
Click that link, and a modal titled “Install Google Tag Manager” will pop up with further instructions on your next steps.
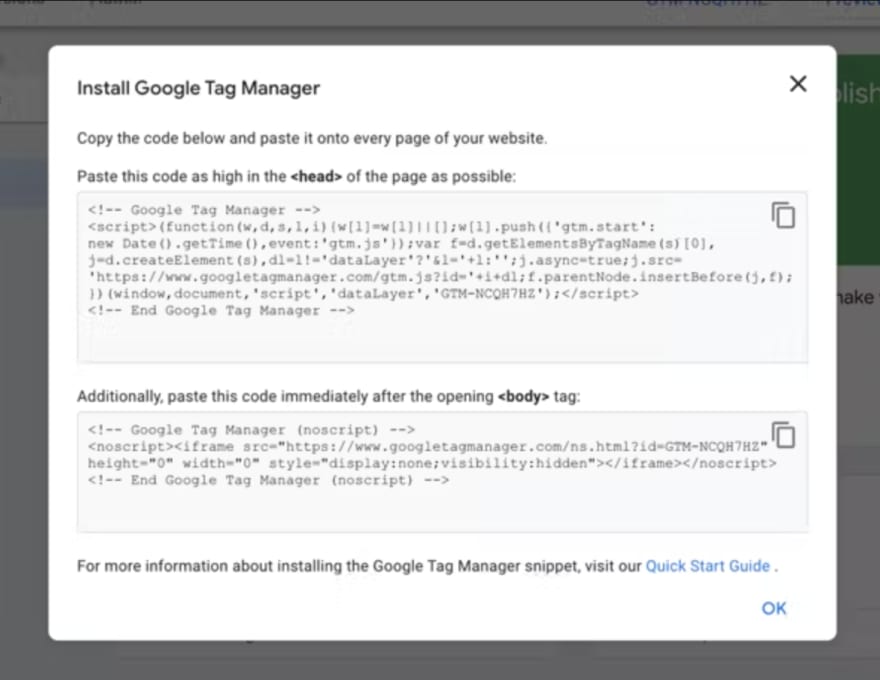
Start with the first snippet: highlight and copy it into your clipboard, or simply click the copy icon on the top right.
4. Paste the snippets into your website’s base code
Depending on how you have your website set up, the process of pasting the GTM installation snippets may vary somewhat. If you are working only with hard code, and not using a popular content management system like WordPress, for example, you’ll have to find the relevant files in your website code and insert the snippets in the right locations. As indicated in the GTM documentation, simply paste the code snippets in their respective places in the head and body of your code.
Okay, that makes sense – you might be thinking – but my website is powered by Wordpress. Now what?
Install Google Tag Manager on your WordPress Website
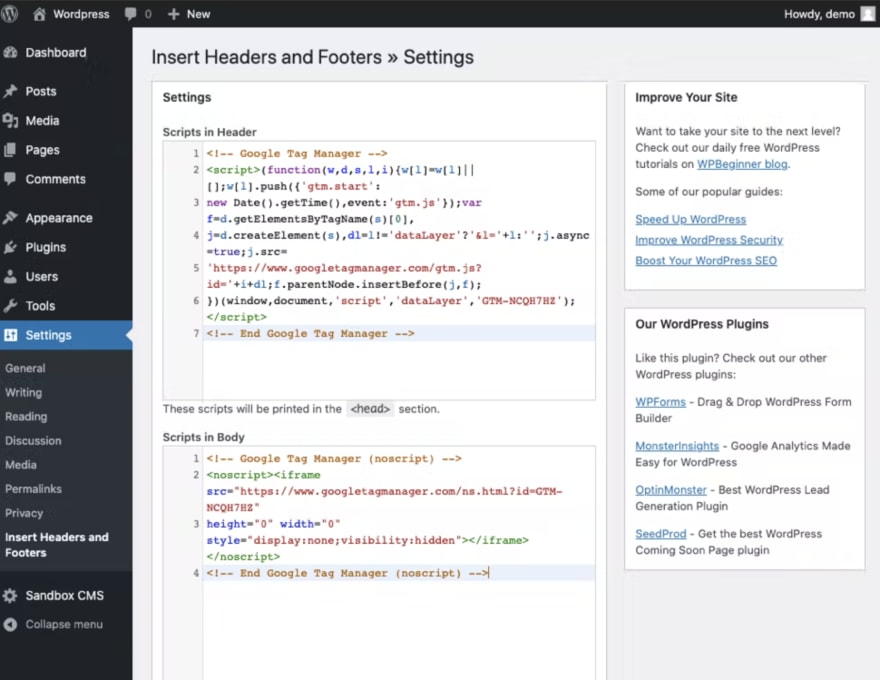
Finding the head and body of your website may not be so straightforward to everyone working with WordPress. Luckily, there is a WordPress plugin that you can install called 'Insert Headers and Footers by WPBeginner'. So, go to your WordPress sidebar, click Plugins and search for this plugin. Next, install it!

Now that it’s installed, go to Settings, then click Insert Headers and Footers. Voila! This is where you will have to paste your GTM installation snippets. After pasting them, remember to save them.
If you are using a platform other than WordPress, the process is the same. Find a way on that platform to be able to insert the GTM installation snippets into the header and body.
Checking Your Setup
Now, how can you quickly verify that you now have GTM set up on your website? One way is to check that your first tag fires. But even before doing this, you could download a Chrome extension called Google Tag Assistant (Legacy). Go to your website, enable Google Tag Assistant, then refresh your page. If GTM is properly set up, you’ll see it next to the green tag icon like below – congrats!

This post was originally published by Analytics Institute on Hashnode on Nov 25 2022.

Top comments (0)