
There are (paid) services out there that let you monitor the price of a certain product on the internet. But did you know that you can write this kind of monitoring tool yourself?
This use case is perfect for a cron job: A cron job schedules the execution of code at specific times (e.g. once a day, every 5 minutes, etc). Cron jobs are usually used by system administrators to make backups of their servers etc. But it can be useful for other (fun) things too!
🗂️ 1. The crontab command
The single Unix utility to know in order to get started with cronjobs is called crontab.
It's named cron*tab* because it refers to the cron*table*, which is a configuration file (also called table). To get more information on the crontab utility, type man crontab into the Terminal.
Two important commands to remember:
✨ crontab -l This displays the content of your current cron table, meaning all your scheduled cron jobs. (If you have never initialized a cron job, it will say "crontab: no crontab for {user}")
✨ crontab -e with which you can edit your cron table, meaning adding and deleting cron jobs! (If you haven't initiated a crontab yet, it will say: "crontab: no crontab for {user} - using an empty one")
Notes about text editors
The command crontab -e will try to open the crontab file with a text editor. If you haven't configured this before, the default will be vim, which is fine. By contrast, I had difficulties using vscode.
Tip: If your default editor isn't vim but you want to use vim only once for this occasion (without changing the default editor settings in your bashprofile), type export EDITOR=vi into your Terminal, this will set your default editor to vim until the end of this terminal session (e.g. until you close the Terminal).
Questions
Why does crontab -e create a temporary file in /tmp? This is normal behavior. Instead of editing the crontab directly, they will let you write into a temporary file first, which will then be copied to the real crontab.
🤡 2. Writing your first (silly) cron job
To get started, let's do something silly. Let's create a cron job that makes your computer say a word out loud every minute. (Very useful to annoy a friend or roommate).
First, open the crontab with the crontab command:
crontab -e
Then add the following line to the file and save the file.
* * * * * say Hello
This will immediately start your first cron job!
But what does this mean? The stars here represent the time instructions (5 stars separated by a space mean „every minute“), followed by the actual shell command (say Hello) that will be executed in the specified rhythm.
Why does * * * * * mean every minute? Because this is the magic instruction syntax of crontabs! And the star means "every" like in regexes.

If you want to learn more about the syntax and how to express situations like every day at midnight, or every 15 minutes in August watch this video.
Okay, this cronjob was just a silly test, so let's delete it! You can just remove the line by editing the file (with crontab -e). Or remove the whole crontab (with crontab -r).
⛓️ 3. Write a cron job that runs code from another file
Instead of typing the actual code we want to execute into the crontab itself, we can write our code into a file and execute the file from the crontab. The file could be written in any programming language you like, e.g. shell, Node, Python etc...
Example 1 (Shell)
* * * * . path/to/my-shell-script.sh
will execute a Shell script. The single dot before the file path means execute („source“) the following script.
Example 2 (Node)
* * * * path/to/your/node/binary path/to/my-node-script.js
will execute a Node script.
Note Example 2: Note that you can't just type node path/to/my-node-script.js, but you have to insert the full path to the node binary too. Why is that? The fact that you can usually run node just by typing node is because you configured your PATH. Cron jobs do not read this PATH like you would expect, that's why they don't know what node or npm is.
You can get the path to your node binary by typing which node into the console. If you haven't installed node at all on your machine, you should do that first (ideally via nvm). But note that this is by no means a requirement to write a cron job. You can choose any other language!
🕵️♀️ 4. Writing the (Node) script that finds the discount
Now let's get to the actual heart of it all: Analysing a website to get details about a certain product. This part very much depends on the website you're analysing. Here is how I approach this:
(1) First I check with a browser plugin called "Wappalyzer“ which technologies are used on the site. This gives me hints about how the website works: Is it a Single-Page-App that consumes a Rest API or is it server side rendered. Does it use any known APIs?
(2) Then I check the network tab in the Browser Dev Tools and filter for „XHR“ requests, and quickly scan through their JSON responses. Is there something that looks like a Rest API to me? Are there any key names in data that seem relevant to me, e.g. product name, price, etc?
(3) If this is the case, we're lucky! We can just parse these JSON outputs with a (Node) script which we will build now.
Note: In case there aren't any JSON responses with relevant data, the site is probably server-side rendered. This means we have to do a little more work by parsing the HTML and look for relevant CSS classes and ids in order to get the data. I'd prefer to do this task in Node, because it is plain Javascript and it has the DOM API natively baked in. But if you write your script in Python, you would have to use a library called Beautiful Soup.
Our little node script is really a piece of cake. We need 1 library, which is called node-fetch, which makes http requests easier.
So let's create a new Node project by
yarn init
And then install the library
yarn add node-fetch
Now let's write our little Node script. Note that the content depends on your usecase, website, etc. You have to write your own! ;-)
const fetch = require("node-fetch");
const URL ="url-for-your-product-from-the-rest-api";
const MAX_PRICE = 999;

fetch(URL)
  .then((response) => response.json())
  .then((data) => {
    const item = data.result[0];
    if (item.price < MAX_PRICE) {
      const message = `PRICE ALARM :-) ${item.price}${item.currency}`;
      sendNotification(message);
    }
  });

function sendNotification(message) {
  /* Because this is a cron job this plain console.log is enough to send an email to me... */
  console.log(message);
}
📬 5. Let the cron job report back to you
Note that in our little script the function sendNotification is really just doing a plain console.log.
But ask yourself, where will a console.log end up if it is run by a cron job? All cron jobs are run in non-interactive shells, there is no terminal screen attached to it!
Most of the time cron emails the output to the user whose crontab the job came from, but only if they have set up a „mailer daemon“ (like sendmail, qmail, postfix). If this isn't the case, the output just lands somewhere on your computer, and nobody really knows where. :-D
In my case I already had such a mailer deamon installed, and the emails ended up in a file under /var/mail. Check out if you have such a file. If this is the case, then your mailer daemon works, and you can easily set the recipient to a real email address, e.g. your Gmail address, like so:
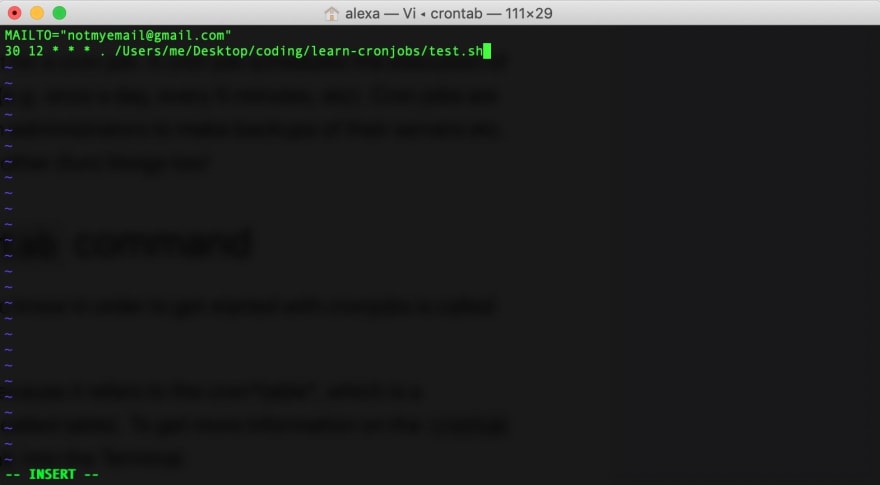
At the top of the crontab file write:
MAILTO="youremailadress@gmail.com"
Then check your Gmail spam folder, after the cronjob was executed (if necessary, change the cron job timing back to each minute for testing). Then click on „report as not spam“ and it will go to your regular inbox.
Yaay, you should now receive an email when the product has a discount!!
😴 6. But wait - what happens when I close my laptop?
Question: Will it run the cronjob nevertheless?
Answer: No! Cron doesn't execute while the computer is asleep.
But there is a trick you can do: You can schedule your computer to "wake up" 5 minutes or so before your cron job is scheduled.
On Mac you can do this via Preferences >> Energy Saver >> Schedule.
Happy cron jobbing!
Credits: Title image by David Vega under CC BY 2.0

Top comments (0)