
EventBus is the number 1 event library for android and java. EventBus uses the publisher and subscriber pattern for loose coupling which means the possibility of errors will be less. EventBus simplifies the communication between different components for example communications between different levels of activities or even services. You need very less or no setup to use EventBus in your existing project.
EventBus provides a convenient annotation-based API which makes it fast and the performance is increased. EventBus is used by many popular apps, apps which has 1 billion-plus download which shows how EventBus popular.
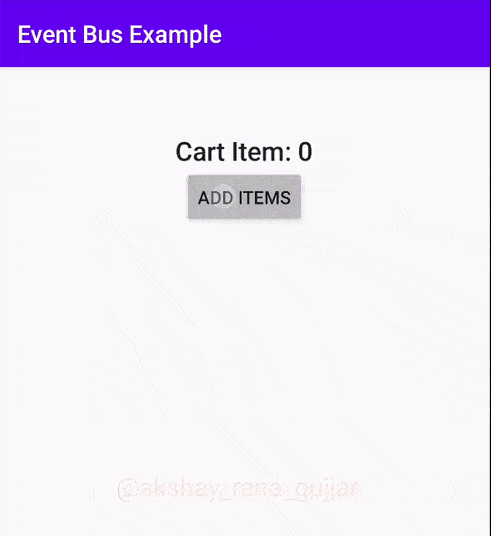
In this tutorial, we will see how we can get started using EventBus in an android project. Before jumping in the code let's see what we will be going to make. To better understanding EventBus we will make an app that allows us to add items to the cart and show the total count of the items. See below how our app will work.
Let's get started.
Add EventBus Dependency in Android Studio
First, we need to add EventBus Dependency in the project. Open your build.gradle and add the dependency.
implementation 'org.greenrobot:eventbus:3.2.0'
Hit the sync button and move to the next step.
Make a POJO class for EventBus
The next step is to make a Java object class to pass in the EevntBus Subscribe method and to be used later.
For our example app, we will make a class with the name of CartEvent.java with a string field for cart items.
See the below code for better understanding.
public class CartEvent {
    public String cartItem;

    public CartEvent(String cartItem) {
        this.cartItem = cartItem;
    }
}
Move to the next step.
See also: Android Libraries for Beginners
Make UI for the App
In the first activity, we have a textview to show the total count of the cart item.
And a button to open second activity to add items in the cart.
See the below code to understand.
<?xml version="1.0" encoding="utf-8"?>
<androidx.constraintlayout.widget.ConstraintLayout xmlns:android="http://schemas.android.com/apk/res/android"
    xmlns:app="http://schemas.android.com/apk/res-auto"
    xmlns:tools="http://schemas.android.com/tools"
    android:layout_width="match_parent"
    android:layout_height="match_parent"
    tools:context=".MainActivity">

    <TextView
        android:layout_width="wrap_content"
        android:layout_height="wrap_content"
        android:text="Cart Item: 0"
        android:id="@+id/cartTextView"
        app:layout_constraintLeft_toLeftOf="parent"
        app:layout_constraintRight_toRightOf="parent"
        app:layout_constraintTop_toTopOf="parent"
        android:layout_marginTop="50sp"
        android:textAppearance="@style/TextAppearance.AppCompat.Title"
        />
    <Button
        android:layout_width="wrap_content"
        android:layout_height="wrap_content"
        android:text="Add Items"
        android:id="@+id/button"
        android:onClick="open"
        app:layout_constraintTop_toBottomOf="@id/cartTextView"
        app:layout_constraintLeft_toLeftOf="parent"
        app:layout_constraintRight_toRightOf="parent"
        />
</androidx.constraintlayout.widget.ConstraintLayout>
Now make the second activity to show the items list and add a method for the button click.
We made simple cart items. We add 3 items but in the real world application, you should use recyclerview or any other view to make a list of items.
Here is the second activity XML code.
<?xml version="1.0" encoding="utf-8"?>
<androidx.constraintlayout.widget.ConstraintLayout xmlns:android="http://schemas.android.com/apk/res/android"
    xmlns:app="http://schemas.android.com/apk/res-auto"
    xmlns:tools="http://schemas.android.com/tools"
    android:layout_width="match_parent"
    android:layout_height="match_parent"
    android:padding="15sp"
    tools:context=".MainActivity2">

    <TextView
        android:layout_width="wrap_content"
        android:layout_height="wrap_content"
        android:id="@+id/item1"
        app:layout_constraintLeft_toLeftOf="parent"
        app:layout_constraintTop_toTopOf="parent"
        android:text="Item 1"
        android:layout_marginTop="25sp"
        android:textAppearance="@style/TextAppearance.AppCompat.Title"
        />

    <Button
        android:layout_width="wrap_content"
        android:layout_height="wrap_content"
        android:id="@+id/addItem1"
        android:text="Add to cart"
        app:layout_constraintRight_toRightOf="parent"
        app:layout_constraintTop_toTopOf="@id/item1"
        app:layout_constraintBottom_toBottomOf="@id/item1"
        android:onClick="addItemToCart"
        />

    <TextView
        android:layout_width="wrap_content"
        android:layout_height="wrap_content"
        android:id="@+id/item2"
        app:layout_constraintLeft_toLeftOf="parent"
        app:layout_constraintTop_toBottomOf="@id/item1"
        android:text="Item 2"
        android:layout_marginTop="25sp"
        android:textAppearance="@style/TextAppearance.AppCompat.Title"
        />

    <Button
        android:layout_width="wrap_content"
        android:layout_height="wrap_content"
        android:id="@+id/addItem2"
        android:text="Add to cart"
        app:layout_constraintRight_toRightOf="parent"
        app:layout_constraintTop_toTopOf="@id/item2"
        app:layout_constraintBottom_toBottomOf="@id/item2"
        android:onClick="addItemToCart"
        />

    <TextView
        android:layout_width="wrap_content"
        android:layout_height="wrap_content"
        android:id="@+id/item3"
        app:layout_constraintLeft_toLeftOf="parent"
        app:layout_constraintTop_toBottomOf="@id/item2"
        android:text="Item 3"
        android:layout_marginTop="25sp"
        android:textAppearance="@style/TextAppearance.AppCompat.Title"
        />

    <Button
        android:layout_width="wrap_content"
        android:layout_height="wrap_content"
        android:id="@+id/addItem3"
        android:text="Add to cart"
        app:layout_constraintRight_toRightOf="parent"
        app:layout_constraintTop_toTopOf="@id/item3"
        app:layout_constraintBottom_toBottomOf="@id/item3"
        android:onClick="addItemToCart"
        />

</androidx.constraintlayout.widget.ConstraintLayout>
In the above code, we have added the onClick attribute and pass the addItemToCart method name.
And made the appropriate method in the second activity java.
public void addItemToCart(View view) {
}
Now implement EventBus in the project.
Let's make the subscriber and in the subscriber method, we will add items to the list.
See below to understand.
Make Subscribe Method of EventBus to update Cart
We will show cart count in the first activity so we need to update cart count in the subscriber method. Open your java file and create a method onCartItemAdd and in the parameter, we will get our CartEvent object.
to read further please go here: EventBus Library for Android
Thank you for reading have a nice day.

Top comments (0)