
Originally published on my blogging site ajeet.dev
I will write several blog posts on Python. All of them will be focused on the beginners to get them started with Python for Data Science. Follow the updates here : Learn Python Step by Step - A Blog Series by Me 🚀. Don't forget to subscribe to my weekly Newsletter 📧
I am a newbie in tech. This blog post is based on my personal experience. Feedback Welcome. Would really appreciate your time 🙏
Project Jupyter is a non-profit, 100% open-source project. It develops software and web applications to support interactive data science and scientific computing. JupyterLab, Jupyter Notebook, and Jupyter Hub are the three key open source software developed by the team.

Jupyter Logo is taken from Jupyter.org
The Jupyter Notebook is a web app that lets you easily create and share documents that contain your live source code, markdown text, equations and visualizations - all in one canvas called a Notebook. It supports dozens of programming languages such as Python, R, Scala, Spark, and Julia.
Data scientists use Jupyter Notebooks for several tasks - data analysis, cleaning, transformation, modelling, visualizations, machine learning, and so on. You can easily explore data using the popular Python libraries such as pandas, scikit-learn, ggplot2, TensorFlow.
You can easily set up and use Jupyter Notebook with Visual Studio Code, run all the live codes and see data visualizations without leaving the VS Code UI.
This blog post is a step-by-step guide to set up and use Jupyter Notebook in VS Code Editor for data science or machine learning on Windows. The post is written exclusively for the beginners in tech.
Table of Contents
- 🛠️ Set up our environment - Create a Jupyter Notebook
- ⚙️ Work with code cells in the Notebook Editor
- 🔥 Key Features of Jupyter Notebook Editor
- 🤝 Python Interactive - A Mix of Jupyter Notebook & Python Script
- 🔥 Key Features of IPython Interactive
- 💡 What's Next
- 🧰Additional resources for continued learning

🛠️Set up our environment - Create a Jupyter Notebook
To set up your environment, you can either use a combination of WSL and VS Code, or Windows 10 with VS Code. I am using the former - Windows Subsystem for Linux (WSL) on Windows plus VS Code. Read this guide why I use WSL.
We will set up our Jupyter environment by creating a new Jupyter Notebook. If you have followed my WSL guide, you would have seen Ubuntu terminal by now. Let us create a Jupyter notebook. Open VS Code integrated terminal. Here is the quickest way to open VS Code integrated terminal inside Windows Subsystem for Linux (WSL). This will automatically open the Remote WSL. The view should look like this:

Now, press CNTRL+SHIFT+P button simultaneously using your keyboard. This will bring up a dropdown view in the VS Code Editor view. Enter Python: Create New Blank Jupyter Notebook and select it from the dropdown. Clicking on it should load Python extension if not loaded before.

Once connected, the first view should look like this:
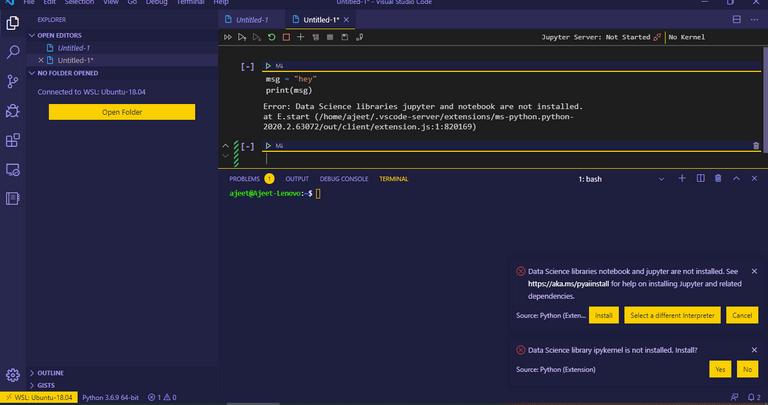
The top right of the VS Code UI says "Jupyter server: Not started". This means Jupyter library is currently not installed inside WSL. You will also get two pops, one of which says, "Data science libraries notebook and jupyter not installed". Click on "Install". It will install Jupyter. Let it first install automatically.
Next, click on "Yes" prompt where it says "Data Science library ipykernel is not installed. Install?".

One thing is to note that, you may see a pop up saying "Error: 'Kernelspec' module not installed in the selected interpreter ({0}). Please re-install or update 'jupyter' ".
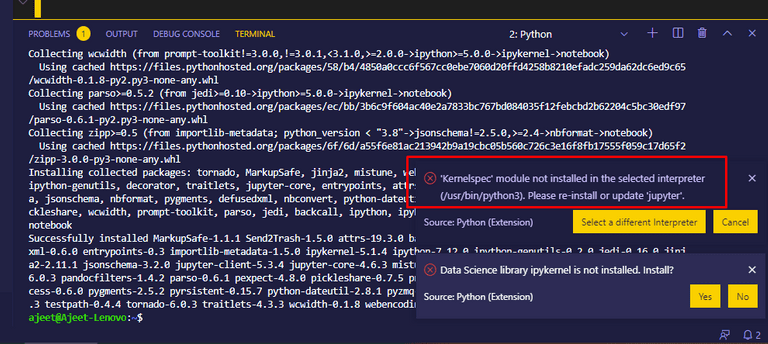
Many people have reported this. Here is a fix taken from official VS Code Python extension. In the integrated VS Code terminal, run both the commands one by one:
python3 -m pip install --upgrade pip
python3 -m pip install jupyter
Restart VS Code editor, and you should not see the pop up now. Let me know in the comments if the issue still persists. We will fix it together.
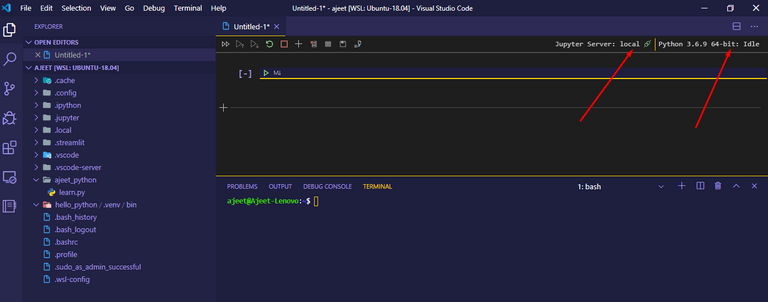
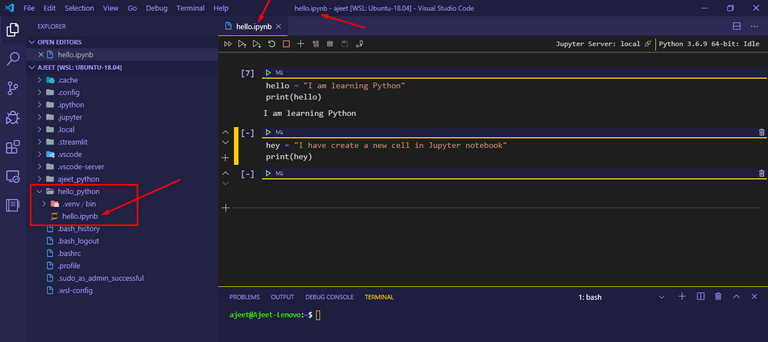
Congrats! You have set up the Jupyter library in VS Code inside the Windows Subsystem for Linux. I have written something in my Note. The final view should look like this.
⚙️ Work with code cells in the Notebook Editor
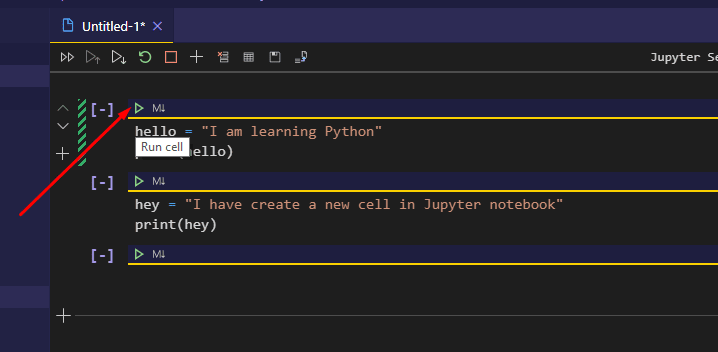
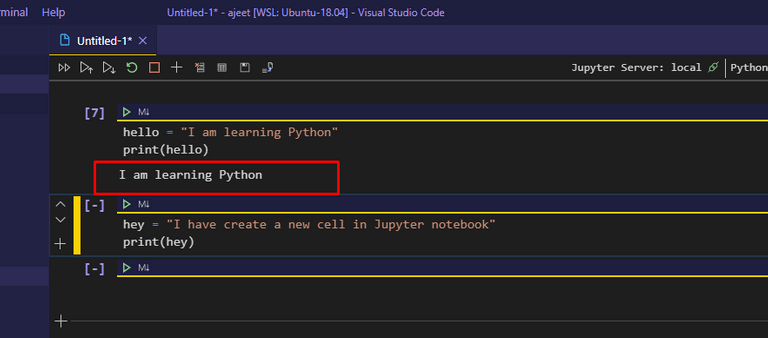
In the view, you should see M with a down arrow. Just below this, you will find cells to type in your code. Copy and paste these lines:
hello = "I am learning Python"
print(hello)

To run this code, click on the green run icon next to the cell. This will run the code cell.
The output of the code cell will appear just below the code cell.
Now, we will save our Jupyter notebook in our desired directory. I will save it in "hello_python" folder. Press CNTRL+S button simultaneously using your keyboard.
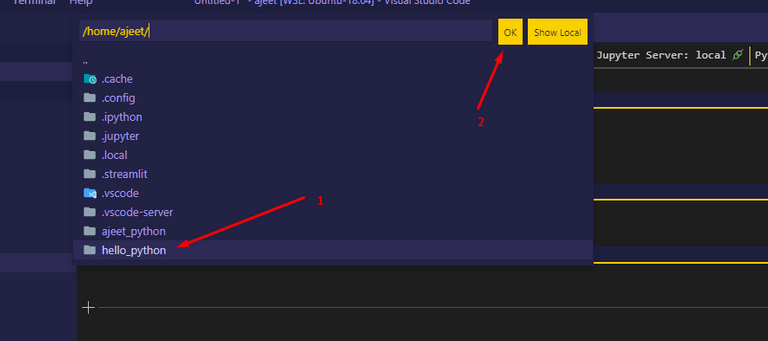
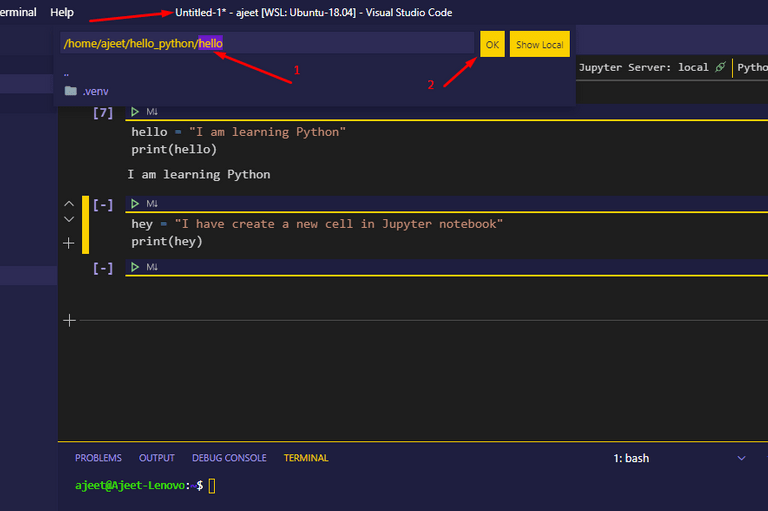
Note the format of the file once you save it, it will be .ipynb format.
🔥 Key Features of Jupyter Notebook Editor
The VS Code Jupyter integration is loaded with a lot of features.
🤝 Python Interactive - A Mix of Jupyter Notebook & Python Script
One of the finest features of the Python VS Code extension is the hybrid
approach to use Jupyter notebook and a Python script. Confused? This is
the Python Interactive window. Once we set this up, the final view will
look like this:

Save the .ipynb file as python script. Click on the "convert and save to a
Python script" option located at the top of the Editor view.

Once you click on the "convert and save to a Python script", VS code editor
will open up a new file. Here is the view of the Untitled-1 file. The format of the file is .py
Save this file and rename it whatever you like it to. Make sure the file extension is .py. My file name is PythonScript. Click on OK.

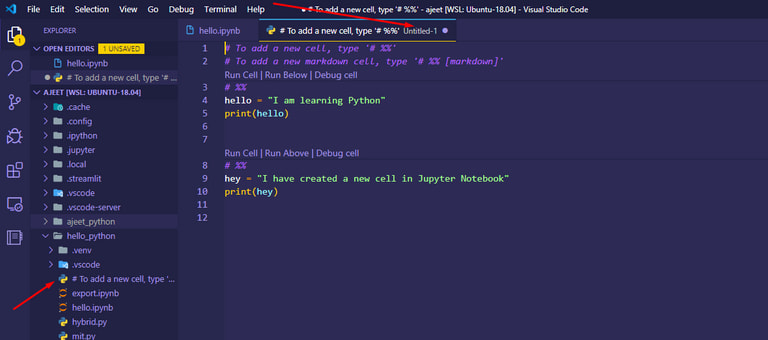
Once you rename the file, the view will look like this:

You will get three options in this view - Run Cell, Run Above, and Debug Cell. Click on the options to see the results.
Now, in the Python extension's settings, we need to tick the Data Science: Debug Just My Code option. To do this, press CTRL+, button simultaneously using your keyboard. This will open up the Settings box. In the search box, paste this: Data Science: Debug Just My Code. Select this Option. Since I am using Windows Subsystem for Linux environment, I have first clicked on Remote [WSL:Ubuntu-18.04] and then checked the Debug Just My Code.

Now, close the Settings option. Let us get the Ipython Interactive view. In
the file PythonScript.py file, click on any cell & press SHIFT+Enter keyboard button. This command opens up the Python Interactive window with the output of the code cell you just ran. It will have three sections: Python Script file code view, IPython Interactive, and a Console to run command.

Click on any code cell in the PythonScript window & press SHIFT+Enter keyboard button to get the output in the IPython Interactive window.
One of the key features of the IPython Interactive is the Console window in which you can run any code and get the output of that single code. Just enter your code and press SHIFT+Enter keyboard button.


🔥 Key Features of IPython Interactive
The Ipython Interactive window has almost all the features of the Jupyter Notebook.
- IntelliSense
- Data and Variable Explorer
- Plot Viewer
- Debugging
- Convert Jupyter notebooks to Python code file
- Export Python Interactive window or Python file as a Jupyter Notebook
- Connect to a remote Jupyter server
💡 What's Next
I am going to write about data structure and algorithms in Python. Meanwhile, if you are a newbie in Python, follow this track.
Newbie in Python? Follow this track
I will add many more posts under this track. Stay Tuned. Subscribe to my Blog.
🧰 Additional resources for continued learning
Here are the recommendations to learn more about VS Code Python extension's usage.
Credits 🙏 :
Official Microsoft Docs on Jupyter Notebook
Emojis taken from Emojipedia
Cover image built with BlogCover


Top comments (8)
great write I used jupyter online to start learning DS, now i want an offline environment, please honestly compare Jupiter and anaconda, which will be perfect for me?
thanks
Thanks Alara :)
Anaconda is all about DS/ML. It has its own Python package manager called
conda, and it supportspipas well. Managingvirtualenvis easy, no need to specify a directory where you want the environment to be set up.Without a doubt, go for it :)
Heard a lot about ipython interpreter, but anaconda sounds so so robust, it's like a world of it's own
Try JupyterLab once you insall Anaconda. You will fall in love with it.
Here is how it looks.
Jupyter lab seems more intuitive than Jupyter notebooks although i got both of them to work offline
What I am trying to wrap my head around now is the whole environments thing in anaconda.
It seems to me that packages are different from the tools(Matplotlib, NumPy ... ) (Jupyter, kite, Ipython ...)
So the tools are always available in every environment, but the packages have to be installed I think, as they are only available in the base environment, which isn't encouraged to be worked on.
My question is, when we install a package (say numpy), that is already in the base environment, is it installed fresh from the internet, or is it just copied over from the base conda environment. ?
If you are using Anaconda distribution, you don’t need to separately installing NumPy or any of the major packages , like pandas, Scikit-Learn... To use NumPy, you just run the command
import numpy as np.But if you have not installed Anaconda, but you have Python installed, in that case you have to install it using
conda install numpyorpip install numpy. Installing will require an internet connection this time. Then you will import it -import numpy as npSure boss!! that settles it!!!
Hi, I have exactly the problem you described: "Error: 'Kernelspec' module not installed in the selected interpreter ({0}). Please re-install or update 'jupyter' ".
I tried your fix, and it says Requirements already satisfied, but when I restart VScode I still get the exact same problem when I want to Select Interpreter for Jupyter.
Any other idea what to try?