So whether you are a web or mobile app developer, I am pretty sure that you would have surely heard about the mobile UI framework to build native apps in record time called Flutter Framework. It’s open-source, Single code based toolkit backend by Google!!
If you are interested in starting your Flutter journey, please go through this article; trust me, you will thank me for sharing this knowledgeable piece of information moreover a tutorial.
In this article, I am going to discuss how you can start your Flutter journey with very basics and essential requirements that you will need to be a Flutter dev!!
1. First of all install Flutter
In order to get started, you will be required to download Flutter SDK.
Please head to this link Install Flutter.
2. Flutter Building Blocks.
As you are new to the Flutter, so I would like you to remember one thing that “everything in Flutter is Widget.”
Now you if you are wondering what this widget actually is, think of widgets as something that describes your application.
For example, Text Field, Buttons, Padding, Row, Column, Loader, etc.
Stateful widget and Stateless Widget
If a widget changes when the user interacts with it, then it is called a Stateful widget, and if the widget doesn’t change, that means it’s a stateless widget.
Let’s understand this terminology with a simple example.
Stateless Widgets:
If you have a component such as your app logo or labels like “please login,”
You know these things are static and are never going to change in the future. These widgets are called “Stateless Widget” just because their value and state will never change.
Stateful Widget:
Now assume that you have a counter, and the value of the counter is going to increase when the user presses a button such as 0, 1, 2…
It can be seen like this:-
{
Current state: 0
Next State: 1
}
So in this case you can continuously change the value, means you are continuously changing the state,
This is called “Tasteful widget” !! Pretty easy, isn’t it!
To understand more in-detail, please go through this link- Stateful and Stateless Widgets
Moving forward to pubspec.yaml: -
This is called a pub file.
pubspec.yaml file is required in order to add any configuration regarding assets used in the application.
Every configuration and every third party plugin needs to be added in this file; if you are an Android developer, you may consider this file as your “Gradle” file. If you are an IOS developer, you can think of this file as a .plist file. You can configure your images, fonts, and any third-party plugins in this file. This file also holds information on your app version.
Packages and Plugins: -
App developers often need some plugins or third parties to meet their project requirements.
So these best Flutter libraries are called “Plugins” in Flutter.
For example:
- shared_preference
- HTTP
You can get all the plugins from Pub.dev Website.
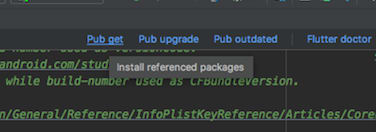
After selecting which plugin you want to use, you can add it to pubspec.YAML file and click the “Pub get” button in the top right corner of IDE. This way, you will be good to go with your favorite plugin.
Folder Structure: -
Your initial flutter structure looks something like this,
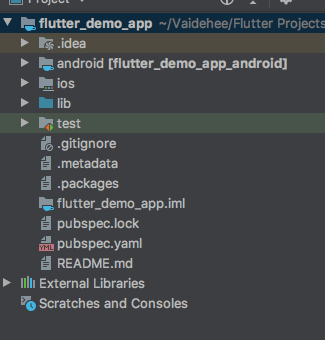
There are mainly three folders to add your codes
- lib Folder - you have to write your Flutter code in this folder only
- Android Folder - here you can add your native android related configuration if required
- iOS Folder - here you can add your iOS native related configuration
Dart Files: -
Flutter is awesome; you can write your whole application in a single file, pretty cool!
But to make your project look neat and clean, you should always practice writing all your UI or class files in different files.
.dart is an extension to describe your Dart or Flutter related file.
You can always create a new file by right-clicking on the lib folder and selecting “dart file” from the menu, as shown below.

Main.dart File: -
When you click the “lib” folder, you will see an auto-generated file. It is the “main. Dart” file and this particular file is the only entry point of your application. Then you can navigate to any screen in the project, but the main.dart is a must.
You can assume it as a bus ticket without which you can not travel on the bus.
Always practice writing your main.dart file as clean as possible, it’s just the entry point rest class should be indifferent file
Code snippet of main.dart file:
Void main()
{
runApp(LoginScreen()); // add your screen name here
}
//Create dart file for your login screen “login. dart”
Class LoginScreen extends StatelessWidget{
//every stateless and stateful widget must override build method in order to start working
@override
Widget build(BuildContext context) {
return Container(); //here you can return any widget you like according to your designs
}
}
So these are all the basic requirements and understating required to know Flutter, it’s Blocks, and it’s Structure.
Please go through the below links to learn the very basics of Flutter; these are the links I referred to when I started my Flutter journey.
- To know about every flutter widget in one minute, you can visit the Widget of the Week!!
- To learn everything in deep from official flutter people, please visit Flutter in Focus !!
I can’t wait to see what you come up with, and I hope this tutorial acts as a kick-off point to write your first Flutter app project! In case of doubt or suggestions, please feel free to get in touch in the comments section below.
I hope your purpose of landing on this article of getting started with Flutter has been served.
Have a Happy Fluttering :)


Top comments (0)