Nuxt 3 is an incredibly amazing Vue.js meta-framework. Its exceptional performance, delightful developer experience, and plethora of features make it a popular choice among developers. In this post, we'll explore how we can harness Nuxt 3's capabilities in conjunction with Garchi CMS, a powerful headless CMS, to create a headless blog.
Let's first demystify a couple of key terms before diving in.
1. Headless CMS
A headless CMS is a type of content management system that provides back-end content management functionalities without any predefined front-end delivery layer. It disseminates content through APIs to any platform or device, empowering developers to construct custom front-ends. This method ensures greater flexibility, scalability, and swifter content delivery.
2. Garchi CMS
Garchi CMS is our proprietary, cloud-based (SaaS) headless CMS. Initially built for the e-commerce industry, it has since been extended to accommodate similar systems like e-learning platforms, blogs, and more. Its core appeal lies in its minimalism and the inclusion of REST APIs. No need to install packages or perform any initial setup other than generating an API token. Its lightweight nature allows it to be used as a component in a diverse range of applications or software.
Tech stacks we will use
- Nuxt 3
- Tailwind CSS
- Garchi CMS
Now that we're up to speed, let's configure our blog's backend on Garchi CMS. For simplicity, we won't be including authentication, but feel free to integrate it with services like Firebase, Supabase, or any other of your choosing.
Start by visiting Garchi CMS website and registering a free account.
Upon successful registration, you'll land on a dashboard with a default space.
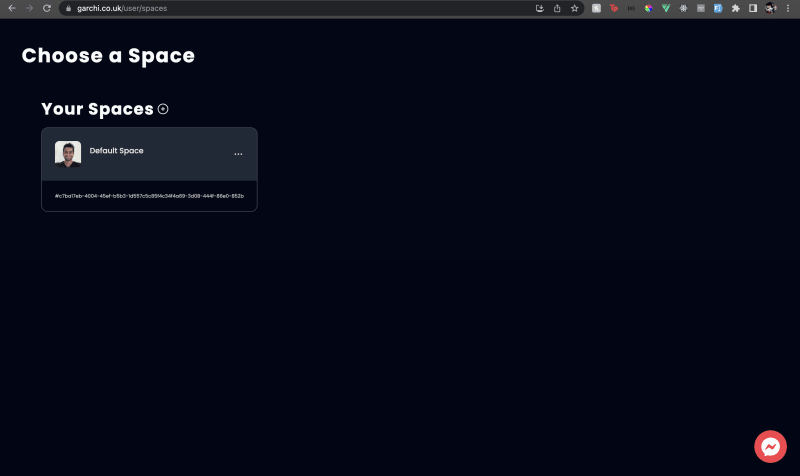
'Space' in Garchi CMS can be thought of as a workspace dedicated to a single system. For example, one space might be reserved for blog articles, while another could cater to product listings. You can either continue with the default space or create a new one.
I will go with the default space and we should see a dashboard like this

We'll begin by establishing categories. You can find this option in the sidebar, under 'Data Set -> Manage Categories'. Add a new category, for example, 'Blog'.

This will be our parent category for blogs and within that we can have sub categories. So I will create another category say Web Dev.

With our categories established, we can proceed to add items. Garchi CMS's item schema echoes its e-commerce roots, but you can extend it with additional features or data points using the 'Add extra details' function.
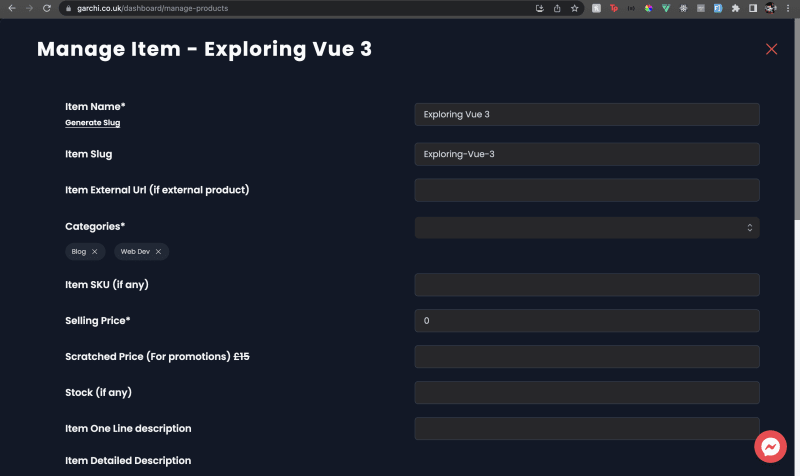
To create a new item (which would be a blog post in our case), click on 'Add New Item'.

For our example, let's generate a simple blog on Vue 3, classified under the 'Blog' and 'Web Dev' categories. To expedite the process, we'll use Garchi's built-in GPT support to generate an item description (which will be our blog article body). Although our example utilizes text content, you can include images, videos, and embeds.
(Don't worry this current article is all written by me :D)
We can keep the selling price to 0.
So we would have something like this

Once you've added the necessary details, you can either 'Save and Publish' immediately or schedule it for a later time.
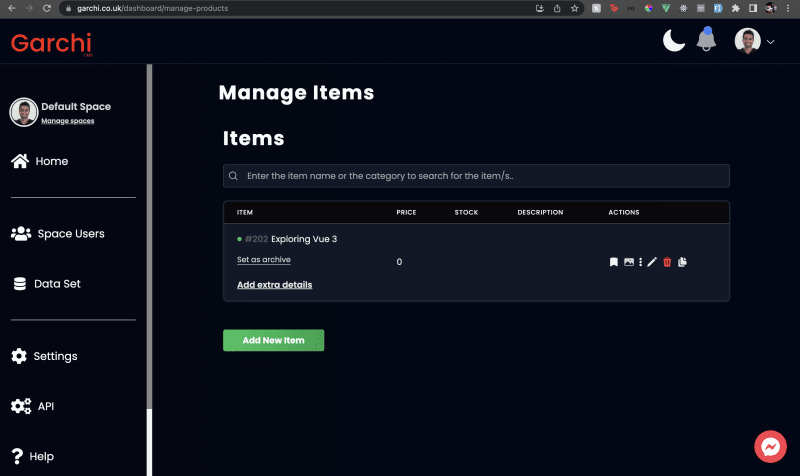
You can augment your post with additional information using the 'Add extra details' option under the item. Let's add details like the author's name, publication date, and avatar.
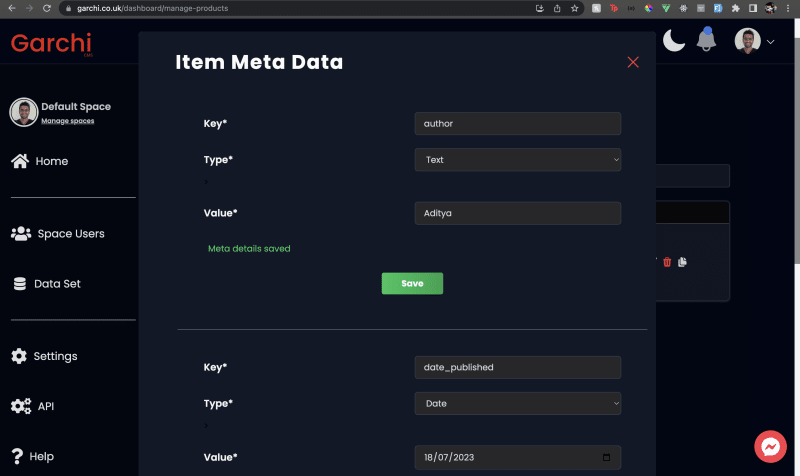
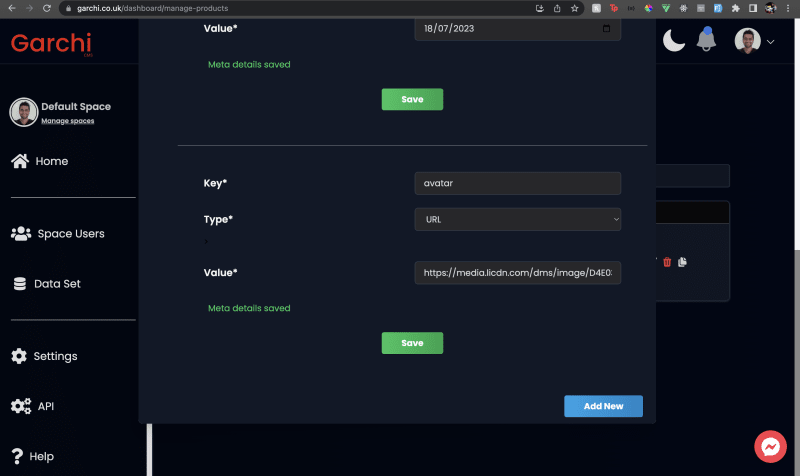
These additional details are formatted as key-value pairs, and you'll need to save each section individually. These pairs will be useful to extract metadata or filter items using the Garchi CMS API later.
Next, add an image for the blog post by clicking on the image icon.
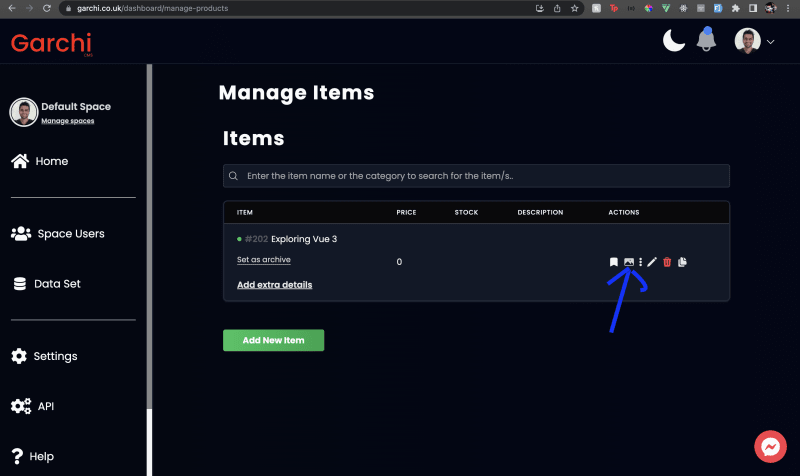
Garchi CMS allows you to add up to four images per post. However, to keep things simple, we'll only add one image for now.

Finally, generate an API key to use Garchi CMS APIs from the Nuxt 3 end. Click on 'API' in the sidebar and then 'Create New Token'.

You should now see your API key. Keep this safe, as it's essential for billing purposes. You can also invite more team members to collaborate on your project.
That's it for this part. We'll continue setting up the Nuxt 3 end in our next part.

Top comments (0)