
Libshare helps you curate and share your favorite NPM libraries with the community. Showcase all the awesome libraries that you used in your side project and give them visibility. Made for the ♥ of open-source.
What is Libshare?
You can think of Libshare as a curator for JavaScript libraries. How often do you come across a library and then when you need to use it, you forget the name of the library?
Happens to me every time. Libshare solves that problem.
Another great use-case for Libshare is to bring visibility to the open-source packages that are used in your projects. Don't let them hide in your package.json file. Let people know about the libraries that are used in building amazing products.
Curate all the libraries used in your project and add them to a list. You can get a public shareable link to it which can be added in Github Readme or blog posts. This makes it easier for people to find out more about the libraries.
Tech Stack
If you look at the subtitle for the blog post, it says "Powered by Angular and HarperDB". Notice that there is a front-end framework and then there is a Database. You might be wondering What is the back-end used for?

The interesting thing about the project is that I didn't have to develop a separate back-end, I didn't have to deploy it, set up SSL, or do any of the things I usually do when I'm building a side project.
The whole back-end is written as Custom Functions in HarperDB. It's crazy, I know right? I didn't think that it could do so much when I was first introduced to HarperDB. But once I used it, I can say that it has great potential.
I'll make sure to link to the list of all the libraries that are used in making this project.
Setting up the Back-end
So there are two parts to the Back-end.
- Setting up Database
- API Server which talks to the DB
Let's start by setting up the DB for the application.
We are going to be using a functionality called Custom Functions.
HarperDB Custom Functions
Custom functions are one of the most interesting features of HarperDB. It's so versatile and makes life easy for a developer.
Custom functions allow us to create API routes inside of HarperDB. Yes, you heard me. No need to create a separate API server.
You can directly interact with HarperDB from within the custom functions. What this means for you is that no more configuration or initialization is required.
You can write the whole server in the Integrate IDE in HarperDB Studio or if you are like me who prefers to do things locally, you can write your functions locally and then deploy it once it's ready.
I'll be setting up a local instance of HarperDB to write the custom functions and then once everything is ready, will deploy it to a cloud instance. In this way, I can code faster, test it out better, and once everything is ready, deploying it is easy-peasy.
Note: If you like to write your functions inside the Harper Studio, you can skip setting up the local instance and write your functions directly in the cloud instance.
Setting up a HarperDB
There are two ways to setup HarperDB:
- Use their cloud offering
- Self-host
Installing HarperDB using Docker.
There are different ways to install a local instance. You can read more about them here. I'll be using docker to create a container using the harperdb/harperdb image.
Create a file called docker-compose.yml and copy over the content below into that file:
version: '3.3'
services:
    harperdb:
        volumes:
            - /Users/admin/Desktop/libshare:/opt/harperdb/hdb
        environment:
            - HDB_ADMIN_USERNAME=admin
            - HDB_ADMIN_PASSWORD=password
            - CUSTOM_FUNCTIONS=true
        ports:
            - '9925:9925'
            - '9926:9926'
        image: harperdb/harperdb
Note: Provide a valid path for volumes (left-hand side of :). That's where we will be setting up the custom functions.
You can then start the container by running:
docker-compose up
Run this command in a separate terminal and keep this open, so you can watch the logs.
Registering the User Installed Instance
Go ahead and sign up for an account in HarperDB if you haven't already.
- Once you are logged in, create an Organization.
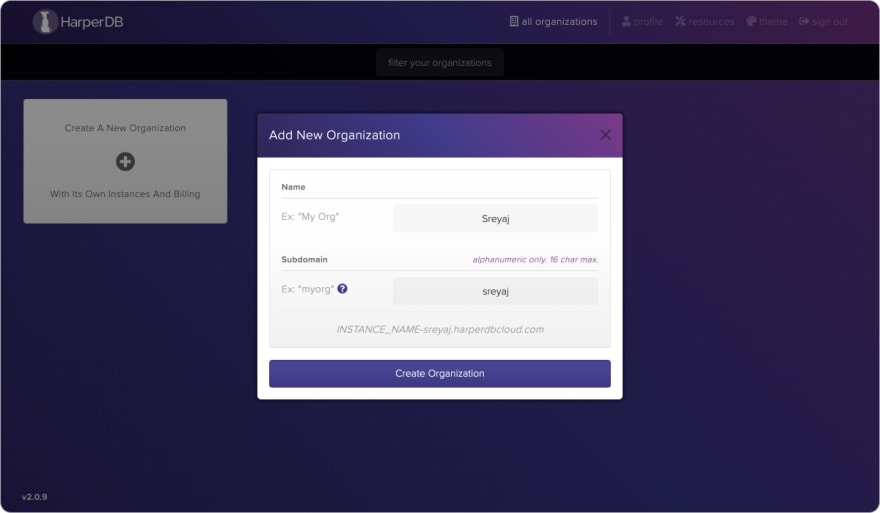
- Once you are inside the newly created Org, you can click on the Add button, which gives you two options. Choose the second option which is Register User-Installed Instance and fill in the details.

- You should now be taken to the studio page.
Setting up tables
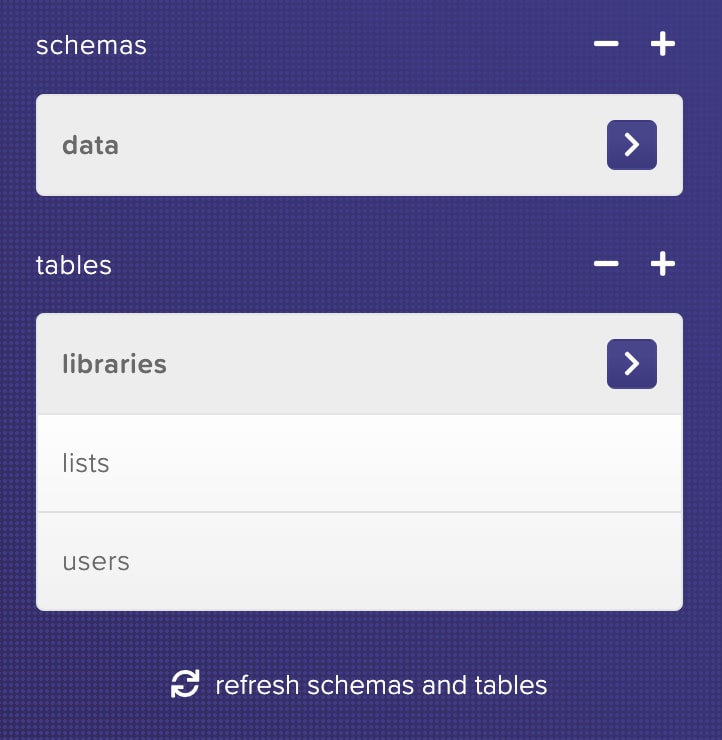
Now we set up the tables required. For that create a new schema first, and then add tables.
Schema is nothing but for grouping tables. I've just named the schema as data.
Setup 3 tables like so:
- users
- lists
- libraries
Note: The hash_attr is kind of the primary key. Just use id in our case.
Here's how my setup looks:
Setting up custom functions
Going to the Functions tab will land you on a page where you can create the routes for your API.
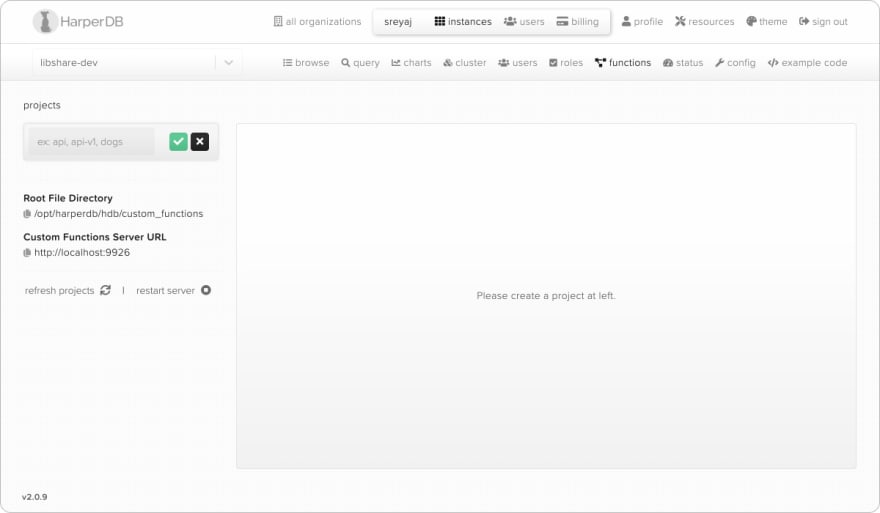
Start by creating a new project first. I named it api. The project name can be used to namespace your APIs. So in this case, the endpoint will look like: http://localhost:9926/api.
We are all done setting up the instance and the table. The only thing that is left is to go to the Config page and copy the Instance API Auth Header which we need to use.
Creating the APIs
If you navigate to the folder that is mentioned under the volumes in the docker-compose.yml file, you can see there are a couple of folders that got created.
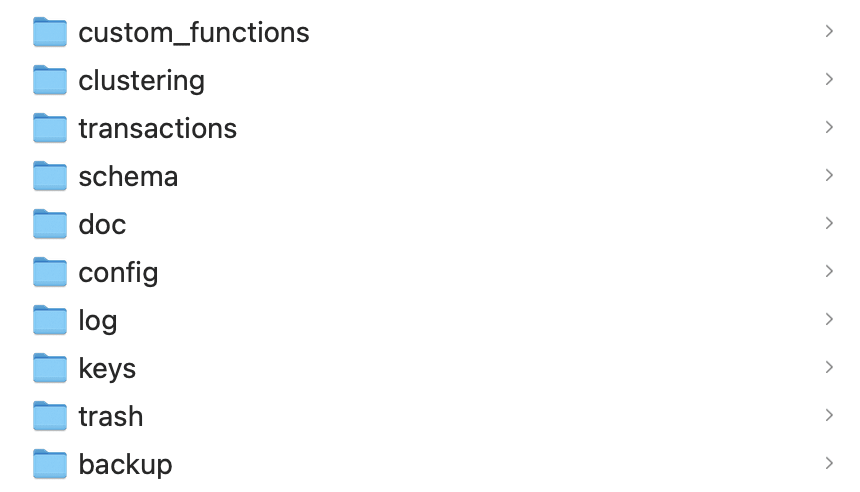
We will be working in the custom_functions directory. Navigate into the custom_functions folder and open your favorite IDE.
The first thing that you will notice, there is an api folder. So each project that you create on the custom functions page, will have its folders. The folders would have the following folders/files:
├── helpers
├── routes
└── static
The names are self-explanatory.
Let's start by initializing git in the custom_functions folder so that we can save it to a repo.
git init
also, initialize npm so that we can install packages
npm init
You can see a few boilerplate files inside these folders, just delete them so we can start fresh.
Setting up first route
You can create multiple files inside the route to organize things better. So we'll few files:
├── auth.js
├── general.js
├── libraries.js
├── lists.js
└── users.js
Here's what a route file would look like:
'use strict';

module.exports = async (server) => {
  server.route({
    url: '/',
    method: 'GET',
    handler: (request, reply) => {
      return {
        status: 'OK',
      };
    },
  });
};
The best thing about HarperDB custom functions is that they are powered by Fastify which is fantastic. The route files contain basic Fastify route declarations.
For maintainability and a better overall structure of code, You can extract the handler into a separate file and add it to the helpers folder. It's not necessary, but doable and I would highly recommend it. I've split my code into multiple handlers and helper files:
├── auth-handler.js
├── auth-helper.js
├── errors-helper.js
├── libraries-handler.js
├── libraries-helper.js
├── list-handler.js
├── list-helper.js
├── query-builder-helper.js
├── users-handler.js
└── users-helper.js
Let's see a complete implementation of how to set up a signup route and its handler:
// users-handler.js

const createUserHandler =
  ({ hdbCore }) =>
  async (request) => {
    const { firstName, lastName, email, password } = request.body;
    const hashedPass = await hashPassword(password);

    const sqlReq = {
      ...request,
      body: {
        operation: 'sql',
        sql: qb.buildInsertQuery('data.users', {
          firstName,
          lastName,
          email,
          password: hashedPass,
        }),
      },
    };

    return hdbCore.requestWithoutAuthentication(sqlReq);
  };

module.exports = { createUserHandler }
and the route:
'use strict';

const userHelpers = require('../helpers/users-helper');
const userHandlers = require('../helpers/users-handler');

module.exports = async (server, hdb) => {
  server.route({
    url: '/signup',
    method: 'POST',
    preValidation: [userHelpers.validateUser(hdb.logger), userHelpers.existingUserValidation(hdb)],
    handler: userHandlers.createUserHandler(hdb),
  });
};
Note: You can also add Validation methods where the authentication can be checked or the request body can be validated.
// users-helper.js

'use strict';

const joi = require('joi');
const errors = require('./errors-helper');

const USER_VALIDATION_SCHEMA = joi.object({
  firstName: joi.string().required(),
  lastName: joi.string().required(),
  email: joi.string().email().required(),
  password: joi.string().required(),
});

const validateUser = (logger) => async (request, reply) => {
  try {
    await USER_VALIDATION_SCHEMA.validate(request.body);
    return true;
  } catch (error) {
    logger.error('Bad Request');
    errors.badRequest(reply);
  }
};

module.exports = {
  validateUser
};
See how I've used joi for validating the request body. You can install and use different libraries like this inside the helpers/routes. Joi can be installed with the following command:
npm install joi
Head over to the documentation website of Joi for more info: https://joi.dev/
Once all the endpoints are set up. We can now deploy the functions to a cloud instance.
Development Tips
Here are a few recipes that could come in handy when working with HarperDB.
Automatically restart the functions on changes
When working with custom functions, whenever you make changes to the files, you need to restart the Custom Functions server every time for those changes to take effect.
So to speed up the process, I created a file watcher which listens to changes in any of the routes or helpers folders and auto-magically restarts the custom functions server. It's a very simple script that makes an API call to restart API when you save a file.
Getting Auth Token
Step into HDB studio and go to the config page. Under the heading of Instance API Auth Header (this user) you can see the token. Copy the token using the icon on the left.

Add a .env file in the root folder of custom_functions where you can mention the copied token which is needed to call the HarperDB API.
HDB_AUTH=
Create a file watcher
Create a file file-watcher.js under the custom_functions/scripts folder. We don't want this to be part of the project so it is kept outside the project folder.
const fetch = require('node-fetch');
const chokidar = require('chokidar');
require('dotenv').config(); // <-- to read the env variables
const updateFunctions = async () => {
  try {
    fetch('http://localhost:9925', {
      method: 'POST',
      headers: {
        'Content-Type': 'application/json',
        authorization: `Basic ${process.env.HDB_AUTH}`,
      },
      body: JSON.stringify({ operation: 'restart_service', service: 'custom_functions' }),
    });
    console.log('Custom functions server restarted');
  } catch (error) {
    console.error('Failed to restart custom functions',error);
  }
};

// Make sure the path is correct
chokidar.watch('./api/**/*.js').on('change', () => {
  updateFunctions();
});
You can then open a terminal and run the script:
node file-watcher.js
Note: Make sure the path to your custom functions is correct.
How to use env variables in HarperDB Custom Functions
I needed to save a private key for signing the JWT when the user logs in. For this purpose, the keys should be saved as environment variables.
We use a popular library called dotenv to implement this. dotenv will automatically read the variables in our .env file and inject it to process.env The only gotcha is that the .env file for each project should be placed inside the project folder. In this case, the .env file path is:
custom_functions/api/.env
And for using it, specify the path to the .env file:
require('dotenv').config({
  path: `${__dirname}/../.env`, // <-- relative url
});

console.log(process.env.JWT_SECRET) // <-- access it
Here is the content of the .env file:
JWT_SECRET=
JWT_SECRET is used for signing and verifying the access tokens. You can see the usage in the auth-helper.js file.
Note: There are .env.example files kept in certain places in the repo which is where the actual .env files should be.
Repo
Here is the Github repo with all the routes, helpers written for Libshare.
Testing the custom functions
All the API endpoints can be validated locally using apps like Postman or Insomnia. The URL will be http://localhost:9926/api with your route specified in the routing files. Eg: The signup route will be http://localhost:9926/api.
Here's an example cURL command:
`curl --request POST \
  --url http://localhost:9926/api/signup \
  --header 'Content-Type: application/json' \
  --data '{
    "firstName": "Adithya",
    "lastName": "Sreyaj",
    "email": "hi@adi.so",
    "password": "mysecretpassword"
}'
Final files and folders
Here's what the whole project now looks like:

Deploying the custom functions
There are two different ways to deploy the custom functions to a cloud instance. One involves us zipping the custom_functions folders and making an API call for packaging the functions and then another call to deploy the packaged functions. This is really cumbersome and I'm not a fan of it.
The other one is to deploy it using the HarperDB Studio, which deploys the local custom functions to the chosen cloud instance with a button click.
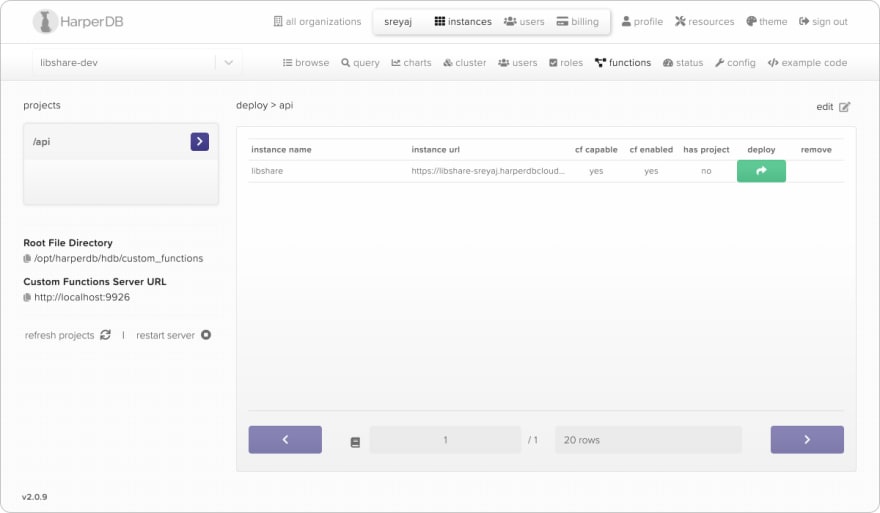
- Go to the
functionstab. - Select the project in the left sidebar.
- Click on the deploy button on the top right of the editor.
- Select the cloud instance to deploy to and press that green deploy button.
Woohoo. We have successfully deployed a whole back-end. You can now visit the cloud instance functions URL to see the API.
Setting up the UI
The Libshare UI is built using Angular and styles are handled using Tailwind CSS. Here's how you can set up the UI to run locally.
%{https://github.com/adisreyaj/libshare%}
- Clone or download the repo:
git clone https://github.com/adisreyaj/libshare.git
- Navigate to the folder
cd libshare
- Initialize the submodule
git submodule update --init
- Install the dependencies
npm install
- Serve the UI
npm start
Now you can visit http://localhost:4200 in your browser to see the application running.
Note: The UI components come from another repo called zigzag which is added as a submodule in the repo. We need to initialize the submodule before installing dependencies. It's a set of common components that I use in my projects.
Make sure the HarperDB docker image is running as in the local environment the UI is going to be calling the API at http://localhost:9926.
Pages in UI
So the UI is actually quite simple, there are like 4 pages in the application at the moment:
- Login
- Signup
- Libraries
- Lists
Libraries Page
This is where you can add the NPM libraries that you have used or you found useful. You can then add a new library by just entering the name and searching for it.
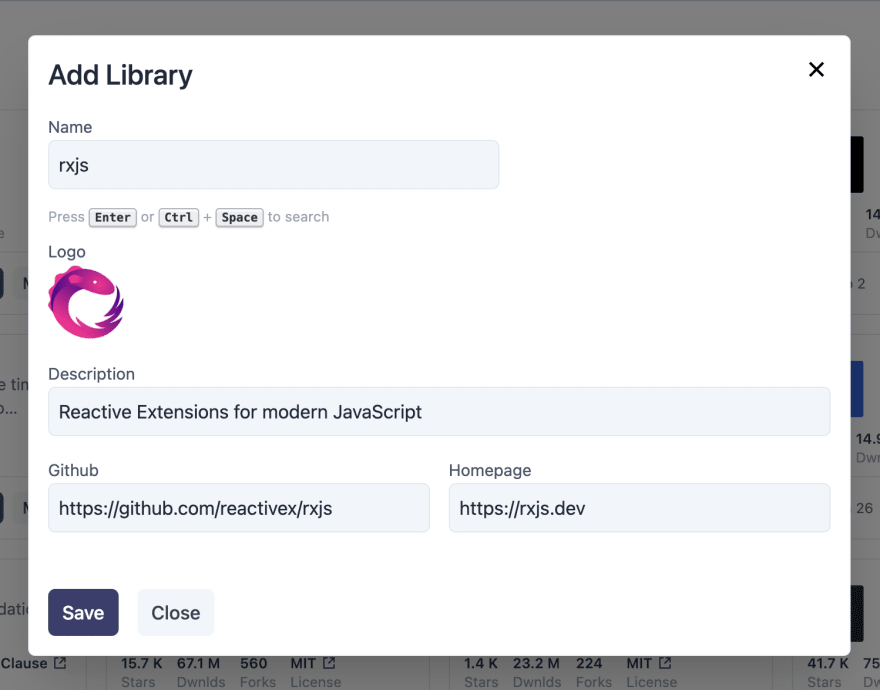
If the API is able to find the library, all the details are pre-filled by the application. If not the user can simply enter them manually.
Lists Page
Lists are a way to group the libraries that are added. So let's say you can think of them as folders. So if you worked on a project, you can create a list for that project and add all the libraries that are used.
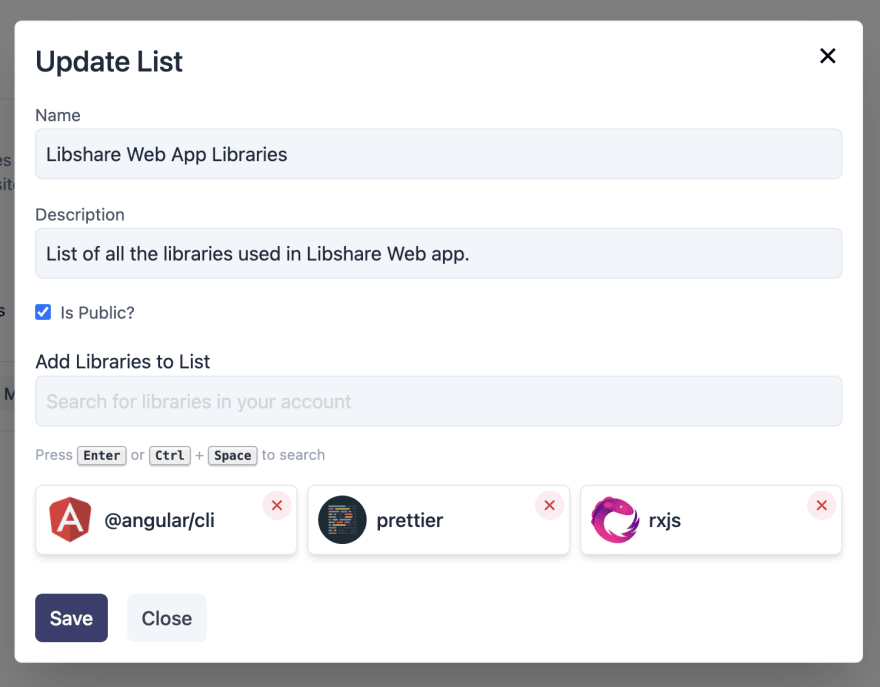
The list can then be made public, which produces a public link that can be shared. If not the list is only visible to the owner.
Here's the link to Libshare's list page: https://libshare.adi.so/view/libshare-api-libraries-i95t9kib9a
Public Lists
Here's what a public list page looks like.

You get a nice list of libraries used with some useful info about it. There is a title and description along with the last update date.
Have you worked on something interesting? Try Libshare! You can showcase all the cool packages that made your application great.
Connect with me
Do add your thoughts or if you have any questions, shoot'em below in the comments.
Stay Safe ❤️


Top comments (0)