
For most of my geocoding needs, Geocod.io more than fits the bill. Their API provides a fast and simple way to convert addresses into geographic coordinates, get congressional or state legislative districts, and much more. I'd recommend giving their API docs a read if you have an upcoming project that you need geocoding for.
(Full disclosure: I'm NOT sponsored by Geocod.io, I just like using their service and it makes my life easier)
Despite all these great features, there are some instances where we need to check against geographic boundaries that Geocod.io doesn't have. An example of this would be seeing if someone's address is inside a specific City or County Council district.
Fortunately, we can use turf.js to extend Geocod.io's functionality to fit our own specific needs.
The 1,000 foot overview:
To give you the gist of what we'll be doingt:
First, we'll still use Geocod.io to convert our Address into latitude and longitude coordinates. Doing so allows us to take those coordinates, and work with them through the turf.js module.
Next, we'll take the geoJSON file of our custom geography, and use the node-geojson module to extract the features (more on these later) into a format we can pass into turf.js as a polygon.
Once we have those two things ready to go, we'll use a turf.js function booleanPointInPolygon, to check if our coordinates is inside one of those polygons.
If that all sounds a bit confusing now, don't worry, things will make more sense once we see it in action, and also once we start visualizing some of our spatial data.
The Code:
Let's start with a fresh project, I'm creating a new directory called turf-tut to hold our working files in. Create that directory, then cd inside and run the following 2 commands to install our dependencies:
npm install geocodio-library-node node-geojson @turf/turf
npm install dotenv --save-dev
Everything should be pretty self-explanatory here, the only thing that might look a little weird is that we'll be installing dotenv as a dev dependency to store our Geocodio API Key. It's a bad idea to hard code API keys.
Once that finishes installing, update your package.json file to add the following start script. Your final package.json should look something like this:
(Note: the version numbers to the right of your packages might be different from mine. If you copy/paste this entire .json file, you'll need to re-run npm install which will reinstall all these packages from the package.json file)
{
  "scripts": {
    "start": "node -r dotenv/config index.js"
  },
  "dependencies": {
    "@turf/turf": "^6.5.0",
    "geocodio-library-node": "^1.4.0",
    "node-geojson": "^1.0.2"
  },
  "devDependencies": {
    "dotenv": "^16.0.0"
  }
}
Create a .env file and add the following line to it:
GEOCODIO_API_KEY="HelloWorld!"
Finally, create an index.js file, and add the following code:
const GEOCODIO_API_KEY = process.env.GEOCODIO_API_KEY

const Geocodio = require('geocodio-library-node');
// const geocoder = new Geocodio('YOUR_API_KEY');
const geoJSON = require('node-geojson');
const turf = require('@turf/turf')

async function main() {
    console.log(GEOCODIO_API_KEY)
}

main();
Now if we run npm start we should see the below response:
❯ npm start

> start
> node -r dotenv/config index.js

HelloWorld!
Take note that since we called -r dotenv/config in our start script, we could access those env vars through the process.env object without having to configure that in our code.
You'll also notice that we're executing our code inside async function main(), this is to avoid issues with top-level awaits, a topic that I won't go into here.
Before we can dive into writing code, we have 2 final setup steps. 1 - downloading some geoJSON data to work with, and 2 - setting up a Geocod.io account.
For geoJSON, go to: https://www1.nyc.gov/site/planning/data-maps/open-data/districts-download-metadata.page and select "City Council Districts (Clipped to Shoreline)" and click the globe that says "GeoJSON". You'll be redirected to a text webpage with the GeoJSON data, save the data from that website, or grab the file from the example repo.
Data Side Note:
When working with public data like this, especially datasets that deal with things like legislative districts, it's important to note that the possibility of the data being inaccurate or incomplete always exists.
Just be aware that nyc.gov provides this data as-is for informational purposes only as stated in their disclaimer
For Geocod.io go to dash.geocod.io/register, sign up for an account, then once you're logged in, hit the "API Keys" button on the left-hand sidebar, then hit the "Create an API Key" button. The only permissions we'll need are GET /v1.7/geocode. Give your key a name, save it, then you should be able to copy your key and paste it into the .env file we created earlier in the GEOCODIO_API_KEY variable.
Let's return to our index.js file and start building out our geocoder.
With your API Key now stored as a .env variable, we can update our index.js, change the Geocodio config line like below:
...
// const geocoder = new Geocodio('YOUR_API_KEY'); <- Change this
const geocoder = new Geocodio(GEOCODIO_API_KEY); // <- To this
...
Then update our main() function:
async function main() {
    var geoResponse = await geocoder.geocode('City Hall Park, New York, NY 10007')

    console.log(JSON.stringify(geoResponse, null, 4))

    var lng = geoResponse.results[0].location.lng
    var lat = geoResponse.results[0].location.lat

    var pt = turf.point([lng,lat]);

    console.log("Our coordinates are: ", [lng, lat])
    console.log("Our point is: ", pt)
}
It's only a few lines of code, but we have a lot going on here. To start, we create a variable, geoResponse, and set it equal to the value of the promise returned from geocoder.geocode(). In the above code I supplied the address City Hall Park, New York, NY 10007, that is (as you probably could assume) the address for New York City Hall.
Next, we console.log the response (I just used JSON.stringify to make sure everything gets printed) so you can see what the API response schema looks like (you could also check the docs for this). Then, we extract the Longitude and Latitude from our geocoder.geocode response and store them as variables.
Next, we create a variable pt which we set as a turf.point(). Note that the .point() function accepts a single array of Longitude,Latitude. Turf.js uses the longitude first convention as does GeoJSON. If you take those coordinates and plug them into Google Maps they'll need to be latitude first, so it's good to keep track of this while we work.
Finally, I console log our coordinates array, as well as the turf point pt.
After running npm start again, you should see an output similar to the following.
❯ npm start

> start
> node -r dotenv/config index.js

{
    "input": {
        "address_components": {
            "city": "New York",
            "state": "NY",
            "zip": "10007",
            "country": "US"
        },
        "formatted_address": "New York, NY 10007"
    },
    "results": [
        {
            "address_components": {
                "city": "New York",
                "county": "New York County",
                "state": "NY",
                "zip": "10007",
                "country": "US"
            },
            "formatted_address": "New York, NY 10007",
            "location": {
                "lat": 40.713941,
                "lng": -74.007401
            },
            "accuracy": 1,
            "accuracy_type": "place",
            "source": "TIGER/Line® dataset from the US Census Bureau"
        }
    ]
}
Our coordinates are:  [ -74.007401, 40.713941 ]
Our point is:  {
  type: 'Feature',
  properties: {},
  geometry: { type: 'Point', coordinates: [ -74.007401, 40.713941 ] }
}
Great, we now have a means to convert an address into lng,lat coordinates, and convert that into a turf.js point. If you'll recall back to our 1,000 ft overview, that's one of the two input parameters we need for booleanPointInPolygon.
So let's now turn our attention to our geoJSON file. If you haven't worked with geoJSON before, it might be worth briefly familiarizing yourself. I'm by no means an expert on GeoJSON, but I'll do my best to explain enough to get through our use case.
GeoJSON is valid JSON (ie you can save the file as either a .json or .geojson), however, GeoJSON has a pre-defined format for how its data should be structured, which allow different applications to share GeoJSON between them. Here's an example of GeoJSON data:
{
  "type": "Feature",
  "properties": {
    "name": "Dinagat Islands"
  },
  "geometry": {
    "type": "Point",
    "coordinates": [125.6, 10.1]
  }
}
If that looks familiar, it's because our turf.point() from earlier is actually valid GeoJSON itself. Taking a closer look at the geojson file, you'll also notice that the first value, type, is equal to Feature. In this case, features refer to Simple Features, which are things like points, lines, polygons, multi-points, etc (think back to high school geometry).
Additionally, geojson files can have the type of FeatureCollection, which (again you probably guessed) is comprised of a collection of Features. FeatureCollection, is the type of the NYC Councilmanic districts file that we downloaded earlier.
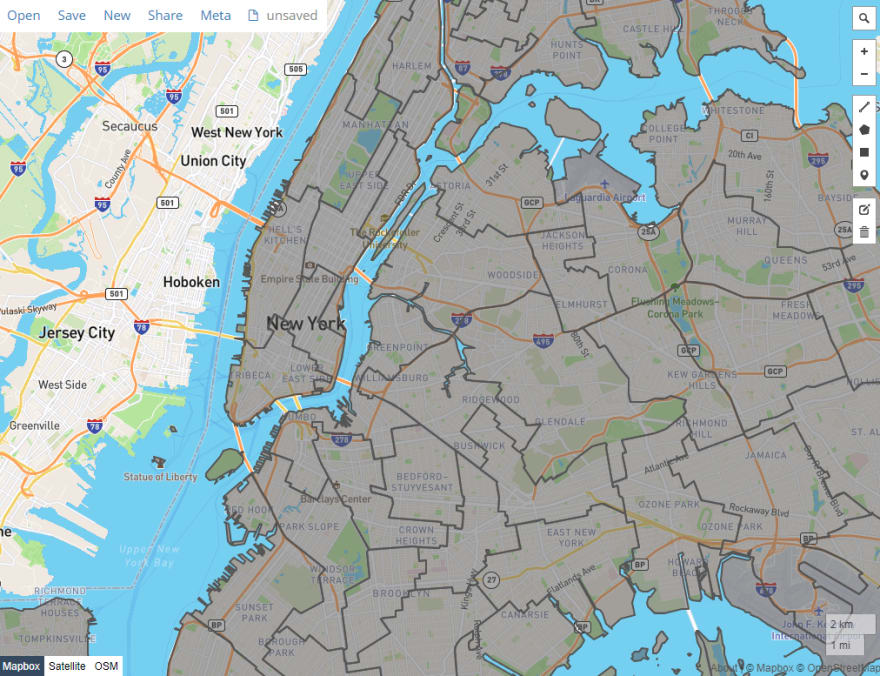
Another great tool is this online geojson editor, courtesy of Tom MacWright. You can either copy / paste, the contents of our geoJSON file onto that website, or use the file upload feature to load it up.
After loading the file, you'll see a map of New York City with various polygons overtop of city limits. Each of those polygons is a distinct City Council district, and is a geoJSON Feature. (See, told you it'd be easier to visualize).
If you try clicking on a specific polygon, you'll see that geojson.io shows a pop-over tooltip with more info about that polygon. This additional info is the properties value on our GeoJSON file. In the below image, I zoomed in on the map to City Hall, and clicked the polygon to pull up the properties for that feature. You can see that it has the properties, OBJECTID, CounDist, Shape__Area, Shape__Length. (The other properties geojson.io adds so that you can change the polygon line & fill colors, etc. Just disregard those).
The property that we're interested in is CounDist, that refers to the number of the NYC Council District.

Side Note: The properties Shape__Area and Shape__Length were included on the geoJSON file when we downloaded it. GeoJSON doesn't automatically compute those values for you. But, Turf.js has the area function that you could use to implement size calculation if you wanted.
Geojson.io also has a nice feature Table view, which further helps understand how our geojson data works. If you click a cell in the Table view of our geojson file, you'll see the map zooms you to be centered on that polygon. You'll also notice that you can edit the contents of the cell. I mentioned this earlier, but the table view really highlights it, the OBJECTID field != Council District.

Turning our attention back to index.js (you can comment out our existing console.log calls for now) add the following new code inside our main() function at the bottom:
var geodata = await geoJSON.createUsingFile("./nyc-city-council.json");
var features = geodata.GetAllFeatures();

features.forEach(feature => {
  console.log(feature.properties)
})
In this new section of code we're creating a new variable, geodata, and setting it's value to the return of geoJSON.createUsingFile(). That does 2 things: 1 - it loads our geoJSON from file into memory so our application can manipulate the geoJSON file, but 2 - we also get access to some nice helper functions from the node-geojson module such as GetAllFeatures() which we use in the next line to save each of the features from our geoJSON file into a new array.
And, as we just saw, each feature in our geoJSON is a file, so when we call the .forEach function over our features array, we console.log the properties of each feature, which should be OBJECTID, CounDist, Shape__Area, Shape__Length.
After updating the code and running npm start again, you should see output like the following:
> start
> node -r dotenv/config index.js

{
  OBJECTID: 1,
  CounDist: 12,
  Shape__Area: 137870996.813004,
  Shape__Length: 56950.2637871384
}
{
  OBJECTID: 2,
  CounDist: 18,
  Shape__Area: 106383536.643585,
  Shape__Length: 62147.4707677974
}

...rest

{
  OBJECTID: 51,
  CounDist: 17,
  Shape__Area: 135003397.512329,
  Shape__Length: 119656.385650236
}
Finally, update our features.forEach() loop to the following:
features.forEach(feature => {
  // THIS IF ELSE IF VERY IMPORTANT!!!
  if(feature.geometry.type == 'Polygon') {
    var poly = turf.polygon(feature.geometry.coordinates);
  } else if(feature.geometry.type == 'MultiPolygon') {
    var poly = turf.multiPolygon(feature.geometry.coordinates)
  }

  var isPointInPoly = turf.booleanPointInPolygon(pt, poly);

  if(isPointInPoly) {
    console.log("Your point is in Council District: ", feature.properties.CounDist)
  }
})
Once again, we've added only a few lines of code, but there's a lot going on here. So let's break it down. The first thing we do is check if our feature is of type Polygon or MultiPolygon. It is very important we run this check because if we try passing a MultiPolygon geoJSON feature to the Polygon turf.js we'll get a confusing error message and spend a couple hours banging our heads against a keyboard until we figure it out.
Don't ask me why I know that.
Once we have our correct polygon type, we then pass our point, pt, from earlier and polygon into the turf.booleanPointInPolygon() function. That function (again, this is kinda obvious here) checks if the point is inside the polygon, and if so, returns True.
Finally, if we hit a match, we console log back to the user, which feature (aka council district) the match was in.
(For clarity I saved the result of booleanPointInPolygon to a new variable, but you could just as easily run the if() check on the function itself.)
From looking at the pdf map on the nyc.gov site, I know that City Hall should be in district 1, but now for the moment of truth. Can our app figure that out?
After saving index.js, run npm start one last, fateful time.
> start
> node -r dotenv/config index.js

Your point is in Council District:  1
It's a thing of beauty. Look out, Uber.
Extra Credit:
If we really want to test how well our Geocoder does, let's pull an address off Governor's Island, to see if the MultiPolygon is really testing all the polygons.
Originally, I wanted to use the address Statue of Liberty, because the GeoJSON file from ny.gov indicated it was also in Council District 1. There were 2 problems with that though, 1 - Geocod.io had a hard time converting the very non-standard address into lat, lng coordinates, and 2 - The Statue of Liberty is technically in New Jersey so I don't know what that's included in the GeoJSON file.
Since resolving inter-state disputes is also outside the scope of this tutorial, I pulled the address for Taco Vista, a TexMex restaurant at 140 Carder Rd, New York, NY 10004 instead. Sounds tasty.
Change line 10 in index.js to geocoder.geocode('140 Carder Rd, New York, NY 10004'), then run npm start.
Once again, Council District 1.
Conclusion
GeoSpatial data can be really fun (and really frustrating) to work with. I hope this example was helpful for someone looking to get their toes feet and dive into working with spatial data, geoJSON and, turf.js more.
A good further extension of this project would be to integrate it into Express.js as a backend api, then use Mapbox, or leaflet.js to build a frontend to display the points and polygons on a map.

Top comments (1)
Hi Adam! Co-Founder of Geocodio here, thanks for writing this great tutorial. We'd love to republish this on our website and pay you to be able to do so. Can you reach out to me to discuss? michele at geocod dot io