
This Car Parking Finder App UI clone tutorial series was inspired by the Store Locator App template that provides us with a dynamic, fully-coded starter kit written in React Native that anyone can use to build their own store locator React Native application or initiate their own startup.
This tutorial replicates the coding implementations and designs from the Youtube video tutorial by React UI Kit for the Car Parking Finder App UI Clone. The video tutorial is delivered using speed coding with quick implementations which may be difficult for any developer to comprehend. Therefore, the video tutorial is not made for beginners as it does not explain any details of the code. So in order to make things easier and clearer, this tutorial series breaks down the video into different sections. It also provides step by step guide to implement each UI section of the app. This will make things easier for anyone especially the beginners.
Overview
In this first part of this tutorial series, we are going to implement the map view as well as divide the map view screen into different UI sections for upcoming tutorial parts. This first part basically lays out the foundation for upcoming parts of this tutorial series so that it will become easier later on. Here, the idea is to start with a new React Native starter project using expo. Then, we will begin by implementing the map view. After that, we will divide the UI sections of the map screen.
So, let us begin!!
_ Note that, in this tutorial, we are going to use the EXPO as the React Native project development tool. So first, we are going to create a boilerplate React Native application using expo client. _
Creating Starter React Native project
First and foremost, since we are going to use the expo as a development engine, we need to install it into our system. To install expo globally into our system, we need to have Node Package Manager(NPM) installed first. Then, we need to run the following command:
npm install -g expo
Now, we need to create a boilerplate react native application using expo. In order to do this, we need to run following command in the desired project directory:
expo init \<project\_name\> // project name==\> carParking
After running the above command, we will be asked to choose the template for the boilerplate app. Here, we are going to choose the *blank * template. The blank template provides a very minimal app template as clean as an empty canvas. The selection screenshot is provided below:
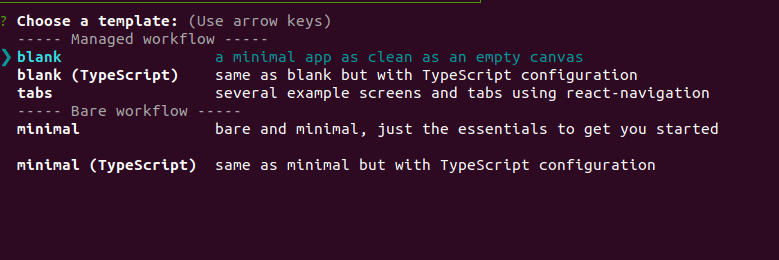
As we can see, we choose the blank template and hit enter. Then, we need to enter the project name and after that, the boilerplate react native app is configured into our directory.
Now, we need to enter the project directory and then run the command:
expo start
Then, we will get the following boilerplate app in our emulator screen:
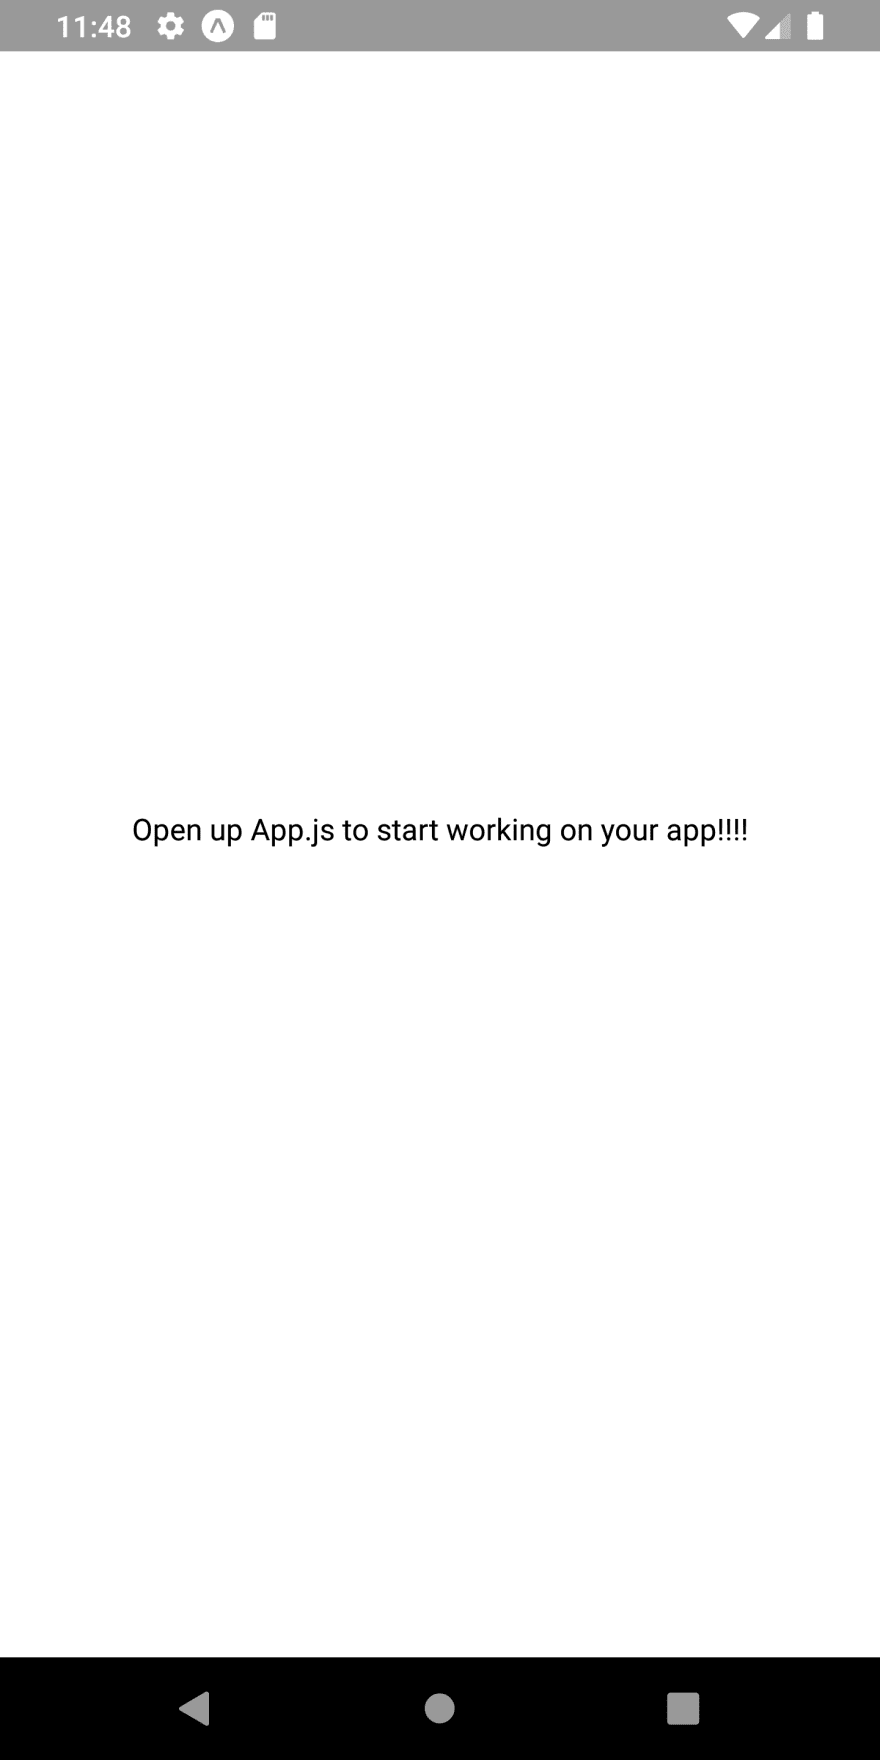
As we can see, we have got the starter template running in the emulator. The screen is not configured with too many styles and layout designs. Just a simple white screen with text in the middle.
Configuring project files and folders
Now, in the project folder, we need to create a new directory named ‘screens’. In the ‘./screens/’ directory, we need to create a new JavaScript file called Map.js. The overall project folder structure is provided in the screenshot below:

Now, we need to make the Map.js as a react native screen component. For that, we need to copy the code from the following code snippet and paste in the Map.js file:
import React from 'react';
import { StyleSheet, Text, View } from 'react-native';
export default class Map extends React.Component {
  render(){
    return (
      <View style={styles.container}>
        <Text>Map</Text>
      </View>
    );
  }
}
const styles = StyleSheet.create({
  container: {
    flex: 1,
    backgroundColor: '#fff',
    alignItems: 'center',
    justifyContent: 'center',
  },
});
Here, we have imported the React component from the ‘react’ package in order to configure the file as a react file. We have imported some necessary components from the react-native package as well. Then, we have defined a class named Map which extends to Component module of the React component. In the render() function, we have configured a bare minimal template that has a View component wrapping Text component. Then, we have defined some styles using the StyleSheet component.
Now, we need to import the Map component screen into our App.js file. For that, we need to add the following code to our App.js file:
import Map from './screens/Map'
Now, we need to replace the code inside the render() method of App.js file with Map component as shown in the code snippet below:
render(){
    return (
      <Map />
    );
  }
As a result, we will get the same screen as earlier in the emulator.
Here, we can remove styles from the App.js file as well. Now, we are only going to work on the Map.js file for the Map view screen.
The post React Native Car Parking Finder App UI Clone #1 : Map View appeared first on Kriss.
Disclosure
This post includes affiliate links; I may receive compensation if you purchase
products or services from different links provided in this article.


Top comments (1)
Snow umbrella parking shades are designed to offer robust protection for vehicles in snowy climates, combining functionality with an aesthetically pleasing structure. Their umbrella-like shape facilitates the easy shedding of snow, preventing buildup that could potentially damage both the shade and the parked vehicles. Constructed from high-quality, weather-resistant materials, these shades provide excellent shelter from harsh winter elements, including ice and frost. In addition to protecting vehicles, snow umbrella parking shades enhance the overall look of parking areas, making them a stylish and practical choice for homeowners and businesses alike. With their combination of durability and design, they are ideal for maintaining vehicle integrity during winter months.