
How to make your own internet connected t-shirt with LEDs that respond to realtime data
As a developer advocate I get to make all kind of fun projects. I particularly like to make wearable technology, specifically, things with lots of lights on that can connect to the internet. Because I like to be sparkly! I started making wearable tech projects a couple of years ago, my first being a light up, tweet controlled wedding dress.
When I started working with hardware, I had no real clue what I was doing and made a few very silly mistakes around choices of hardware and how to stick them all together, My hope for this blog is to give a little direction to those who are looking to get into hardware projects and to help you over that initial ‘hardware is scary’ hurdle.
The project we’ll be making is a wearable LED array which responds to data sent from a web app. The app allows people to draw in a 16x16 pixel array, kind of like a low res version of MS paint, but multiplayer! In order to realise this dream we’ll need a few things:
Firstly an array of lights which can change colour
A microprocessor to control those lights
An app where users can set colours
A method of sending messages to and from the app and the microprocessor.
Making a wearable LED array
Let’s start by building the array of lights. It is going to be a 16 by 16 grid of LEDs.
The LEDs that we’ll be using in this project are called Addressable RGB LEDs. Each LED has a tiny microcontroller which allows it to be lit up with a unique colour and brightness. Addressable means that we can target each LED individually, we send them an RGB colour value (similar to that which you might be familiar with from CSS).
For this project we’ll be using 5V LED strips. These are great as we don’t have to individually solder each LED, this also makes them nicely robust for a wearable, fewer solder points means fewer points of weakness where the connection could potentially snap - a lesson I sadly learnt the hard way with my dress project!
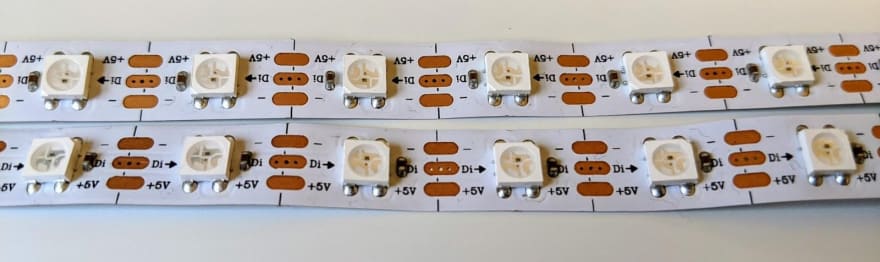
The strips can be bought by the meter or spool and you can cut them along the lines indicated to get them to the length you require. We’ll be cutting them into lengths of 16 LEDs. They also have clear labelling for which lines carry power, data and ground; which makes them easier to solder together correctly.
Things to bear in mind when purchasing LED strip:
The price of the strip increases as the pixel density increases
The voltage — we want 5V for this project so that we can run it with a USB battery.
The colour of the ribbon itself — try and match the clothing you’ll put the array on
The type of RGB LEDs (some are RGBW which will require you to send an extra “whiteness” value in your code)
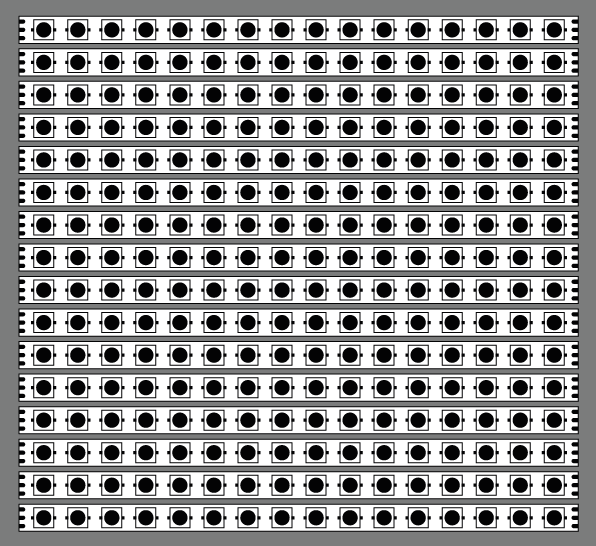
I opted for a strip with a white ribbon (as the tshirt I’ll be mounting it in is white) and with LEDs that are 2cm apart. I cut them down to 16 strips with 16 lights per strip and laid them out in a square:
To keep the strips safe in a wearable I sewed two piece of fabric together to make long pockets to insert each strip:
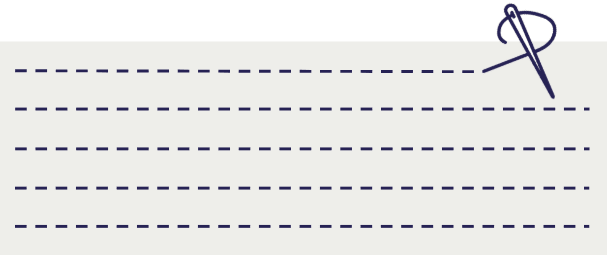 Diagram of sewn pockets
(In actuality, my sewing was much more messy than this)
Insert each strip into each pocket and carefully solder together each of the connections at ether end, to create continuous connections throughout the strips. Pay attention to the direction of the data line indicators on the strip while doing this. Connect together the power data and ground lines:

You can buy a soldering iron and solder from around £30 and I used single core copper wire to connect them all up (because it doesn’t fray so I find it easier to solder). There are lots of tutorials and videos on soldering online so I won’t go into it here, but it isn’t too scary and once you’ve had a few goes at practising you’ll get the hang of it quickly.

Once soldered, you will have a flexible LED array which can be sewn into clothing.
Controlling the array
So, now that we have a display, we need a way to actually control what colours are sent to it. A microprocessor will be useful here as they can do enough calculations to control the lights, but are nice and small so can be easily hidden in a wearable. For this project I am using the Adafruit Feather Huzzah, a small, lightweight, affordable board with onboard WiFi. Adafruit have written some great step by step instructions on how to get started with this board and the Arduino IDE.
The Huzzah runs C/C++ out of the box and the Arduino IDE comes with a collection of example code to get you up and running. Here’s an example of how to set all of the lights in the array to show red:
You’ll need to do a little more soldering to connect the Huzzah up to the LED array. As seen above, we’re putting the data out on pin 4 and we’ll be using a USB battery, so you’ll want to connect your pins up as follows:

Board⠀⠀⠀** ⠀LEDs**
Pin 4⠀⠀ ↔ ⠀Data
GND⠀ ⠀↔ ⠀⠀−
USB ⠀ ⠀↔⠀ +5V
Connect up the board and run the above code to see your LEDs light up!
Making a web app to set the colours on the array
So, now we have a display, and a way of controlling it, we need a way to tell the controller what colours to set. Being a web developer, I opted to build a web app. It looks like this:
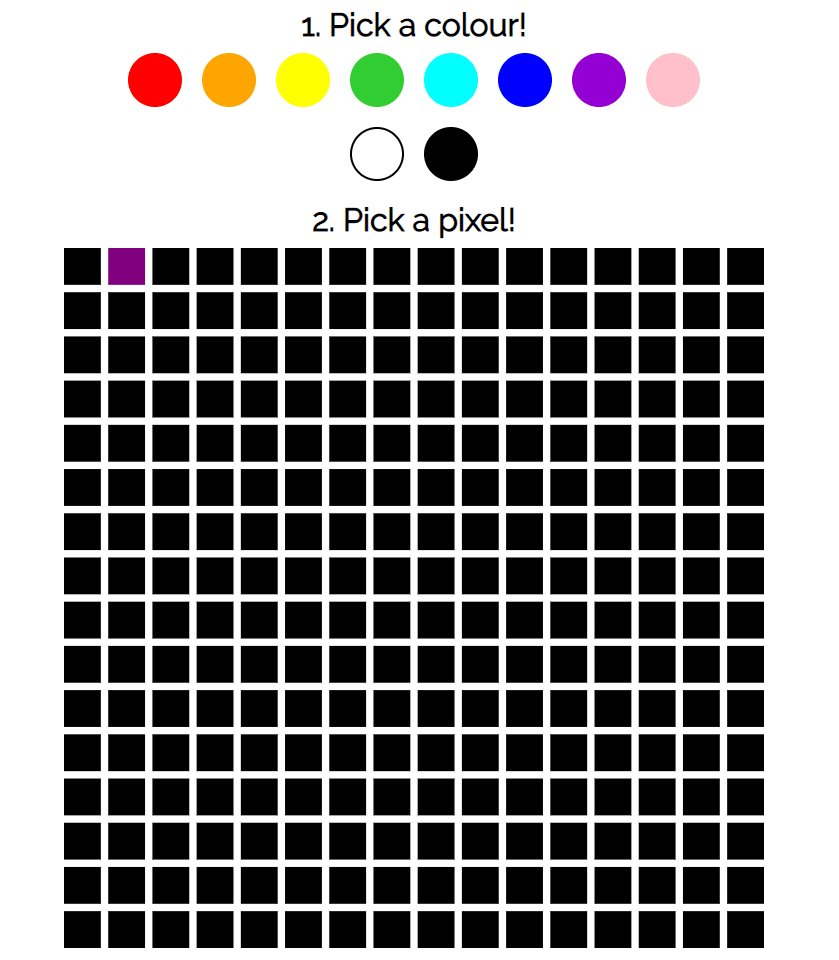
The app has some buttons at the top where the user can pick a colour, and an SVG of squares that represent the pixels in the array.
Each square in the SVG has an id with its number in the array — 0, 1, 2, 3, etc etc
Once a colour and a square has been selected by the user; the app updates the colour of that square to match the selected colour.
You can check out the app and its code here: https://ably-mqtt-iotshirt.glitch.me/
As well as updating the display of the app, we want a selected square to illuminate the correct LED on the array. We can do that using a **realtime data service and the pub/sub model. We’ll create a data channel on which we will which **publish messages that contain the colour updates. We can also subscribe to this channel to listen for changes made by other people also using the web app.
To achieve this, I used Ably’s messaging platform to set me up with a channel. Then I used their JavaScript SDK to manage publishing and subscribing to messages on this channel. In order to use the SDK, you’ll need an API key which you can get with a free account.
On the front end of the app I use the following code to set up my channel and subscribe to it:
The cool thing about using realtime pub/sub streaming is that all of the other users of the web app are also subscribed to these messages, so their clients will update when people paint cooperatively with them!
We’re using the Ably SDK’s createTokenRequest feature to authenticate to be allowed to connect to the data stream. On the back end, in a node server we will require the Ably promises SDK to do our authentication and to create Ably Token Request objects. Using tokens instead of sending the API key directly minimises the amount of work that our server needs to do and keeps our API keys nice and safe.
Now that we’ve established a connection to a channel, and subscribed to it, we need to publish a message to that channel when someone clicks on a square. We add a event listener for a click event to each of our squares:
When clicked, we’ll publish a message to the “tshirt” channel with the number of the pixel to change and the RGB value of the selected colour. An example of the data sent would look like this:
**name:** tshirt
**data:** 001#aa00ff
Where we’ve clicked the second square in the array and selected a purple colour.
Receiving data on the Huzzah
Now that we’re subscribed to and publishing to the channel in the web app, we need a way to get the data from that to the Huzzah board.
You are probably familiar with HTTP — the protocol that browsers use to request web pages. The word “protocol” just means “the way two things talk to each other”. HTTP is great, it powers websites, and APIs and is built to be descriptive and flexible, and it can be used for IoT connections, but it’s not lightweight and it’s not terribly fast. Another problem with HTTP is that it’s pull only, the device has to constantly connect and ask “Are there any updates?” “What about now?” “Anything now?” which is both data and time consuming.
On low power IoT devices, we don’t have much memory, power or bandwidth, so we need protocols that are designed to be small and fast. Message Queuing Telemetry Transport — MQTT is a connectivity protocol which was designed to be extremely lightweight. Connecting to a server only takes about 80 bytes and the device stays connected the entire time. Data is published when it is pushed from the device to the server and the device subscribes to data pushed from the server. Because the size of the data being sent over MQTT is small by design, messages can be sent quickly, making the hardware very responsive. Making it feasible to change the lights on the tshirt in realtime!
In order to use MQTT, we’ll need an MQTT broker. This is just a server that the devices connect to using the MQTT protocol in order to listen for messages. It keeps track of all the clients that are connected and the topics they are subscribed to, forwarding any messages to any subscribers. For this project I am using mqtt.ably.io as my broker. A third party that your IoThings can connect to to send and receive messages.
The cool thing about the Ably MQTT broker is that any messages we send in our browser to an Ably Channel using the JavaScript SDK, are also sent out over MQTT automatically, so we have no extra setup to do!
The code to get our Huzzah board up and running with MQTT is as follows:
Every time ensure_MQTT_connected is called, if the client is already connected, it returns immediately, otherwise, it’ll loop until it can establish a connection — subscribing when it does. This function is called every time the hardware runs its main loop to make sure it doesn’t accidentally disconnect from the MQTT broker due to our internet connection dropping. The process_messages function calls the client’s loop function. This function is part of the MQTT library, it calls the callback to get any messages that have arrived in the MQTT buffer since the last time it was called.
If we take the example message we used earlier we can look at how we will process it once received by the board:
The final thing to mention is the order of the lights in the array. You may have noticed that when I wired up the lights, I wanted to keep my wires nice and neat, so i soldered these nice little jumps at each end. But this means that the data line doesn’t run from left to right as would in normal array enumeration - it runs in what I have affectionately called ‘Snake mode’. :

Not only that, i connected up the cable at the wrong end of the first strip, all of this means that we have to essentially reverse every other line of the array in order for the numbering of the LEDs to match that of the array in the app. Oops! The code to do this is as follows:
The code to run an array of neopixels wired up in this configuration is now available as an Arduino library.
The IoTshirt in action
Here are some photos of the t-shirt


1)⠀The t-shirt with the array on the front (and me pointing at it)
2)⠀An example of drawing on the t-shirt using the app, I drew a heart.
3)⠀People using the app in realtime, they created a beautiful Paolozzi like piece!
4+5)⠀A message I wrote on the app and it showing on the tshirt.
What’s next?!
I’d love to take this idea further and perhaps make a wearable game, something like a tamagotchi or digimon, which would require a slightly larger pixel density, and therefore a new pixel array. I’d also love to get some animations running on the t-shirt. If you’ve got any ideas for how I can develop this further or some fun demos we could run on the t-shirt, do let me know! I’d love to work with others on this project.
All of the code for the t-shirt and the app is opensource and available on GitHub: https://github.com/thisisjofrank/interactive-lights
you can see and use the app on
Glitch: https://ably-mqtt-iotshirt.glitch.me/ and it’s code is
remixable: https://glitch.com/~ably-mqtt-iotshirt
I hope this long, rambling blog gives you some starting points for hardware projects and realtime data. Let me know if you make your own or if this inspires you to build other projects, I’d love to see them!

Top comments (0)