This is part two in the series Learn to Web Scrape. The first was on using Cheeriojs in order to parse HTML. This next part is on taking that data and making it save to csv.
Csv stands for comma separated value and it can be easily imported into any spreadsheet software, such as google sheets and excel.
The tools and getting started
This section I will include in every post of this series. It’s going to go over the tools that you will need to have installed. I’m going to try and keep it to a minimum so you don’t have to add a bunch of things.
Nodejs – This runs javascript. It’s very well supported and generally installs in about a minute. You’ll want to download the LTS version, which is 12.13.0 at this time. I would recommend just hitting next through everything. You shouldn’t need to check any boxes. You don’t need to do anything further with this at this time.
Visual Studio Code – This is just a text editor. 100% free, developed by Microsoft. It should install very easily and does not come with any bloatware.
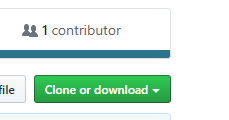
You will also need the demo code referenced at the top and bottom of this article. You will want to hit the “Clone or download” button and download the zip file and unzip it to a preferred location.
Once you have it downloaded and with Nodejs installed, you need to open Visual Studio Code and then go File > Open Folder and select the folder where you downloaded the code.

We will also be using the terminal to execute the commands that will run the script. In order the open the terminal in Visual Studio Code you go to the top menu again and go Terminal > New Terminal. The terminal will open at the bottom looking something (but probably not exactly like) this:
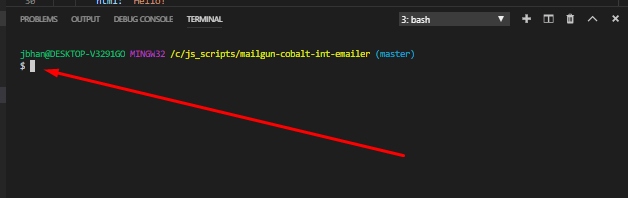
It is important that the terminal is opened to the actual location of the code or it won’t be able to find the scripts when we try to run them. In your side navbar in Visual Studio Code, without any folders expanded, you should see a > src folder. If you don’t see it, you are probably at the wrong location and you need to re-open the folder at the correct location.
After you have the package downloaded and you are at the terminal, your first command will be npm install. This will download all of the necessary libraries required for this project.
JSON

JSON is going to be important for this lesson in web scraping and it’s an important concept in most programming, especially when working with javascript. JSON stands for “Javascript Object Notation”. There are a lot of ways to pronounce it but I prefer the best way, which is JAY-sahn. Others pronounce it the inferior way of Jason.
JSON is just a way to organize data. It’s a data structure based on key-value pairs. You have a label for a piece of data and then you have the actual data. Let’s say we are storing data about me. First we’d think of some attributes, such as “strong”, “tall”, and “devilishing handsome”. We think of a label for each one of these pieces of data (strength, height, attractiveness) and we put it together in a JSON object, like this:
const jordan = {
   strength: "strong",
   height: "tall",
   attractiveness: "devilishly handsome"
};
The labels are the key and the actual data is the value. In order to access one of these pieces (let’s say strength), we’d just type jordan.strength and the value of that would be “strong”. JSON is going to be critical for us to be able to save to a csv.
For more information on JSON, check here.
The code for saving to csv

This code is going to start off exactly where we left off last week where we parsed html with Cheeriojs. Now with this code we have quite a bit of data from pizza.com saved to variables with code such as this:
// Search by element
const title = $('title').text();

console.log('title', title);
I’ve also made a slight adjustment to the loop at the end where we went through all of the li selectors and I’ve put them into an array (an array is just a list of items. See here for more information) so that we can put them all into a JSON object.
const listElements: any[] = [];

// Access each of a list in a loop
$('li').each(function (index, element) {
    const elementText = $(element).text();
    listElements.push(elementText);
    console.log('this text', $(element).text());
});
Now we set all of this information into a JSON object. I just follow the pattern I showed above in the JSON section and save it as follows:
const data = {
    titleText: title,
    homeButtonText: homeButton,
    topNavButtonsText: topNavButtons,
    pizzaNewsText: pizzaNews,
    listElementsArray: listElements
};
The values on the left here are the variables that we set above. You can see the listElements array we pushed those values into and then the title one above. Check the whole code here in src/index.ts.
Now, we save it to a csv. This is a really simple process using a library called json2csvand Nodejs’ built in file system functions. We first parse the JSON object into a csv format and then save it. It looks like this:
const csv = json2csv.parse(data);

fs.writeFile('data.csv', csv, (err) => {
    if (err) {
        return console.log('an error happened while saving the file', err);
    }
    console.log('file saved successfully!');
});
The 'data.csv' part is the actual path of the file that is being save. Doing it like the above will create the file at the root of your project. If you wanted to save it somewhere else, like in src you’d do it like this: fs.writeFile('src/data.csv',.
And that’s it! Your data should now be saved to a csv. The csv when imported to google sheets looks like this:

Looking for business leads?
Using the techniques talked about here at javascriptwebscrapingguy.com, we’ve been able to launch a way to access awesome business leads. Learn more at Cobalt Intelligence!
The post Save to csv. Jordan Teaches Web Scraping appeared first on JavaScript Web Scraping Guy.


Top comments (3)
FYI, if you want a more direct path to CSV. Dump the values into a 2D array. Then you can use any CSV formatter to produce the CSV.
Ex With
csv-esDisclaimer: I'm the author of both jquery-csv and just recently csv-es
Cool man, thanks for the suggestion!
Some comments may only be visible to logged-in visitors. Sign in to view all comments.