This is part five in the Learn to Web Scrape series. The next few posts are going to go into more depth using Puppeteer. This post is going to focus on navigation with puppeteer. If you are completely new to using puppeteer, you really should checkout the first post about the basics of puppeteer.
The tools and getting started
This section I will include in every post of this series. It’s going to go over the tools that you will need to have installed. I’m going to try and keep it to a minimum so you don’t have to add a bunch of things.
Nodejs – This runs javascript. It’s very well supported and generally installs in about a minute. You’ll want to download the LTS version, which is 12.13.0 at this time. I would recommend just hitting next through everything. You shouldn’t need to check any boxes. You don’t need to do anything further with this at this time.
Visual Studio Code – This is just a text editor. 100% free, developed by Microsoft. It should install very easily and does not come with any bloatware.
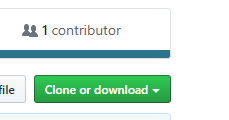
You will also need the demo code referenced at the top and bottom of this article. You will want to hit the “Clone or download” button and download the zip file and unzip it to a preferred location.
Once you have it downloaded and with Nodejs installed, you need to open Visual Studio Code and then go File > Open Folder and select the folder where you downloaded the code.

We will also be using the terminal to execute the commands that will run the script. In order the open the terminal in Visual Studio Code you go to the top menu again and go Terminal > New Terminal. The terminal will open at the bottom looking something (but probably not exactly like) this:
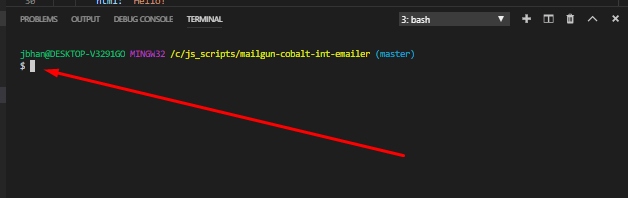
It is important that the terminal is opened to the actual location of the code or it won’t be able to find the scripts when we try to run them. In your side navbar in Visual Studio Code, without any folders expanded, you should see a > src folder. If you don’t see it, you are probably at the wrong location and you need to re-open the folder at the correct location.
After you have the package downloaded and you are at the terminal, your first command will be npm install. This will download all of the necessary libraries required for this project.
Puppeteer navigation with normal links

Navigating with puppeteer can be a kind of tricky thing sometimes just because of how the puppeteer browser is set up. A very typical webpage will be like our classic example, http://pizza.com. You’ll have a list of links and want to visit each one so you can get data from that specific page. The html will look something like this.

A very common first instinct is to do something like this:
    const linkHandles = await page.$$('.word-only a');

    for (let linkHandle of linkHandles) {
        await linkHandle.click();
    }
It makes sense. It’s what you want. You are storing the list of links and then looping through those links and clicking them. The problem is the list of links is still related to the page they are on. As soon as you use puppeteer to navigate, you are now on a new page and so the context for those links is destroyed. You’ll get something like the following error:
(node:21784) UnhandledPromiseRejectionWarning: Error: Execution context was destroyed, most likely because of a navigation.
So the proper way to do this is to get the hrefs and store them as strings in an array. Then we just loop through this list of hrefs and navigate directly to them without caring about the original page context. Check it:
    const baseDomain = 'http://pizza.com';

    await page.goto(`${baseDomain}/pizza-news`);

    const links = await page.evaluate(() => Array.from(document.querySelectorAll('.word-only a'), element => element.getAttribute('href')));
    for (let link of links) {
        console.log('link', link);
        await page.goto(`${baseDomain}${link}`);
    }
Puppeteer navigation without links

Unfortunately, there are many links across the web that aren’t anchor tags or hrefs. They navigate to new locations strictly on javascript clicks and don’t use an href. There are many reasons for them wanting to do this and it’s probably a fact of the web that will not change.
The example page I’m going to use here is based upon a tricky scrape I wrote about previously on realforeclose.com. There is a calendar on the first page and each day navigates to a new page but they are not actual links.

This is still possible to scrape, however! Using javascript like this almost always has something within the html element that is tied to the page we are going to. If you click one of these boxes, for example, it takes you to a url like this: “https://www.miamidade.realforeclose.com/index.cfm?zaction=AUCTION&Zmethod=PREVIEW&AUCTIONDATE=11/04/2019“. You can see the AUCTIONDATE at the end of the url matches the dayidin the html element.
So we end up doing something like this:
    await page.goto(`https://www.miamidade.realforeclose.com/index.cfm?zaction=USER&zmethod=CALENDAR`);
    const dayids = await page.$$eval('.CALSELF', elements => elements.map(element => element.getAttribute('dayid')));

    const baseDayPage = `https://www.miamidade.realforeclose.com/index.cfm?zaction=AUCTION&Zmethod=PREVIEW&AUCTIONDATE=`;

    for (let dayid of dayids) {
        await page.goto(`${baseDayPage}${dayid}`);
    }
We get the dayid from each html element. We set the baseDayPage and then loop through the list of dayids and within the loop navigate to the proper url with a concatenated baseDayPage and dayid. BAM. Magic. The tricky part is doing the investigation to figure out how the javascript is identifying the page it needs to go to from the html element.
And that is about it. These are some basic examples of how to handle some navigation in puppeteer. It all becomes trickier than Axios because the puppeteer page is living and currently active while you are scraping it and the data from axios is all static.
Looking for business leads?
Using the techniques talked about here at javascriptwebscrapingguy.com, we’ve been able to launch a way to access awesome business leads. Learn more at Cobalt Intelligence!
The post Puppeteer navigation. Jordan Teaches Web Scraping appeared first on JavaScript Web Scraping Guy.


Top comments (0)