Introduction:
In the vast domain of cloud computing world, Microsoft Azure remains a popular choice for organizations and developers looking for scalable, trustworthy, and adaptable solutions. The capacity to construct and administer Virtual Machines (VMs) inside a Virtual Network (VNet) is a crucial feature of Azure infrastructure. In this post, we will look at how to create VMs within a VNet and how to communicate between two VMs within the same VNet.
Step 1: Set Up a Virtual Network (VNet)
Before creating Virtual Machines, it's essential to have a Virtual Network in place. A VNet provides an isolated and secure environment for your VMs. Follow these steps to create a VNet:
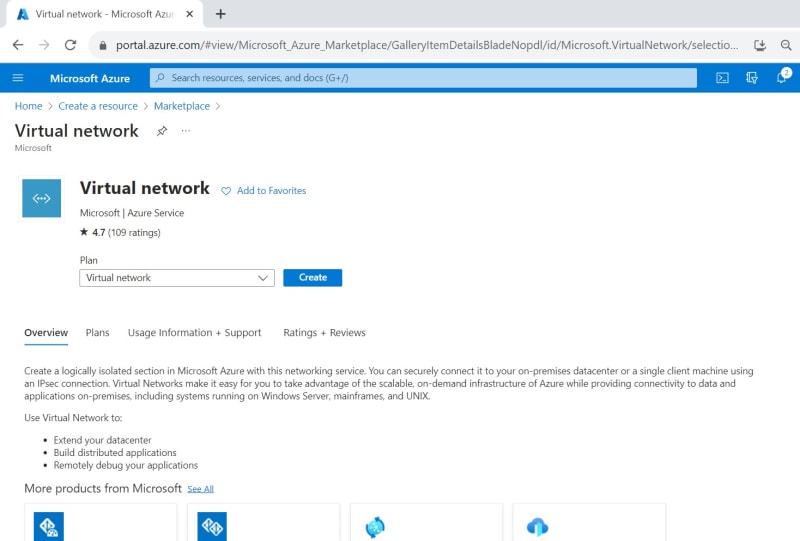
- Navigate to the Azure Portal and select "Create a resource."
- Search for "Virtual Network" and click on "Virtual Network" from the results.
- Fill in the necessary details such as name, address space, and subnet details.
- Review your settings and click "Create" to provision the VNet.
Step 2: Create Virtual Machines
Now that the VNet is set up, let's proceed with creating Virtual Machines. This can be done by following these steps:
- Navigate to the Azure Portal and select "Create a resource."
- Search for "Virtual Machine" and click on "Virtual Machine" from the results.
- Complete the VM creation wizard, specifying details such as VM name, OS, disk type, and administrator credentials.
- In the Networking section, select the previously created VNet and subnet for the VM.
- Review the configuration and click "Create" to deploy the VM.
Repeat these steps to create a second VM within the same VNet.
Step 3: Configure Network Security Group (NSG)
To allow communication between VMs within the same VNet, we need to configure Network Security Groups. NSGs act as firewalls, controlling inbound and outbound traffic. Follow these steps to configure NSGs:
- In the Azure Portal, navigate to the created VNet.
- Under "Settings," select "Network security group."
- Click on "Inbound security rules" and add a rule to allow traffic between the VMs.
Step 4: Enable VM-to-VM Communication
With the NSG rules in place, the VMs should now be able to communicate within the same VNet. Ensure that any software firewalls within the VMs are configured to allow the necessary traffic.
Step 5: Log in to your Virtual Machine
- To verify communication between the VMs.
- Navigate to the Virtual Machine page in your Azure Portal.
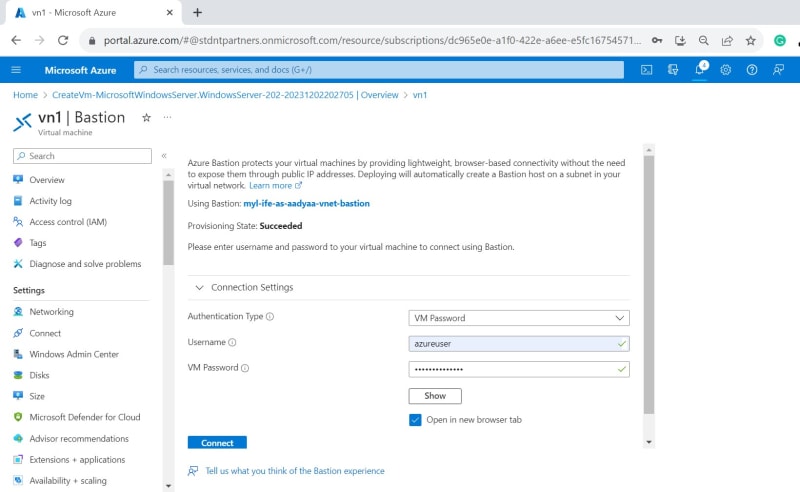
- Click on your Virtual Machine 1 and then connect via Bastion.
- A new Tab will open where you need to enter your credentials created earlier while initializing the Bastion login to your
virtual machine 1. - Navigate to the
settingsclick onwindows securityand then disable all the firewalls from public and private networks. - Now open
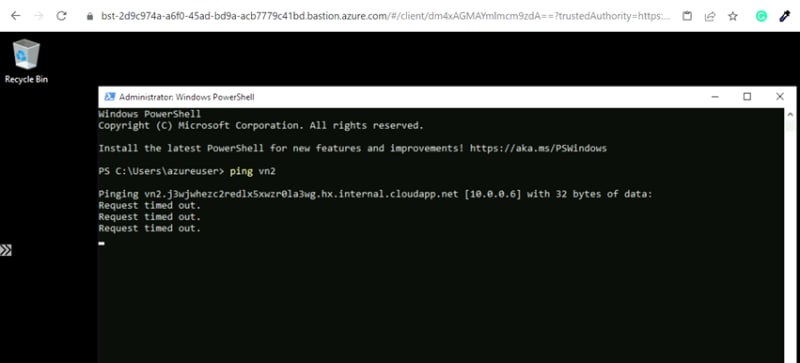
PowerShelland type in ``ping (virtual machine 2’s name) and then press enter.
You will now observe the connection is time out.
Now go back to your Azure portal.
Navigate to your
virtual machine 2and connect to it viaBastion.A new tab will open where you need login to your
virtual machine 2by entering the credentials you generated earlier while initializing your Bastion.Once logged in go to the
settingsclick onwindows securityand then disable all the firewalls from public and private networks.Now open
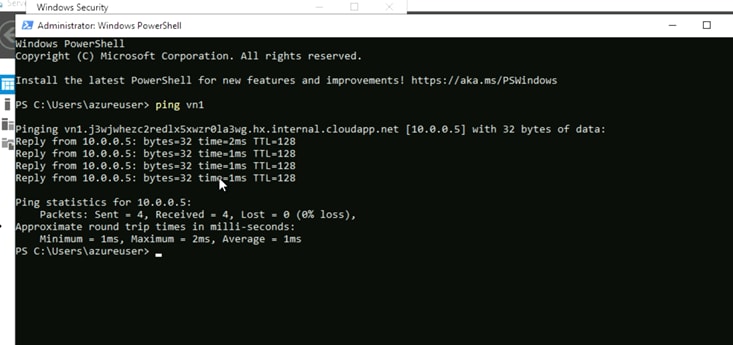
PowerShelland type inping (virtual machine 1’s name)and then press enter.
- Now you see that a connection has been established.
Conclusion:
Creating Virtual Machines within a Virtual Network in Azure is a fundamental task for many cloud-based applications. By following the steps outlined in this article, you can not only deploy VMs but also establish secure communication between them within the same Virtual Network. This forms the foundation for building scalable and interconnected solutions in the Azure cloud.


Top comments (0)