
In 2010, Apple Inc. changed the way we interact with each other online by launching FaceTime app, since then the legacy product has become the part of our social life interactions. Today, this blog will take you through a step by step guide on how to build a basic FaceTime clone app using 100ms SDK in iOS.
This content was originally published - HERE
You can also build an audio conferencing app like Clubhouse with 100ms iOS SDK.
Prerequisites
- Basic understanding of iOS Development.
- SwiftUI basics.
- Third party integration.
Getting Started
- Building UI using SwiftUI framework.
- Adding 100ms package to iOS app using Swift Package Manager.
- Setup 100ms.live free account
- Setting up SDK's methods.
- Join a Room.
- Mute/Unmute Audio.
- Switch Camera.
- Stop Camera.
- Leave a room.
Setup your 100ms account now and get 10000 free minutes every month
The structure of the application will have majorly two main views, one is the ContactListView on which you'll be able to see all your contact and from where you can make the call. The other one is the FacetimeView on which you can see the video of the person you have made call to and handle all the video controls over there.
ContactListView
The ContactListView consist of the list of people you can talk to, which mean you need a person model first then you need a list to populate on the view which will be treated as a list of contacts.
UserModel
struct UserModel: Identifiable {
    var id = UUID()
    var image: String
    var name: String
}
Now that the UserModel is ready with a unique UUID for the user, you need to create a ContactListCell which will use this UserModel to populate data in the List, that will be created inside ContactListView.
struct ContactListCell: View {
    var user: UserModel
    var body: some View {
        HStack(spacing: 20) {
            Image(user.image)
                .resizable()
                .aspectRatio(contentMode: .fill)
                .frame(width: 70, height: 70, alignment: .center)
                .clipShape(Circle())
            Text(user.name)
                .bold()
        }
        .padding()
    }
}
ContactListCell
Create ContatactListView that inlcudes a List which reuses the ContactListCell, declare a variable of type [UserModel] called contacts and use it in ContactListCell.
import SwiftUI

struct ContactListView: View {

    @State var contacts = [UserModel(image: "girl", name: "Krystal"), UserModel(image: "girl", name: "Krystal"), UserModel(image: "girl", name: "Krystal")]

    var body: some View {
        NavigationView {
            List(self.$contacts, rowContent: {
                contact in
                NavigationLink(destination: FacetimeView(), label: {
                    ContactListCell(user: contact.wrappedValue)
                })
            })
                .navigationTitle("Facetime Clone")
        }
    }
}

struct ContactListView_Previews: PreviewProvider {
    static var previews: some View {
        ContactListView()
    }
}

The ContactListView is ready to go, next step is to create the FacetimeView which will work as the main video view where both the current user and the contacted user will be able to have a video call.
FacetimeView
The FacetimeView consist of the view where you can see the person who you have called, can mute/unmute & end the call by clicking on any of the options available at the bottom of the view. To maintain the mute/unmute and video pause state, declare variables of type Bool which will help to switch between states.
import SwiftUI

struct FacetimeView: View {

    @State var isMuted: Bool = false
    @State var videoIsShowing: Bool = true

    var body: some View {
        Spacer()
        videoOptions
            .padding(.bottom, 10)

    }

    var videoOptions: some View {
        HStack(spacing: 20) {
            Spacer()
            Button {

            } label: {
                Image(systemName: videoIsShowing ? "video.fill" : "video.slash.fill")
                    .frame(width: 60, height: 60, alignment: .center)
                    .background(Color.white)
                    .foregroundColor(Color.black)
                    .clipShape(Circle())
            }

            Button {

            } label: {
                Image(systemName: "phone.down.fill")
                    .frame(width: 60, height: 60, alignment: .center)
                    .background(Color.red)
                    .foregroundColor(Color.white)
                    .clipShape(Circle())
            }

            Button {

            } label: {
                Image(systemName: isMuted ? "mic.slash.fill" : "mic.fill")
                    .frame(width: 60, height: 60, alignment: .center)
                    .background(Color.white)
                    .foregroundColor(Color.black)
                    .clipShape(Circle())
            }
            Spacer()
        }
    }

}

struct FacetimeView_Previews: PreviewProvider {
    static var previews: some View {
        FacetimeView()
    }
}

Integrate 100ms SDK using SPM
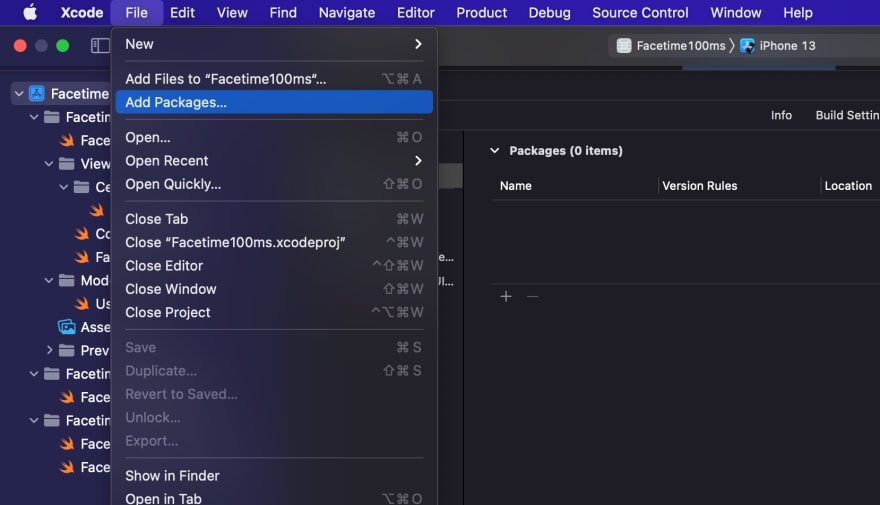
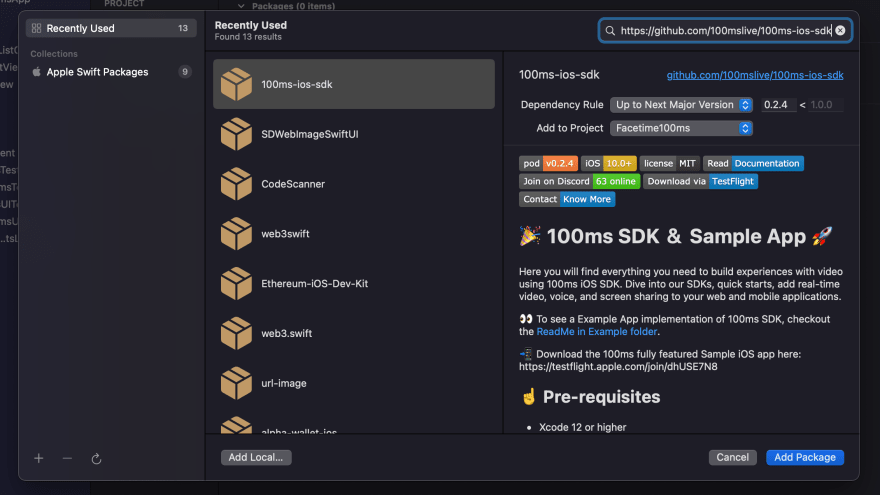
In your 100ms project, go to File -> Add Packages -> Search 100ms git url
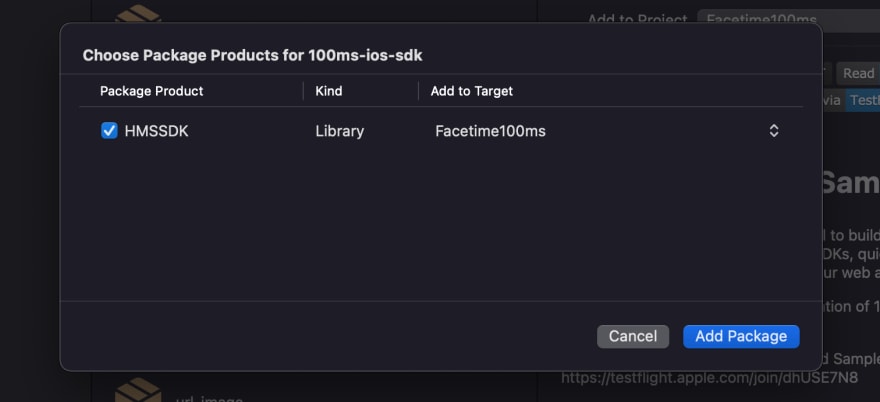
Click on Add Package button to complete the package integration, enable Local Network, Camera and Microphone Usage Access to the application by adding Privacy - Local Network Usage Description, Privacy - Camera Usage Description & Privacy - Microphone Usage Description to your project's Info.plist

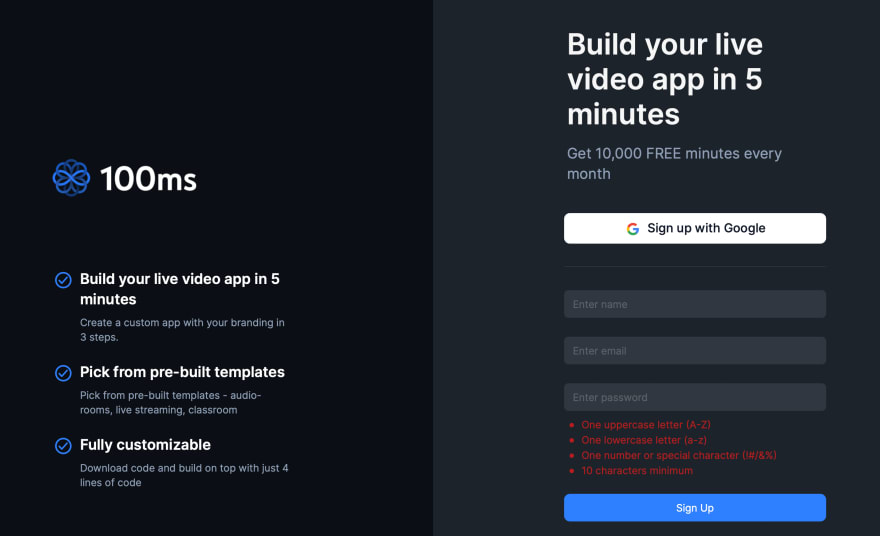
Create Free Account on 100ms.live
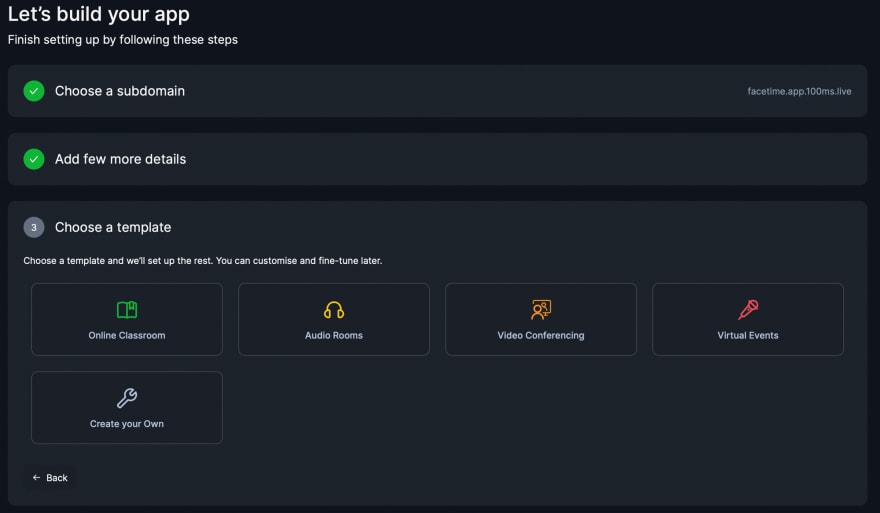
Click on Try for Free button on 100ms.live website and create account using your gmail account, after selecting your gmail account you'll find the option to choose the subdomain for your hosted sessions on 100ms platform.


You get the option to choose your hosted sessions subdomain, here let's name it facetime and add more details. The key step is to choose the right template, in this case since Facetime Clone demo has video conferencing capability, select Video Conferencing template from the listed options and create app.

The basic onboading setup is now complete and you'll be able to find all the options on your dashboard, so click on Go to Dashboard button.
On Dashboard you'll find that all the templates, rooms, sessions etc. you have created so far are available and now all you need to get things working for the Facetime Clone is first, to create a new room under the Rooms tab and use it's roomID and second, to get the tokenEndpoint which is available under the Developer tab option. These two key information will help to connect the facetime application to the room and share the room invite with other peers, who can connect to join conference.

Video Conferencing template has two type of roles by default, Guest and Host which have different set of permissions that can be modified here in this panel. You can also add a new type of role by clicking on the Add a Role button.
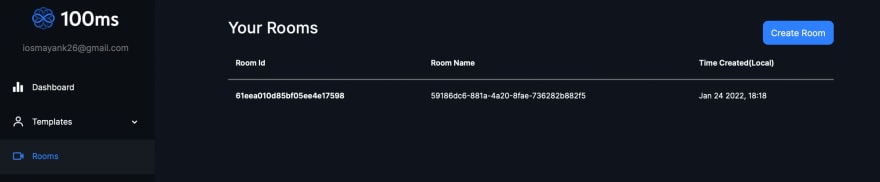
Under the Rooms tab, you'll find the button to create a new room "Create Room" , click on it and fill the details of newly created room.
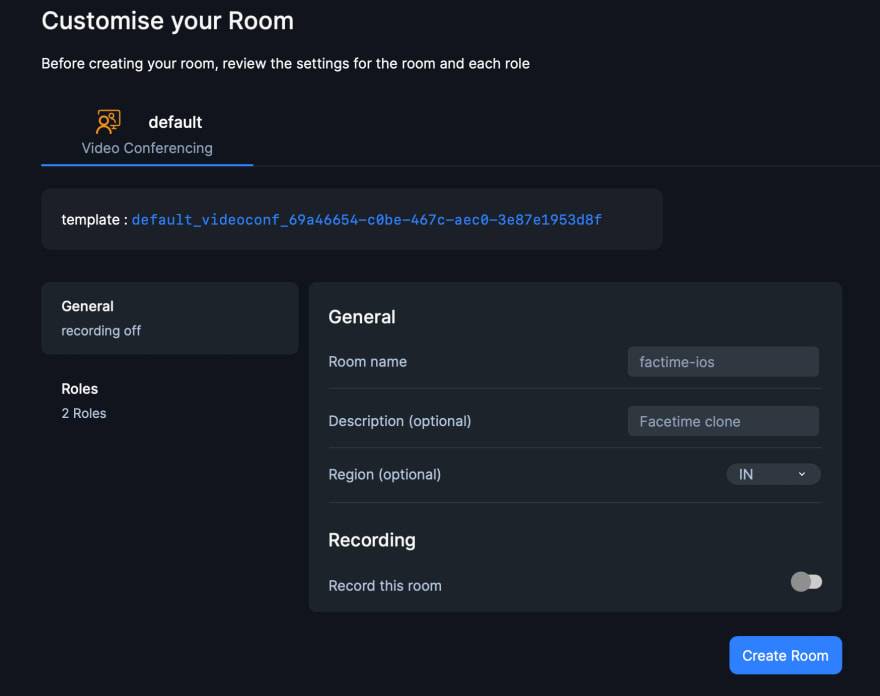
New room needs details like Room name, description and region. Here in this example we named it facetime-ios, you can name it whatever you want and the description is Facetime clone. Click on Create Room to complete the process.
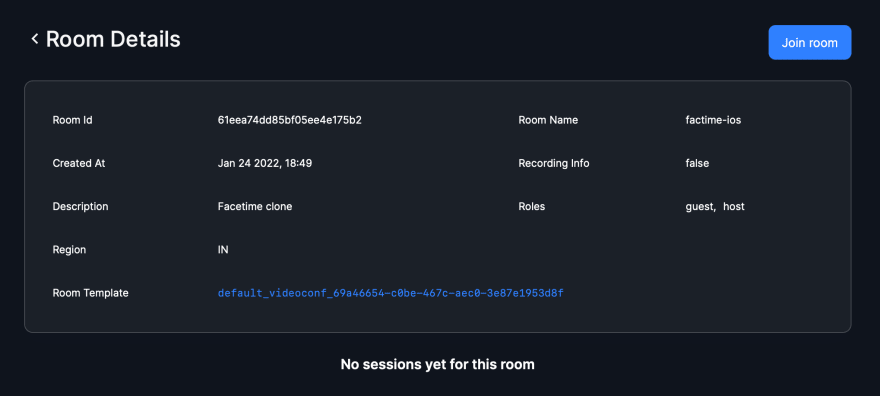

From the newly created room, grab the roomID and from Developer's tab grab the tokenEndpoint.
Add this TokenProvider swift file to your project that helps to setup the communication with 100ms server and add the grabbed roomId & tokenId respectively, which will be used to authenticate the connection and get the stream going.
Token Provider
enum TokenProviderError: Error {
    case invalidURL
    case invalidRequestPayload
    case invalidResponseFormat
    case tokenMissing
    case networkError(reason: String?)
}

class TokenProvider {
    struct Constants {
        static let tokenEndpoint = "https://prod-in.100ms.live/hmsapi/facetime.app.100ms.live/"
        static let roomID = "61eea74dd85bf05ee4e175b2"
    }

    func getToken(for userID: String, role: String, completion: @escaping (String?, Error?) -> Void) {
        let tokenRequest: URLRequest

        do {
            tokenRequest = try request(for: userID, role: role)
        } catch {
            completion(nil, error)
            return
        }

        URLSession.shared.dataTask(with: tokenRequest) { [weak self] data, response, error in
            DispatchQueue.main.async {
                self?.process(data: data, error: error, completion: completion)
            }
        }.resume()
    }

    private func request(for userID: String, role: String) throws -> URLRequest {
        guard let url = URL(string: Constants.tokenEndpoint + "api/token") else {
            throw TokenProviderError.invalidURL
        }

        var request = URLRequest(url: url)
        request.httpMethod = "POST"

        let body = ["room_id": Constants.roomID,
                    "user_id": userID,
                    "role": role]

        request.httpBody = try JSONSerialization.data(withJSONObject: body, options: .prettyPrinted)

        request.addValue("application/json", forHTTPHeaderField: "Content-Type")
        request.addValue("application/json", forHTTPHeaderField: "Accept")

        return request
    }

    private func process(data: Data?, error: Error?, completion: (String?, Error?) -> Void) {
        guard error == nil, let data = data else {
            completion(nil, TokenProviderError.networkError(reason: error?.localizedDescription))
            return
        }

        let token: String
        do {
            token = try parseToken(from: data)
        } catch {
            completion(nil, error)
            return
        }

        completion(token, nil)
    }

    private func parseToken(from data: Data) throws -> String {
        let json = try JSONSerialization.jsonObject(with: data)

        guard let responseDictionary = json as? [String: Any]  else {
            throw TokenProviderError.invalidResponseFormat
        }

        guard let token = responseDictionary["token"] as? String else {
            throw TokenProviderError.tokenMissing
        }

        return token
    }
}
In order to listen back from 100ms server, import HMSSDK in FacetimeView file and create an extension of Facetime View and declare a ViewModel that confirms to HMSUpdateListener protocol. Add all the required methods of HMSUpdateListener protocol to the view model and use on(track: HMSTrack, update: HMSTrackUpdate, for peer: HMSPeer) to listen to any change in peerTrack.
extension FacetimeView {
    class ViewModel: ObservableObject, HMSUpdateListener {

        @Published var addVideoView: ((_ videoView: HMSVideoTrack) -> ())?
        @Published var removeVideoView: ((_ videoView: HMSVideoTrack) -> ())?

        func on(join room: HMSRoom) {

        }

        func on(room: HMSRoom, update: HMSRoomUpdate) {

        }

        func on(peer: HMSPeer, update: HMSPeerUpdate) {

        }

        func on(track: HMSTrack, update: HMSTrackUpdate, for peer: HMSPeer) {
            switch update {
            case .trackAdded:
                if let videoTrack = track as? HMSVideoTrack {
                    addVideoView?(videoTrack)
                }
            case .trackRemoved:
                if let videoTrack = track as? HMSVideoTrack {
                    removeVideoView?(videoTrack)
                }
            default:
                break
            }
        }

        func on(error: HMSError) {

        }

        func on(message: HMSMessage) {

        }

        func on(updated speakers: [HMSSpeaker]) {

        }

        func onReconnecting() {

        }

        func onReconnected() {

        }

    }
}
To setup video frames for contacted person and current user in FacetimeView, create a VideoView using UIViewRepresentable
Video View
import Foundation
import SwiftUI
import HMSSDK

struct VideoView: UIViewRepresentable {
    var track: HMSVideoTrack

    func makeUIView(context: Context) -> HMSVideoView {
        let videoView = HMSVideoView()
        videoView.setVideoTrack(track)
        videoView.backgroundColor = UIColor.black
        return videoView
    }

    func updateUIView(_ videoView: HMSVideoView, context: Context) {
        videoView.setVideoTrack(track)
    }
}
The Video View is ready to use in FacetimeView, but before adding it to the View first import HMSSDK and declare the hmsSdk object, token provider object, viewModel object and other tracks objects.
import Foundation
import SwiftUI
import HMSSDK

struct FacetimeView: View {
    var hmsSDK = HMSSDK.build()
    @State var localTrack = HMSVideoTrack()
    @State var friendTrack = HMSVideoTrack()
    let tokenProvider = TokenProvider()
    @StateObject var viewModel: ViewModel
    @Environment(\.presentationMode) var presentationMode

    @State var isMuted: Bool = false
    @State var videoIsShowing: Bool = true
All the required variables have been declared, so let's go back to the FacetimeView file and inside body, add video view that requires a track in it's initialiser.
    var body: some View {
        ZStack(alignment: .bottomTrailing) {
            VideoView(track: friendTrack)
                .edgesIgnoringSafeArea(.all)
            if !videoIsShowing {
                ZStack {
                    Color.gray
                    Image(systemName: "video.slash.fill")
                }
                .frame(width: 150, height: 250, alignment: .center)
                .padding()
            } else {
                VideoView(track: localTrack)
                    .frame(width: 150, height: 250, alignment: .center)
                    .cornerRadius(10)
                    .shadow(radius: 20)
                    .padding(.bottom, 80)
                    .padding()
            }
            videoOptions
                .padding(.bottom, 10)
        }
    }
Join Room & Listen To Peer Track
In the joinRoom() method, use newly created roomID in the token provider's getToken() call. The listen() methods listens to the change in peer track from 100ms server, based on which you can add or remove the video view for the peer connected in the room.
    func listen() {
        self.viewModel.addVideoView = {
            track in
            hmsSDK.localPeer?.localAudioTrack()?.setMute(false)
            hmsSDK.localPeer?.localVideoTrack()?.startCapturing()
            self.localTrack = hmsSDK.localPeer!.videoTrack!
            self.friendTrack = track
        }

        self.viewModel.removeVideoView = {
            track in
            self.friendTrack = track
        }
    }


    func joinRoom() {
        tokenProvider.getToken(for: "61eea74dd85bf05ee4e175b2", role: "host", completion: {
            token, error in
            let config = HMSConfig(authToken: token!)
            hmsSDK.join(config: config, delegate: self.viewModel)
        })
    }
Create & Add Video Control Event Methods
There are three actionable events that can take place in our Facetime Clone namely, switchCamera(), muteMic(), stopCamera() and endRoom(). After declaring these methods, call them in respective button action built inside videoOptions object of type some View.
    func switchCamera() {
        self.hmsSDK.localPeer?.localVideoTrack()?.switchCamera()
    }

    func muteMic() {
        self.hmsSDK.localPeer?.localAudioTrack()?.setMute(isMuted)
        isMuted.toggle()
    }

    func stopCamera() {
        if self.videoIsShowing {
            self.hmsSDK.localPeer?.localVideoTrack()?.stopCapturing()
            self.videoIsShowing = false
        } else {
            self.hmsSDK.localPeer?.localVideoTrack()?.startCapturing()
            self.videoIsShowing = true
        }
    }

    func endRoom() {
        hmsSDK.endRoom(lock: false, reason: "Meeting has ended") { didEnd, error in
            if didEnd {
                self.presentationMode.wrappedValue.dismiss()
            } else {

            }
        }
    }

    ///////////////////////////////////////////////////

    var videoOptions: some View {
        HStack(spacing: 20) {
            Spacer()
            Button {
                stopCamera()
            } label: {
                Image(systemName: videoIsShowing ? "video.fill" : "video.slash.fill")
                    .frame(width: 60, height: 60, alignment: .center)
                    .background(Color.white)
                    .foregroundColor(Color.black)
                    .clipShape(Circle())
            }

            Button {
                endRoom()
            } label: {
                Image(systemName: "phone.down.fill")
                    .frame(width: 60, height: 60, alignment: .center)
                    .background(Color.red)
                    .foregroundColor(Color.white)
                    .clipShape(Circle())
            }

            Button {
                muteMic()
            } label: {
                Image(systemName: isMuted ? "mic.slash.fill" : "mic.fill")
                    .frame(width: 60, height: 60, alignment: .center)
                    .background(Color.white)
                    .foregroundColor(Color.black)
                    .clipShape(Circle())
            }
            Spacer()
        }
    }
Final Method Calls
In FacetimeView, add .onAppear modifier and call joinRoom() & listen() methods to it.
        .onAppear(perform: {
            joinRoom()
            listen()
        })
Build and run the Xcode project, and share the newly created room invite with any of your peer to join the room. You'll be able to have a video call with your peer and will be able to manage the controls like muting the call, stoping camera, switching your camera, ending the call. If you wish to experiment more then do play with the role types and it's permissions to build a next level application that you can show the world. Please find the project link below to take a reference;
Project Github link : Facetime Clone in iOS

Top comments (0)