A YugabyteDB cluster provides High Availability thanks to synchronous replication between the nodes. On top of that, you can replicate tables asynchronously between clusters. There are multiple reasons for that. One is Disaster Recovery to a region where latency is too high to wait for synchronous replication. Another is higher flexibility: the target can be read or write. Here is an example to show how to setup.
Two YugabyteDB clusters
I'll start to create two YugabyteDB clusters with Docker. I define a bash function that starts one from a container name and a network name, the hostname in this network will be the container name:
yb_cluster(){
# the delete option removes all container in the network
[ "$2" == "delete" ] && docker rm -f $(docker ps -q --filter "network=${1}" | tee /dev/stderr)
# takes a network name, cluster number and node number
echo "Network: ${1} Cluster: ${2} Node: ${3}" |
grep '^Network: [^ .]* Cluster: [0-9] Node: [0-9]$' || return 1
# create the network if not already there
docker network inspect ${1} 2>/dev/null 1>&2 ||
docker network create ${1}
# drop the container if already there with this name
docker container inspect ${1}${2}${3} 2>/dev/null 1>&2 &&
docker rm -f ${1}${2}${3}
# check if node one else join it ----------------v
if [ "${3}" -gt 1 ] ; then join=" --join ${1}${2}1" ; else join="" ; fi
# start the container
docker run -d --cap-add NET_ADMIN -p 154${2}${3}:15433 \
-p 70${2}${3}:7000 -p 90${2}${3}:9000 -p 54${2}${3}:5433 \
--network ${1} --name ${1}${2}${3} --hostname ${1}${2}${3} \
yugabytedb/yugabyte:2.15.3.0-b231 bash -c " \
\
yugabyted start $join --listen ${1}${2}${3} \
--tserver_flags='' &&
cd /root/var/data/yb-data/tserver/logs &&
tail -F * | grep -v 'DEBUG:'
"
echo http://localhost:70${2}${3}
# check the nodes
docker exec -it ${1}${2}${3} bash -c "
until ysqlsh -h ${1}${2}${3} -c '
select host,node_type,cloud,region,zone from yb_servers()
' ; do sleep 1 ; done 2>/dev/null
"
}
# first RF=3 cluster
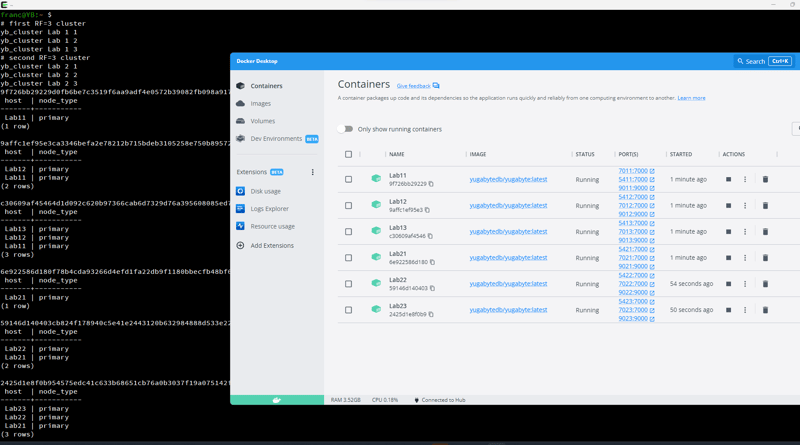
yb_cluster Lab 1 1 ; yb_cluster Lab 1 2 ; yb_cluster Lab 1 3
# second RF=3 cluster
yb_cluster Lab 2 1 ; yb_cluster Lab 2 2 ; yb_cluster Lab 2 3
You may like my container orchestration from bash, or not, I'm just showing different ways in my blog posts. You can deploy it as you want as long as the nodes can see each other on the network, and you have access to yb-admin.
I've used the yugabytedb/yugabyte:2.15.3.0-b231. xCluster will have new features in next releases.
Here is the result on Docker Desktop:
From now, I'll run everything in one container so that all machines are visible by their hostname:
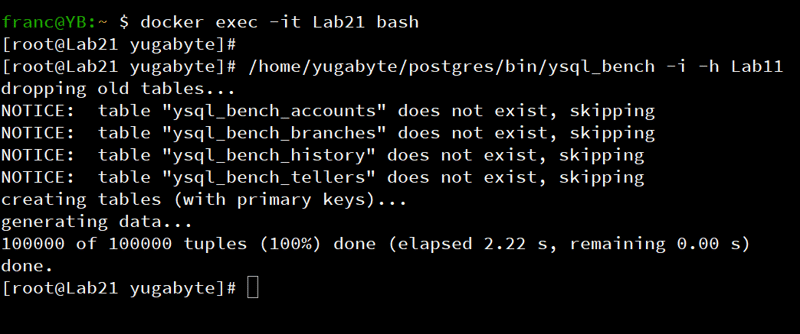
docker exec -it Lab21 bash
I'll create tables on the primary cluster, copy them to the target, start replication, and see how data propagates.
Create tables in the source cluster
I'm simply using pg_bench initialization here. The YugabyteDB version of it is ysql_bench:
/home/yugabyte/postgres/bin/ysql_bench -i -h Lab11
Get necessary info for source and destination
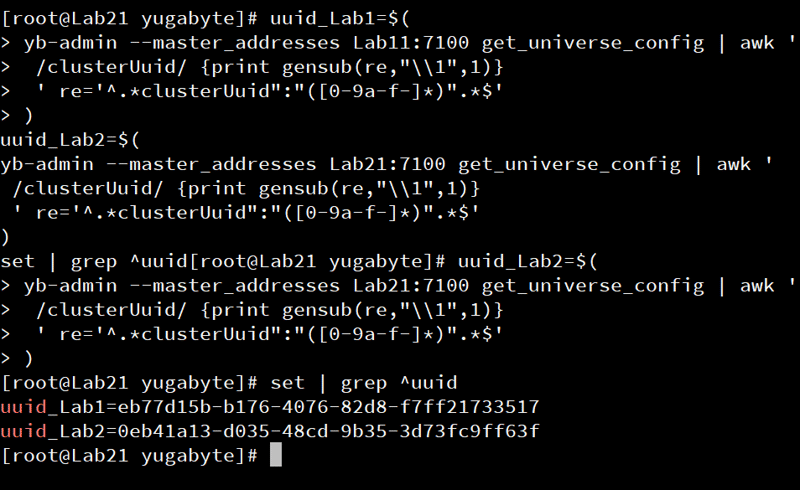
I get the cluster UUID from each one:
uuid_Lab1=$(
yb-admin --master_addresses Lab11:7100 get_universe_config | awk '
 /clusterUuid/ {print gensub(re,"\\1",1)}
 ' re='^.*clusterUuid":"([0-9a-f-]*)".*$'
)
uuid_Lab2=$(
yb-admin --master_addresses Lab21:7100 get_universe_config | awk '
 /clusterUuid/ {print gensub(re,"\\1",1)}
 ' re='^.*clusterUuid":"([0-9a-f-]*)".*$'
)
set | grep ^uuid
If you prefer to get the UUID from the webconsole, here is another awk to do that, as it is defined as a cluster configuration parameter (aka G-Flag aka varz):
uuid_Lab1=$(
 curl -s http://Lab11:7000/varz?raw |
 awk -F= '/--cluster_uuid=/{print $NF}'
)
I collect the table names and their table_id (see this previous blog post about it) , into a temporary file, formatted for pg_dump and yb_admin:
ysqlsh -h Lab11 -Aqtc "
select format('0000%s00003000800000000000%s\"%I.%I'
,lpad(to_hex(oid::int), 4, '0')
,lpad(to_hex(format('%I.%I',schemaname,tablename)::regclass::oid::int),4,'0')
,schemaname,tablename) table_id
from pg_tables, pg_database
where datname=current_database()
  and tableowner=user
" | awk -F '\"' '
{
 printf " -t " qq$2qq > q"table_name.list"
 printf      sep $1 > "table_oid.list"
 sep=","
}
' qq='""'
I use a SQL query here because it is easy to add some filter if required. Note that this works because there's no secondary indexes in this pg_bench schema. Indexes must be replicated as well.
Another way to get the OIDs is from yb-admin.
I use this function to return the comma-separated OIDs for tables and indexes for one database (first argument is the yb-master hostname, the second is the database name):
ysql_oids(){
 yb-admin --master_addresses ${1}:7100 list_tables include_db_type include_table_id include_table_type | sort -k2 |
 awk '
  $0 ~ "^ysql[.]"database"[.]" && $0 ~ " [0-9a-f]{32} (table|index)$" {
   print > "/dev/stderr" ; print $(NF-1)
  } ' database="${2}" |
 paste -sd, ;  }
I replace the OIDs file with this command:
ysql_oids Lab11 yugabyte > table_oid.list
Create destination tables
In this version you have to run the same DDL on the source and the destination. This also concerns indexes: additional indexes on the destination are not maintained if they don't exit on the source.
This will pg_dump the schema (-s or --schema-only) from source, using the list of -t arguments from the file generated above.
./postgres/bin/ysql_dump -h Lab11 -s $(cat table_name.list) |
 ysqlsh -eh Lab21
Start replication
Here is the replication from the source, connecting to the target, and defining the source with the UUID and hostname, with the list of tables generated above
yb-admin --master_addresses Lab21:7100 \
setup_universe_replication $uuid_Lab1 Lab11 "$(cat table_oid.list)"
This is run on the destination, which will pull the changes from the source.

A note about the vocabulary here, to explain setup_universe_replication. I called "Cluster" the deployment of one logical YugabyteDB database over multiple nodes. A "Universe" can be larger than that, with additional read replicas (not part of the quorum). In this example, with only primary nodes, this is the same. "Replication" is the asynchronous replication between clusters.
Test it
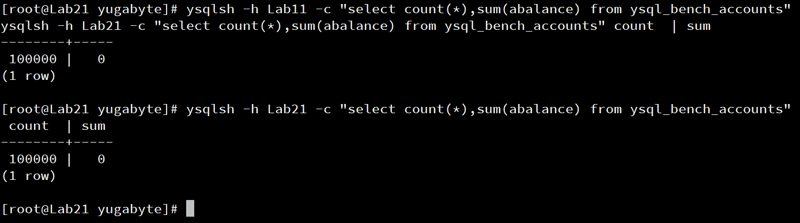
First, I check the state on each database:
ysqlsh -h Lab11 -c "
 select count(*),sum(abalance) from ysql_bench_accounts
"
ysqlsh -h Lab21 -c "
 select count(*),sum(abalance) from ysql_bench_accounts
"
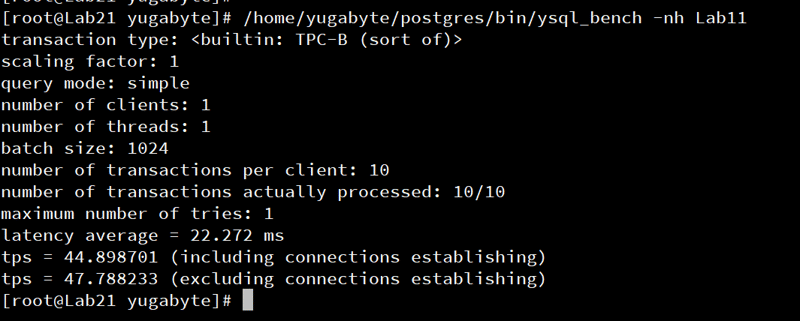
I'm running pg_bench on the source to insert and update tables, and select the totals:
/home/yugabyte/postgres/bin/ysql_bench --no-vacuum -h Lab11
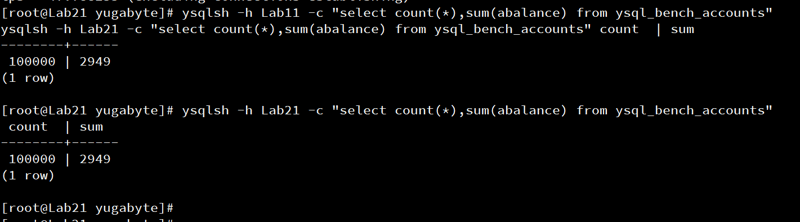
Then checking that all is in sync:
ysqlsh -h Lab11 -c "
 select count(*),sum(abalance) from ysql_bench_accounts
"
ysqlsh -h Lab21 -c "
 select count(*),sum(abalance) from ysql_bench_accounts
"
The changes on the source table have been replicated to the target.
If you want to stop the replication:
yb-admin --master_addresses Lab21:7100 \
 delete_universe_replication $uuid_Lab1
Two-way replication
When using this technique for Disaster Recovery, you can define the same replication in the other way. the table OID on the target are different than the source. You can generate them with the same ysqlsh+awk script as above. I'm showing another way, from yb-admin list_tables:
yb-admin --master_addresses Lab11:7100 \
setup_universe_replication $uuid_Lab2 Lab21 "$(
yb-admin --master_addresses Lab21:7100 list_tables \
 include_db_type include_table_id include_table_type |
 awk '/^ysql[.].* table/{printf s $(NF-1);s=","}'
)"
Of course, you don't want to connect on both sides and update the same rows. This would generate replication conflicts which is what you want to avoid with a distributed SQL database where the replication within each cluster is transactional. With xCluster, the replication is based on the timestamped change logs, so the last version of the row is replicated to the other.
Note that, at this level, we don't have the problems of traditional databases logical replication (like triggers fired twice or loops in 2-way replication). But we still have more flexibility than traditional databases physical replication as we can define it per table and across versions in rolling upgrade.
You can decide to connect to only one site. On failover or switchover, you just connect to the other one, with nothing to change in the database. Another possibility is in multitenant where you connect on both side but for different tenants. Especially if you use Row Level Security to isolate the tenants logically, you are guaranteed to have no replication conflicts. And because asynchronous replication has a recovery point higher than zero (RPO>0), it is not a substitue to High Availability. The recommended deployment is a Replication Factor RF=3 on each region. This is the best way to provide the highest resilience to failures without adding corss-region latency.


Top comments (0)