Kubernetes Patterns: Capacity Planning
An excellent cloud-native application design should declare any specific resource that it needs to operate correctly. Kubernetes uses those requirements to make the most efficient decisions to ensure maximum performance and availability of the application. Additionally, knowing the application requirements firsthand allows you to make cost-effective decisions regarding the hardware specifications of the cluster nodes.
In this post, we will explore the best practices to declare storate, CPU, and memory resources needs. We will also discuss how Kubernetes behaves if you don't specify some of these dependencies.
Storage Dependency
Let's explore the most common runtime requirement of an application: Persisten Storage. By default, any modifications made to the filesystem of a running container are lost when the container is restarted. Kubernetes provides two solutions to ensure that changes persist: èmptyDir and Persistent Volume (PV).

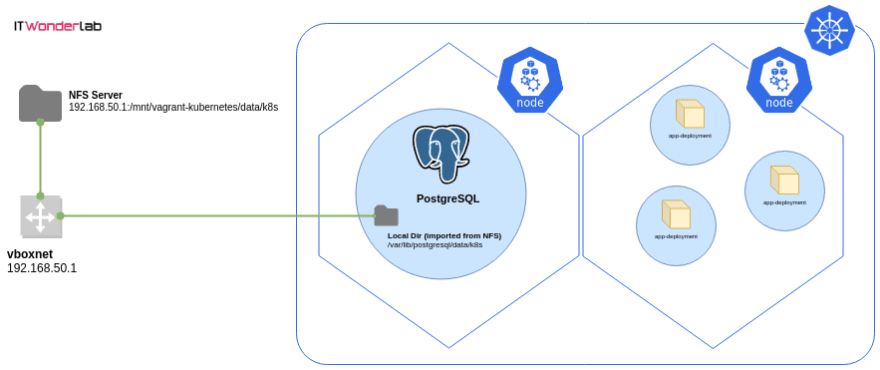
Using PV, you can store data that does not get deleted even if the whole Pod was terminated or restarted. There are several methods by which you can provision a backend storage to the cluster. It depends on the environment where the cluster is hosted (on-prem or in cloud-provider). In the following exercise, we use the host's disk as the PV backend storage. Provisioning storate using PVs involves two steps:
- Creating the PV: this is the disk on which Pod claim space. This step differs depending on the hosting environent.
- Creating a Persistent Volume Claim (PVC): this is where you actually provision the storage for the Pod by claiming space on the PV.
First, let's create a PV using the host's local disk. Create the following PV.yml file:
apiVersion: v1
kind: PersistentVolume
metadata:
 name: hostpath-vol
spec:
 storageClassName: local
 capacity:
   storage: 1Gi
 accessModes:
   - ReadWriteOnce
 hostPath:
   path: "/tmp/data"
This definition creates a PV that uses the host disk as the backend storate. The volume is mounted on /tmp/data directory on the host. We need to crete this directory before applying the configuration
$ mkdir /tmp/data
$ kubectl apply -f PV.yaml
persistentvolume/hostpath-vol created
Now, we can create a PVC and avail it to our Pod to stora data through a mount point. The following definition file creates both PVC and a Pod that uses it.
apiVersion: v1
kind: PersistentVolumeClaim
metadata:
 name: my-pvc
spec:
 storageClassName: local
 accessModes:
   - ReadWriteOnce
 resources:
   requests:
     storage: 100Mi
---
apiVersion: v1
kind: Pod
metadata:
 name: pvc-example
spec:
 containers:
 - image: alpine
   name: pvc-example
   command: ['sh', '-c', 'sleep 10000']
   volumeMounts:
     - mountPath: "/data"
       name: my-vol

 volumes:
   - name: my-vol
     persistentVolumeClaim:
      claimName: my-pvc
Applyting this definiiton file creates the PVC followed by the Pod.
$ kubectl apply -f pvc_pod.yaml
persistentvolumeclaim/my-pvc created
pod/pvc-example created
Any data that gets created or modified on /data inside the container will be persisted to the host's disk. You can check that by logging into the container, creating a file under /data, restarting the Pod and then ensuring the file still exists on the Pod. You can also notice that files created in /tmp/data are immediately available to the Pod and its containers.
The hostPort Dependency
If you are using the hostPort option, you are explicitly allowing the internal container port to be accessible from outside the host. A Pod that uses hostPort cannot have more than one replica on the same host because of port conflicts. If no node can provide the required the port, then the Pod using in the `hostPort option will never get scheduled. Additionally, this creates a one-to-one relationship between the Pod and its hosting node. So, in a cluster with four nodes, you can only have a maximum of four Pods that use the hostPort option.
Configuration Dependency
Almost all application are designed so that they can be customized through variables. For example, MySQL needs at least the initial root credentials. Kubernetes provides configMaps for injecting variables to containers inside Pods and Secrets for supplying confidentaial variables like account credentials. Let's have a quick example on how to use configMaps to provision variables to a Pod:
`yml
kind: ConfigMap
apiVersion: v1
metadata:
name: myconfigmap
data:
# Configuration values can be set as key-value properties
dbhost: db.example.com
dbname: mydb
kind: Pod
apiVersion: v1
metadata:
name: mypod
spec:
containers:
- name: mycontainer
image: nginx
envFrom:
- configMapRef:
name: myconfigmap
Now let's apply this configuration and ensure that we can use the environment variables in our container.console $ kubectl apply -f pod.yml configmap/myconfigmap created pod/mypod created $ kubectl exec -it mypod -- bash root@mypod:/# echo $dbhost db.example.com root@mypod:/# echo $dbname mydbHowever, this creates a dependency of its own: if theconfigMap` was not available, the container might not work as expected. In our example, if this container and application needs a constant database connection to work, then if it failed to obtain the database name and host, it may not work at all. The same thing holds for Secrets, which must be available firsthand before any client containers can get spawned.
- configMapRef:
name: myconfigmap
Resource Dependencies
So far we discussed the different runtime dependencies that affect which node will the Pod get scheduled and the various prerequisities that must be availed for the Pod to function correctly. However, you must also take into consideration that capacity requirement of the container.
Controllable and Uncontrollable Resources
When designing an application, we need to be aware of the type of resources that this application may consume. Generally, resources can be classified into two main categories:
- Sharable: those are the resources that can be shared among different consumers and, thus, limited when required. Examples of this are CPU and network bandwidth
- Non-shareable: resources that cannot be shared by nature. For example, memory. If a container tries to use more memory than its allocation, it will get killed.
Declaring Pod Resource Requirements
The distinction between both resources types is crucial for a good design. Kubernetes allows you to declare the amount of CPU and memory the Pod requires to function. There are two parameters that you can use for this declaration:
- requests: this is the minimum amount of resources taht the Pod needs. For example, you may already have the knowledge that the hosted application will fail to start if it does not have access to at least 512 MB memory.
- limits: the limits define the maximum amount of resources that you need to supply for a given Pod.
Let's have a quick example for a scenario application that needs at least 512 MB and 0.25% of a CPU core to run. The definition file for such a Pod may look like this:
`yml
kind: Pod
apiVersion: v1
metadata:
name: mypod
spec:
containers:
- name: mycontainer
image: myapp
resources:
requests:
cpu: 250m
memory: 512Mi
limits:
cpu: 500m
memory: 750Mi
` When the scheduler manages to deploy this Pod, it will search for a node that has at least 512MB of memory free. If a suitable node was found, the Pod gets scheduled on it. Otherwise, the Pod will never get deployed. Notice that only the requiest field is considered by the scheduler when determining where to deploy the Pod.
How Are the Resource Requests and Limits Calculated ?

Memory is calculated in bytes, but you are allowed to use units like Mi and Gi to specify the requested amount. Notice that you should not specify a memory limit that is higher than the amount of memory on your nodes. If you did, the Pod would never get scheduled. Additionally, since memory is a non-sharable resource as we discussed, if a container tried to request more memory than the limit, it will get killed. Pods that are created through a higher controller like a ReplicaSet or a Deployment have their containers restarted automatically when they crash or get terminated. Hence, it is always recommented that you create Pods through a contoller.
CPU is calculated through millicores. 1 core = 1000 millicores. So if you expect your container needs at least half a core to operate, you set the request to 500m. However, since CPU belongs to sharable resources when the container requests more CPU than the limit, it will not get terminated. Rather, the Kubelet throttles the container, which may negatively affect its performance. It is advised here that you use liveness and readiness probes to ensure that you application latency does not affect your business requirements.
What Happens When You (not) Specify Requests and Limits ?
Most of the Pod definitions examples ignore the requests and limits parameters. You are not strictly required to include them when designing your cluster. Adding or ignoring requests and limits affects the quality of service that the Pod receives as follows:
- Lowest Priority Pods: when you do not specify requests and limits, the Kubelet will deal with your Pod in a best-effort manner. The Pod, in this case, has the lowest priority. If the node runs our of non-shaerable resources, the best-effort Pods are the first to get killed.
- Medium Priority Pods: if you define both parameters and set the requests to be less than the limit, then Kubernetes manages your Pod in the Burstable manner. When the node runs out of non-sharable resources, the Burstable Pods will get killed only when there are not more best-effort Pods running.
- Highest Priority Pods: your Pod will be deemed as of the most top priority when you set the requests and the limits to equal values. It's as if you are saying. I need this Pod to consume no less and no more than X memory and Y CPU. In this case, and in the event of the node running our of shaerable resources, Kubernetes does not terminate those Pods until the best-effort, and the burstable Pods are terminated. Those are the higest priority Pods.
We can summarize how the Kubelet deals with Pod priority as follows:
| Method | Priority | Request | Limit |
|---|---|---|---|
| Best-effort | Lowest | None | None |
| Burstable | Medium | X | Y (higher than X) |
| Guaranteed | High | X | X |
Pod Priority and Preemption
Sometimes you may need to have more fine-grained control over which of your Pods get evicted first in the event of resources starvation. You can guarantee that a given Pod get evicted last if you set the request and limit to equal values. However, consider a scenario when you have two Pods, one hosting your core applicationa nd another hosting its database. You need those Pods to have the highest priority among other Pods that coexist with them. But you have an additional requirement: you want the application Pods to get evicted berfore the database ones do. Fortunately Kubernetes has a feature that addresses this need: Pod Priority and preemption. So, back to out example scenario, we need two high prority Pods, yet one of them is more important than the other. We start by creating a PriorityClass than a Pod that uses this PriorityClass:
`yml
apiVersion: scheduling.k8s.io/v1
kind: PriorityClass
metadata:
name: high-priority
value: 1000
apiVersion: v1
kind: Pod
metadata:
name: mypod
spec:
containers:
- image: redis
name: mycontainer
priorityClassName: high-priority
` The definition file creates two objects: the PriorityClass and a Pod. ## How Pods Get Scheduled Given Their PriorityClass Value ?
When we have multiple Pods with Different PriorityClass values, the admission contoller starts by sorting Pods according to their priority. Highest priority Pods (those having the highest PriorityClass numbers) get scheduled first as long as no other constraints are preventing their scheduling.
Now, what happens if there are no nodes with available resources to schedule a high priority Pod? The scheduler will evict (preempt) lower priority Pods from the node to give enough room for the higher priority ones. The scheduler will continue lower-priority Pods until there is enough room to accommodate the more upper Pods. This feature helps you when you design the cluster so that you ensure that the highest priority Pods (ex. the core application and database) are never evicted unless no other option is possible. At the same time, they also get scheduled first.
Things to Consider in your Design When Using QoS and Pod Priority
You may be asking what happens when you use resources and limits (QoS) combined with the PriorityClass parameter. Do they overlap or override each other? Followings can be essential things to note when influencing the schedule decisions:
- The Kubelet uses QoS to control and manage the node's limited resources among the Pods. QoS eviction happens only when the node starts to run out of shareable resources. The Kubelet considers QoS before considering Preemption priorities.
- The scheduler considers the PriorityClass of the Pod before the QoS. It does not attempt to evict Pods unless higher-priority Pods need to be scheduled and the node does not have enough room for them.
- When the scheduler decides to preempt lower-priority pods, it attempts a clean and respects the grace period. However, it does not honor PodDistruptionBudget, which may lead to distupting the cluster quorum of several low priority Pods.


Top comments (0)