you configure network access to a virtual machine (VM) running on Azure.
You start by creating a Linux VM and installing Nginx, a popular web server, on that VM. To make your web server accessible, you then create a network security group (NSG) rule that allows inbound access on port 80 (HTTP).
There are many ways to create and manage VMs, including their network settings. For example, you can use the Azure portal, the Azure CLI, Azure PowerShell, or an Azure Resource Manager (ARM) template.
Here, you use the Azure CLI. The Azure CLI enables you to connect to Azure and run administrative commands on Azure resources. As with other command-line interfaces, you can run commands directly from a terminal or you can add commands to a Bash script or a PowerShell script. The Azure CLI runs on Windows, macOS, or Linux.
Here, you access the Azure CLI from Azure Cloud Shell. Cloud Shell is a browser-based shell experience that you use to manage and develop Azure resources. Think of Cloud Shell as an interactive console that runs in the cloud.
If you're new to the Azure CLI or to Cloud Shell, just follow along.
Create a Linux virtual machine and install Nginx
Use the following Azure CLI commands to create a Linux VM and install Nginx. After your VM is created, you'll use the Custom Script Extension to install Nginx. The Custom Script Extension is an easy way to download and run scripts on your Azure VMs. It's just one of the many ways you can configure the system after your VM is up and running.
- From Cloud Shell, run the following
az vm createcommand to create a Linux VM:
az vm create \
  --resource-group [sandbox resource group name] \
  --name my-vm \
  --image UbuntuLTS \
  --admin-username azureuser \
  --generate-ssh-keys
Your VM will take a few moments to come up.
You name the VM my-vm. You use this name to refer to the VM in later steps.
2.Run the following az vm extension set command to configure Nginx on your VM:
az vm extension set \
  --resource-group [sandbox resource group name] \
  --vm-name my-vm \
  --name customScript \
  --publisher Microsoft.Azure.Extensions \
  --version 2.1 \
  --settings '{"fileUris":["https://raw.githubusercontent.com/MicrosoftDocs/mslearn-welcome-to-azure/master/configure-nginx.sh"]}' \
  --protected-settings '{"commandToExecute": "./configure-nginx.sh"}'
This command uses the Custom Script Extension to run a Bash script on your VM. The script is stored on GitHub.
While the command runs, you can choose to examine the Bash script from a separate browser tab.
Bash script
#!/bin/bash

# Update apt cache.
sudo apt-get update

# Install Nginx.
sudo apt-get install -y nginx

# Set the home page.
echo "<html><body><h2>Welcome to Azure! My name is $(hostname).</h2></body></html>" | sudo tee -a /var/www/html/index.html
To summarize, the script:
a. Runs apt-get update to download the latest package
information from the internet. This step helps ensure that the
next command can locate the latest version of the Nginx
package.
b. Installs Nginx.
c. Sets the home page, /var/www/html/index.html, to print a
welcome message that includes your VM's host name.
Access your web server
In this procedure, you get the IP address for your VM and attempt to access your web server's home page.
- Run the following
az vm list-ip-addressescommand to get your VM's IP address and store the result as a Bash variable:
IPADDRESS="$(az vm list-ip-addresses \
  --resource-group [sandbox resource group name] \
  --name my-vm \
  --query "[].virtualMachine.network.publicIpAddresses[*].ipAddress" \
  --output tsv)"
- Run the following
curlcommand to download the home page:
curl --connect-timeout 5 http://$IPADDRESS
The --connect-timeout argument specifies to allow up to five seconds for the connection to occur.
After five seconds, you see an error message that states that the connection timed out:
curl: (28) Connection timed out after 5001 milliseconds
This message means that the VM was not accessible within the timeout period.
- As an optional step, try to access the web server from a browser:
a. Run the following to print your VM's IP address to the console:
echo $IPADDRESS
You see an IP address, for example, 23.102.42.235.
b. Copy the IP address that you see to the clipboard.
c. Open a new browser tab and go to your web server.
After a few moments, you see that the connection isn't happening. If you wait for the browser to time out, you'll see something like this:
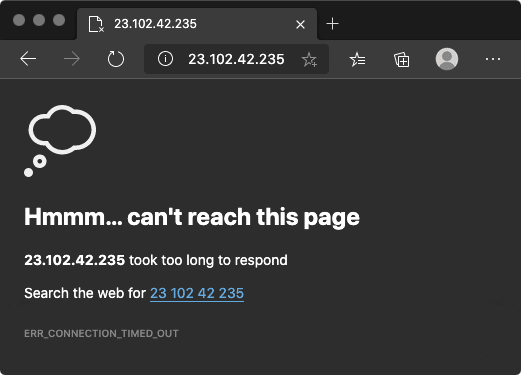
Keep this browser tab open for later.
List the current network security group rules
Your web server wasn't accessible. To find out why, let's examine your current NSG rules.
- Run the following
az network nsg listcommand to list the network security groups that are associated with your VM:
az network nsg list \
  --resource-group [sandbox resource group name] \
  --query '[].name' \
  --output tsv
You see this:
my-vmNSG
Every VM on Azure is associated with at least one network security group. In this case, Azure created an NSG for you called my-vmNSG.
- Run the following
az network nsg rule listcommand to list the rules associated with the NSG named my-vmNSG:
az network nsg rule list \
  --resource-group [sandbox resource group name] \
  --nsg-name my-vmNSG
You see a large block of text in JSON format in the output. In the next step, you'll run a similar command that makes this output easier to read.
3.Run the az network nsg rule list command a second time.
This time, use the --query argument to retrieve only the name, priority, affected ports, and access (Allow or Deny) for each rule.
The --output argument formats the output as a table so that it's easy to read.
az network nsg rule list \
  --resource-group [sandbox resource group name] \
  --nsg-name my-vmNSG \
  --query '[].{Name:name, Priority:priority, Port:destinationPortRange, Access:access}' \
  --output table
You see this:
Name               Priority    Port    Access
-----------------  ----------  ------  --------
default-allow-ssh  1000        22      Allow
You see the default rule, default-allow-ssh. This rule allows inbound connections over port 22 (SSH). SSH (Secure Shell) is a protocol that's used on Linux to allow administrators to access the system remotely.
The priority of this rule is 1000. Rules are processed in priority order, with lower numbers processed before higher numbers.
By default, a Linux VM's NSG allows network access only on port 22. This enables administrators to access the system. You need to also allow inbound connections on port 80, which allows access over HTTP.
Create the network security rule
Here, you create a network security rule that allows inbound access on port 80 (HTTP).
Run the following az network nsg rule create command to create a rule called allow-http that allows inbound access on port 80:
az network nsg rule create \
  --resource-group [sandbox resource group name] \
  --nsg-name my-vmNSG \
  --name allow-http \
  --protocol tcp \
  --priority 100 \
  --destination-port-ranges 80 \
  --access Allow
For learning purposes, here you set the priority to 100. In this case, the priority doesn't matter. You would need to consider the priority if you had overlapping port ranges.
- To verify the configuration, run
az network nsg rule listto see the updated list of rules:
az network nsg rule list \
  --resource-group [sandbox resource group name] \
  --nsg-name my-vmNSG \
  --query '[].{Name:name, Priority:priority, Port:destinationPortRange, Access:access}' \
  --output table
You see this both the default-allow-ssh rule and your new rule, allow-http:
Name               Priority    Port    Access
-----------------  ----------  ------  --------
default-allow-ssh  1000        22      Allow
allow-http         100         80      Allow
Access your web server again
Now that you've configured network access to port 80, let's try to access the web server a second time.
- Run the same
curlcommand that you ran earlier:
curl --connect-timeout 5 http://$IPADDRESS
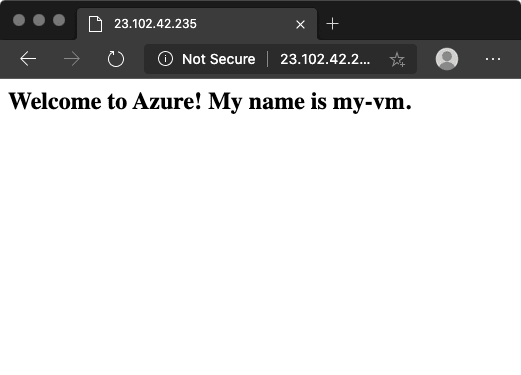
You see this:Html
<html><body><h2>Welcome to Azure! My name is my-vm.</h2></body></html>
** Note**
There may be a slight delay between rules being added and ports being opened.
2.As an optional step, refresh your browser tab that points to your web server.
Clean up
The sandbox automatically cleans up your resources when you're finished with this module.
When you're working in your own subscription, it's a good idea at the end of a project to identify whether you still need the resources you created. Resources that you leave running can cost you money. You can delete resources individually or delete the resource group to delete the entire set of resources.
Nice work. In practice, you can create a standalone network security group that includes the inbound and outbound network access rules you need. If you have multiple VMs that serve the same purpose, you can assign that NSG to each VM at the time you create it. This technique enables you to control network access to multiple VMs under a single, central set of rules.


Top comments (0)