Introduction
This is my very first tutorial on any of the technical blogging platform. In this tutorial, we'll be configuring a custom pipeline that builds the docker image from Dockerfile present in the root of the bitbucket repository, push it to Amazon ECR and execute a script on EC2 server which will pull the image and start a container on the server.
Prerequisites
- An AWS account
- An ECR repository - I'll name it demo-repo
- An EC2 instance with docker setup
- Keyfile to setup communicate to ec2 via ssh
-
awsclisetup and configured on ec2 instance
Step 1
In this step, we'll see how to enable pipeline for a repository
Enable the pipelines for the bitbucket repository in which you have to use the pipeline. You need to have the administrator access to enable pipeline support for a repository in bitbucket. Once you have the admin access then go to Settings > Pipeline > Settings. Here only one option will be available and that will of Enable Pipelines, turn the pipeline on from the slider button
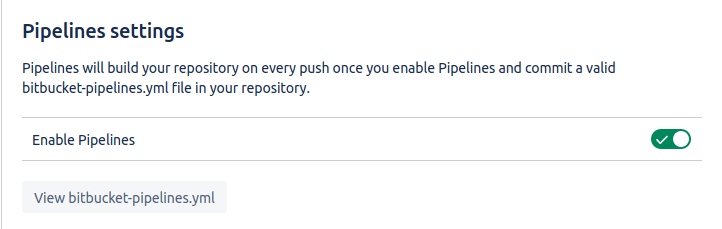
Click on Configure/View bitbucket-pipelines.yml button and continue to the next step.
Step 2
In this step, we'll select a language template for our pipeline.
You'll be now on pipeline configuration page, scroll down to the bottom where you see a bunch of language templates to get started with.
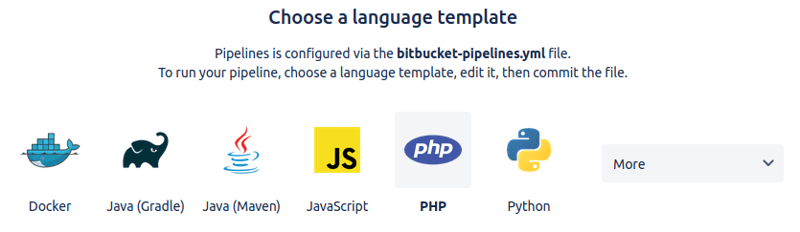
You can select one of the available language templates that suites your needs or if you want any of the predefined language templates then select any one of the language template and edit it according to your needs. Click on the Commit file button on the bottom right once you have selected the language template. I will select Javascript as my project is on node.
On committing the file, you'll see that a bitbucket-pipelines.yml file is now present in your repository's main branch, you can now merge this branch to your branch and continue editing this file in your branch or continue editing the file in main branch itself but it is good practice to not change files directly in the main branch.
Step 3
In this step, we'll configure bitbucket-pipelines.yml file
The basic setup of the pipeline is done, now we'll see how to create a custom pipeline and create a step to deploy our repository.
Note: bitbucket-pipelines.yml is a YAML file so it has a format to follow, just take care of indentation, in some places a 2-space indent is required and in some cases 4-space indent is required.
Let's edit the bitbucket-pipelines.yml file
image: node:10.15.3

pipelines:
  custom:
    build-and-deploy-to-dev:
      - step:
          deployment: Test
          script:
            - docker build ./ -t $AWS_ECR_REPOSITORY --build-arg ENV=dev
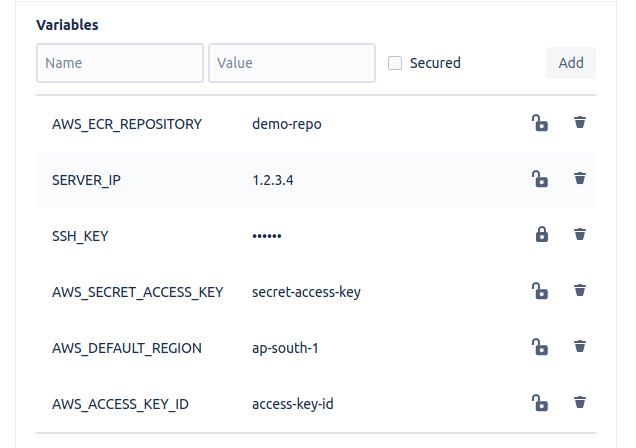
In the above code, I have created a custom pipeline called build-and-deploy-to-dev, also the deployment 'Test' is applied to this step. This step builds a docker image from Dockerfile present in the root of the repository. I have used $AWS_ECR_REPOSITORY, it is a deployment variable. You can have Repository variables and Deployment variables in the bitbucket pipeline, check references for more information on variables. I have 6 deployment variables setup for my pipeline AWS_ECR_REPOSITORY, SERVER_IP, SSH_KEY, AWS_DEFAULT_REGION, AWS_ACCESS_KEY_ID, AWS_SECRET_ACCESS_KEY
I have kept SSH_KEY as a secured variable and I will show you how to set up the value of this variable in upcoming steps.
These 6 variables are defined as deployment variables as their values differ for each deployment, different for test, staging, and production.
The values for AWS_DEFAULT_REGION, AWS_ACCESS_KEY_ID, and AWS_SECRET_ACCESS_KEY can be same as of IAM user used for configuring awscli on ec2 instance.
Getting back to the code, every step should have a script tag and you can see the indentation gap between each line is 2space but there is 4space indent between - step and deployment: Test line, it is the YAML format and we have to follow it otherwise the pipeline will not execute.
Now you can run this pipeline, it will create a docker image with a tag demo-repo in my case.
Step 4
Adding pipes to the custom pipeline for additional functionality
image: node:10.15.3

pipelines:
  custom:
    build-and-deploy-to-dev:
      - step:
          deployment: Test
          script:
            - docker build ./ -t $AWS_ECR_REPOSITORY --build-arg ENV=dev
            - pipe: "atlassian/aws-ecr-push-image:1.1.0"
              variables:
                  AWS_ACCESS_KEY_ID: $AWS_ACCESS_KEY_ID
                  AWS_SECRET_ACCESS_KEY: $AWS_SECRET_ACCESS_KEY
                  AWS_DEFAULT_REGION: $AWS_DEFAULT_REGION
                  IMAGE_NAME: $AWS_ECR_REPOSITORY
            - pipe: "atlassian/ssh-run:0.2.4"
              variables:
                  SSH_USER: ec2-user
                  SERVER: $SERVER_IP
                  SSH_KEY: $SSH_KEY
                  MODE: script
                  COMMAND: demo-repo-container-script.sh
I have added 2 pipes to the custom pipeline, pipes can be viewed as miny pipelines used to ease the pipeline development.
The first pipe is used to push the built docker image from Step #3 to the AWS ECR repository and the second pipe is used to run the demo-repo-container-script.sh script present in the root of the repository on the ec2 instance via ssh.
Note: There should be only 2space indent between - pipe: line and variables: line
The links to the pipes are attached in the references
Setting up SSH_KEY
I read the documentation of the ssh-run pipe and searched over the internet but was unable to figure out the correct format of ssh that is to be used as the secure variable, so I'll show you how it is done.
First of all, you need the .pem file that you use to connect to ec2 instance via ssh and a Linux machine. I managed to do this on Linux only so I can help with Linux only, feel free to provide methods on other OS in comments. I have generated demo-repo-kp.pem from ec2's key-pair generation feature.
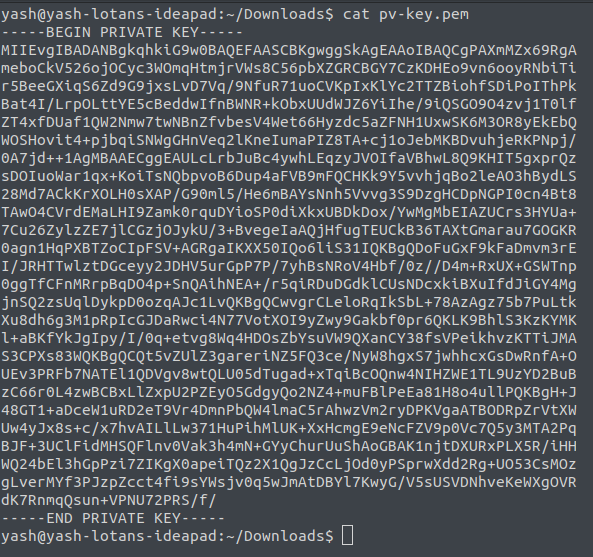
This is what demo-repo-kp.pem file contents looks like(don't worry I'll delete this key-pair file when this article goes live)
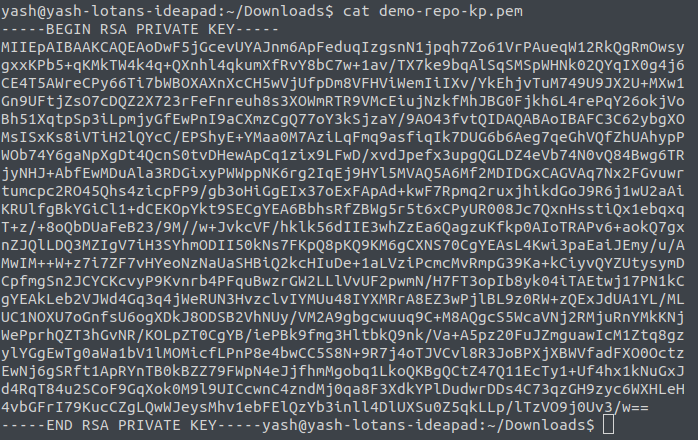
As you can see this is an RSA file and the SSH_KEY needs base64 encoded private key as required by the ssh-run pipe.
To convert this pem file to private key, use this Linux command
$ openssl pkcs8 -in demo-repo-kp.pem -topk8 -nocrypt -out pv-key.pem
Replace demo-repo-kp.pem with your input key file
Now the pv-key.pem contents look like
Now that you have the private key, you can use any online tool to convert the private key file to base64 encoded string which looks like random characters ending with a =
Note: Don't forget to include the first line containing -----BEGIN PRIVATE KEY----- and the last line containing -----END PRIVATE KEY----- while encoding the file in base64.
Now you can use base64 encoded string in the SSH_KEY and don't forget to enable the secured checkbox.
Configuring demo-repo-container-script.sh
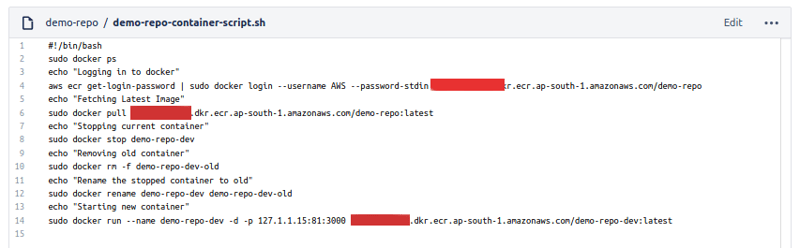
The script is well commented if you have any queries feel free to ask in the comments
References
Variables in pipelines
Use SSH keys in Bitbucket Pipelines
Caching dependencies
ssh-run pipe
aws-ecr-push-image pipe


Top comments (5)
Hey Yash, thanks a lot for sharing that topic. And more to that, explaining each step with the help of images to better understand the process. After getting the private key, to convert it to base64 encoding, I would recommend you to use that tool
url-decode.com/tool/base64-encode
as that tool not only provides a base64 decoding/encoding facility. But also has 100+ other web utilities for the different users as well. You also check it out.
it works! bitbucket didn't explain how can create a valid SSH_KEY base64 encoded. The solution is use de PEM encoded as base64
Hi,
First of all thank you for this informative post.
in you code as you mention:
pipe: "atlassian/ssh-run:0.2.4"
variables:
SSH_USER: ec2-user
SERVER: $SERVER_IP
SSH_KEY: $SSH_KEY
MODE: script
COMMAND: demo-repo-container-script.sh
in server variable can we pass multiple server IP so we can deploy code to multiple server at once?
Thank you again
Sorry for the super late reply, the pipe I used in this article does not support running same script on mutiple servers. You can add multiple pipes in same step to execute the script on multiple server so, each pipe will be responsible for executing the script on each server
Hi Bro,
I am java ARCHITECT but a bit new with DevOps
I'm have an application with angular and spring as backend.
I want to use bitbucket pipeline to deploy to AWS.
I m planning to push angular to S3 and enable static website access from there to outside world.
I want to push spring boot image to ECR and then deploy container to EC2 and use this backend URL in Angular which is in S3
I want to confirm is it my right architecture?