This story was originally posted on ctrl-y blog.
A Spanish version of this article can be found in ctrl-y blog/es.
On the Side Note section at the end of each article, I like to share what I was listening to while writing machine or human words. I ❤️ music so I spend time (sometimes a bit too much) searching for, or creating, long playlists so I can listen to them while I'm working.
Plays Fresh Prince of Bel-Air intro song:

A Slack message popped up. “Can you please check out what is causing this bug?, I am having a meeting with an important client at 3 pm today, and it would be nice to show this feature” it read.
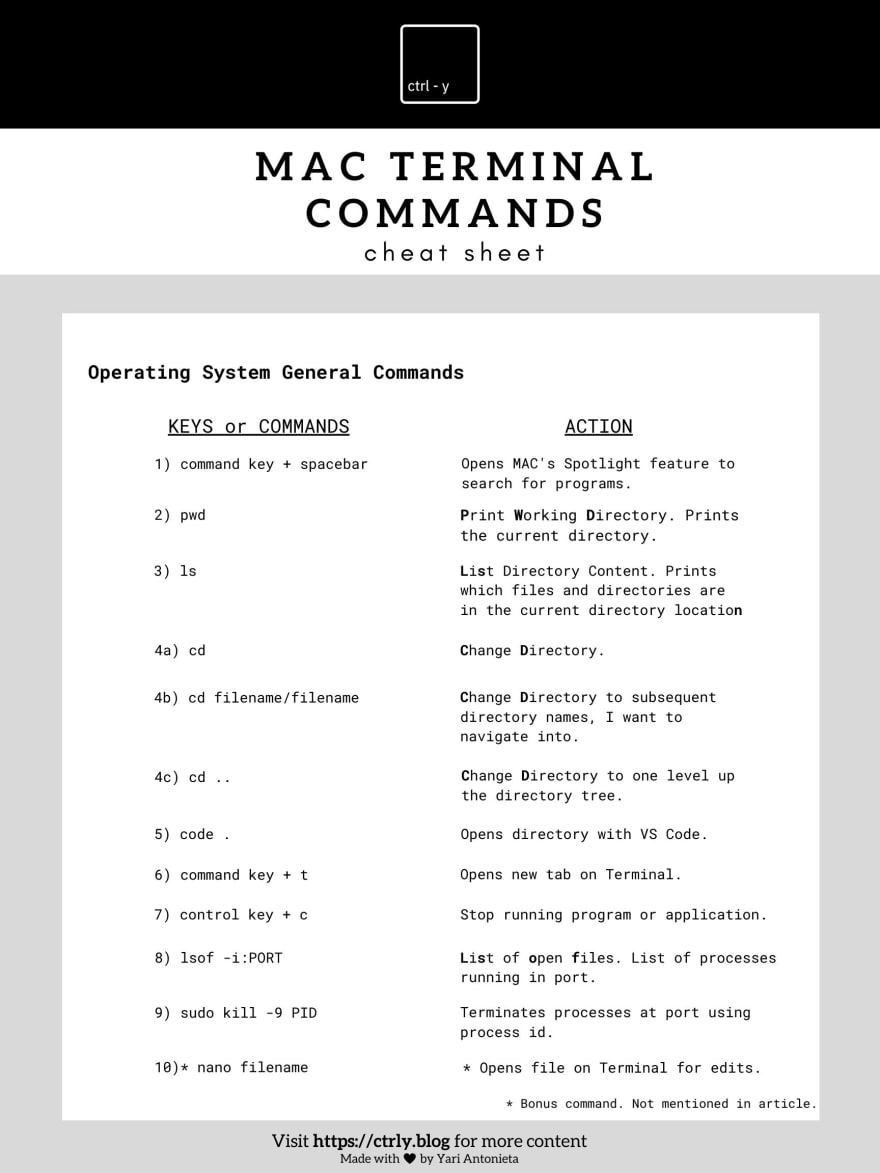
So I searched for my “typing furiously” playlist , wrapped my hair in a bun, took a sip of coffee, and hit the Spotlight Search shortcut [command + spacebar ] to search for “Terminal” and access my Mac Operative System command line.

Note: Commands will be enclosed inside square brackets ( [ ] ) .
Let’s Command
“Where am I?” It sounded philosophical while I thought about it, but in actuality, by typing and entering [ pwd ] (Print Working Directory), I had a better idea. It is because the [ pwd ] is like my Google Maps for file, it shows me the directory where I am.

“Great! I am in the directory I want to be in, but I do not remember the directory I want to navigate to,” I thought about instantly.
But I answered myself with: “That’s where [ ls ] (List Directory Content) comes in handy.” [ ls ] shows the content inside the current directory.

My thoughts continued: “Now that I remembered in which directory I cloned the project, I need to [ cd ] (change directory) to get to the project’s local repository.”
By typing and entering [ cd ] followed by the subsequent directory names I want to navigate into, separating each directory name with a forward slash ( / ), I went ahead and started to change directory.

Until I found myself inside the src (source) directory. “Wait! Is package.json inside the src file? Let me [ ls ] this thing!” I continued.
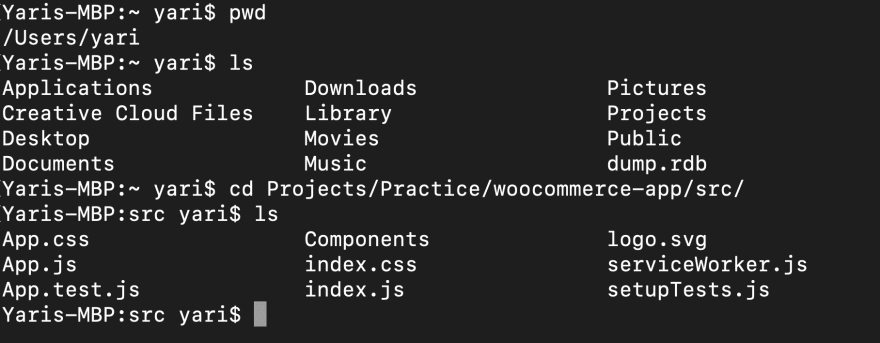
“Nope, there is no way I can run the web app from this directory,” I said to myself… out loud.
“Shhhhhh, I am in a meeting!” said Ramona, my coworker.

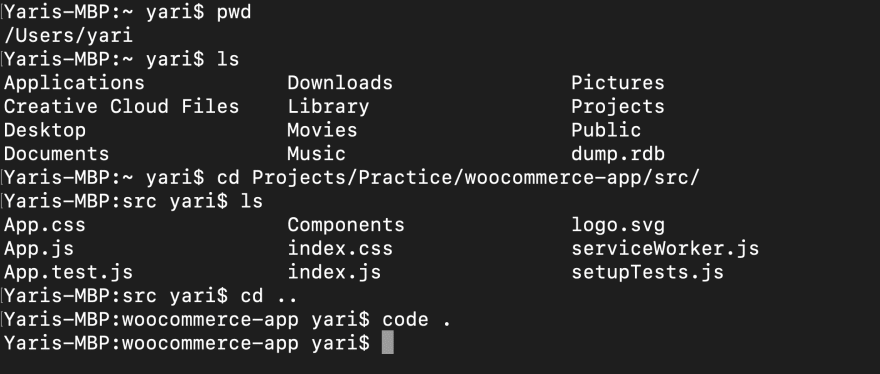
Whispering: “I need to go up a level in the directory, but how?”
That’s where the dots on the command line came in handy: [ cd .. ]. Two dots after cd means to go one level up the directory tree.

My mind went: “Before running the app, I am going to make use of this moment to open the Visual Studio Code at this directory,” so I entered [ code . ] command.
“Ok, let’s run the app,” I thought. I entered [ npm start ], and off it went.
Git Time!
"Before doing anything to the code, I need to make sure that locally I have the latest version of what is in development," my thoughts continued.
So it's time for the: "Git Routine."
"But first ☝️, let me open a new terminal tab or window, by typing [ command + t ], to keep the app running on the current one," I said to myself.

Let me tell you, reader of my thoughts, on what my Almost Four Steps Git Routine consists. I am assuming, though, that you know git basics. Do not worry if you do not know! Here is a quick intro.
Almost Four Steps Git Routine
Check Branch Status
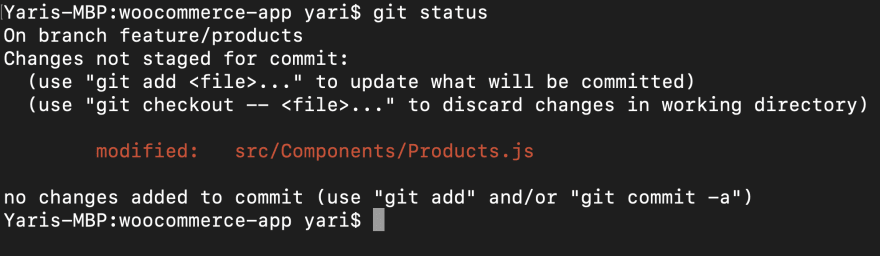
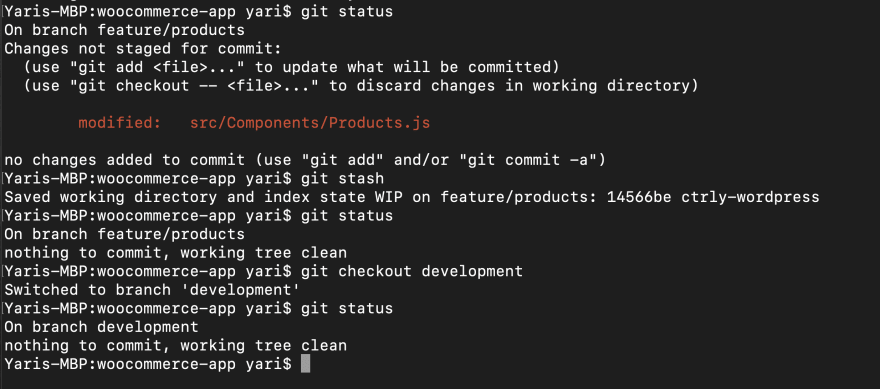
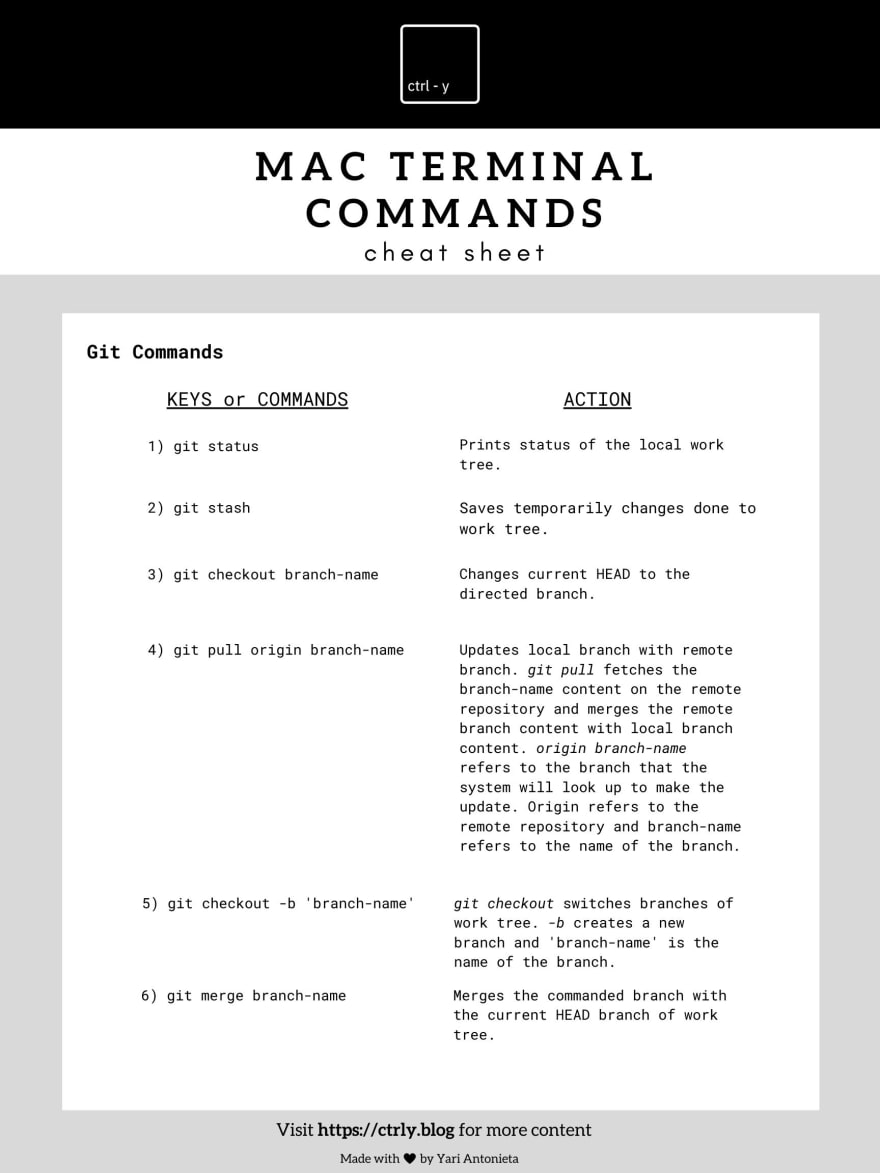
First, check-in the status of the local work tree. Because frankly, I always forget what I was doing before. So, I enter the [ git status ] command.

If the branch is not clean, save changes
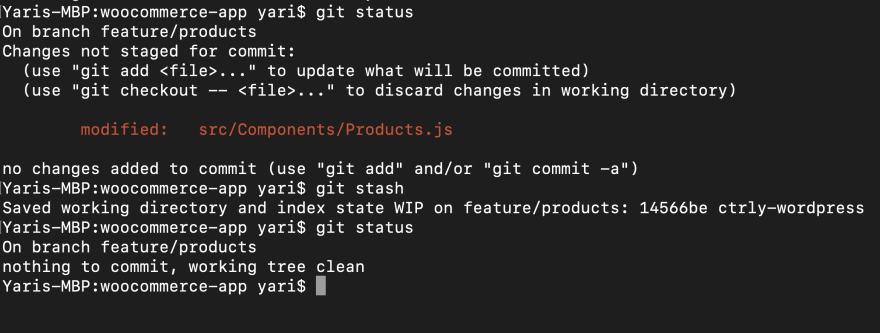
Second, I have learned, after many attempts, that git will not change branch if there are code changes, and changes are not stashed (saved temporarily) or committed (merged with master branch eventually).
So I proceeded to enter [ git stash ] to save changes temporarily.
Now let's see if I can change the branch from the current one to the development branch to make sure that I have the current version of the remote development branch.

Change local branch
Now that the branch is clean, I need to change the HEAD of the work tree to the development branch. [ git checkout development ] does that.
Update development branch
Finally, update the local development branch with the remote repository's development branch. So I enter [ git pull origin development ].
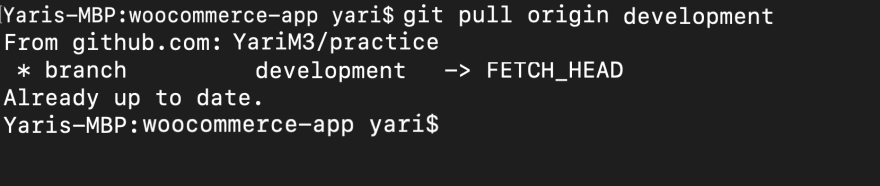
The command [ git pull ] fetches the development branch content on the remote repository and merges the remote branch content with local branch content. The command [ origin development ] refers to the branch that the system will look up to make the update. Origin refers to the repository of origin, in this case, the remote repository. Development refers to the name of the work tree branch that the systems looks up to make updates.
After Routine
From this point forwards, my git commands vary from what I need to do in the day. This time, I need to fix a bug, so I need to create a new branch and perform those changes on that new branch. That requires me to change my HEAD work tree from development to the newly created work tree branch.
"What will be the name of the new branch?" started my thoughts again.
"Something verbose, straight to the point," pointed out a thought with the voice of my team lead.
"Let's go with fix/this-feature" I decided. So I entered [ git checkout -b 'fix/this-feature' ]
[ git checkout ] switches branches of work tree, [ -b ] creates a new working tree branch, [ 'fix/this-feature' ] is the new branch name.

To make sure that I am not in the development branch anymore, I hit again [ git status ].
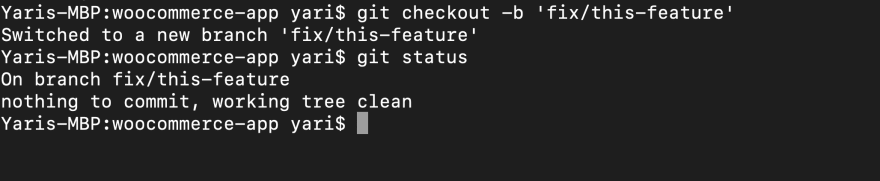
"Yeah, I am at the new branch of the work tree," I confirmed to myself.
Next, I need to merge the updated branch with the new one, so the new work tree branch is up to date with the updated development branch. The command [ git merge development ] does that merge.
Few. I am glad that I got that out of the way. These steps up until changing branches from development to the new o reworked branch always make me nervous.

"Now, I am ready to catch that bug!" And so, I turned to my application and code editor to search for it.
An error occurred
I was having a groove on while writing code, and everything was working fine until something happened that a confusing error started appearing.
"Another application is already using the port," it read.
As an excellent debugger, I stopped the program with [ control + c ] ...
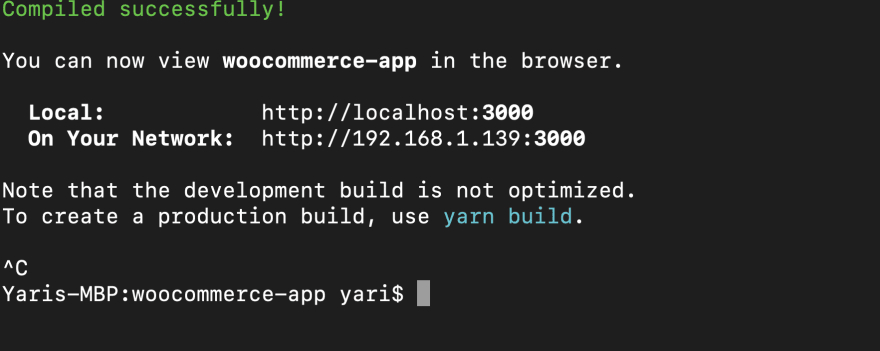
... and reran. But it did not help.

So I asked my friend Google for some help, and it suggested to locate and kill the port process. To do this, I needed to identify the process id that I intended to kill and, well, terminate it.
The command to locate and display the list of the processes happening on a port is [ lsof -i:PORT ], where [ lsof ] stands for a list of open files, [ -i ] is the list of processes and [ PORT ] is the port number that we want to review. This case is the port 3000 so [ lsof -i:PORT ] is really entered as [ lsof -i:3000 ].

After locating the process that I wanted to terminate, I proceed to enter [ sudo kill -9 15010 ] to kill the process. Where 15010 is the terminated processes' PID (process identification number).

Ready to start rerunning the app.
"Grrrrrlrllrrlrlr" growled my belly. "I am hungry, and I cannot think with my stomach screaming," I thought.
"Let's go to lunch," suggested Ramona.
"Please!" I responded and headed out to lunch feeling like:

Side Note
Enjoy a couple of Cheat Sheets including the commands used throughout this post!
Also, I wrote this story with the newly released Four Tet album, Sixteen Oceans playing in the background. The beginning of the first song sets an incredible mood for a subtle yet productive day. It has been my go-to album during this whole self quarantined time.
Thanks for reading! 😄


Top comments (0)