
Once again, we have a new tutorial for those who have a food online order website or something similar. This time, we’re going to display the a section for featured restaurants on the homepage using Meta Box, Elementor, and WP Grid Builder. We believe that this kind of showcase will help a lot in attracting your customers.
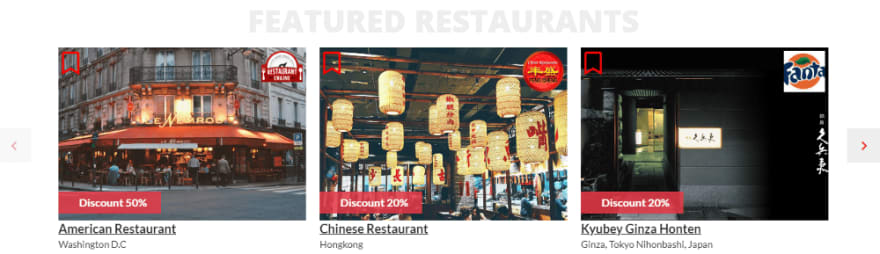
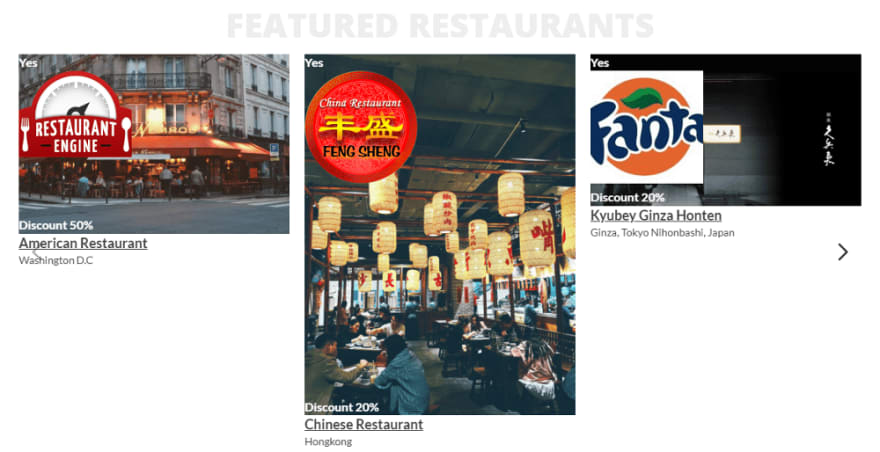
This is how the section displayed:
Video Version
Before Getting Started
There is something we need to make clear first:
In this tutorial, I have already made the homepage using Elementor. You can see that this section is shown as a slider. It is called a grid created by WP Grid Builder. In the grid, there are cards and each one displays information about a restaurant.

The restaurant's information will be saved in a post of a custom post type. Their names and images are the titles and featured images of the posts. And other Information such as address, voucher, and logo will be saved in the custom fields.
So, here are the tools we need for this practice:
First, we need the Meta Box core plugin to have a framework for creating a custom post type and custom fields. It’s free and available on wordpress.org.
We also need some Meta Box extensions for more advanced features. You can use Meta Box AIO or install the following extensions individually:
- MB Custom Post Type: to create custom post types;
- Meta Box Builder: to have a UI on the back end to create custom fields easily.
As I said before, I built the page with Elementor. I use the Elementor Pro.
For the section, I use WP Grid Builder. This plugin allows us to display the restaurants which meet a condition.
In addition, WP Grid Builder helps to get information from fields, so we’ll need the integration between WP Grid Builder and Meta Box. Besides, Elementor helps to create the section, and display the grid created by WP Grid Builder. Thus, we’ll need the integration between WP Grid Builder and Elementor too. You can activate them in the Add-ons section of WP Grid Builder.
Step 1: Create a New Custom Post Type
Go to Meta Box > Post Types to create a new post type for your restaurants.

Step 2: Create Custom Fields for the Custom Post Type
Go to Meta Box > Custom Fields, then create fields as you want.

To select and display which restaurant is featured on the frontend, I’ll create an extra custom field as the Switch type.

The Off status will show that the restaurant is not featured. Otherwise, the On status will let us know that the restaurant is featured.
After creating all the needed fields, go to the Settings tab > Location > choose Post Type as the Restaurant post type that we’ve just created to apply the custom fields to it.

Back to the post editor, you will see all of the newly created custom fields.

Step 3: Create a Card
Go to Gridbuilder > All Cards > Create a Card.

You can change all the settings of the cards as you want in the General section.
To add content to the card, move to the Blocks section. First, choose the Title block to get the restaurant’s name and drag it to any place where you want to display it.

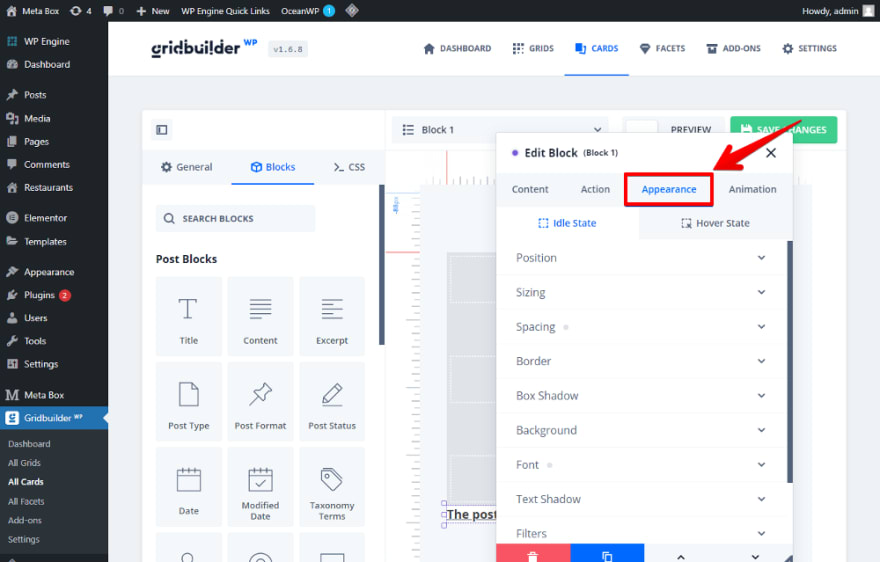
To style the title, go to the Appearance tab in the Edit Block popup, and change the settings.
For the information that is saved in custom fields created by Meta Box, I’ll add a Custom Field block.

You can add a class name for the block in the Class Name section. It’ll help in styling later.
Also in this popup, the Source Type is Custom Field by default. To get the data from the field which we want to display the information, choose the name of the field in the Custom Field section.
We do this to display the voucher and address information as well.
For the logo, it is an image. However, WP Grid Builder has no pre-made block for displaying images from the custom field. So, we have a special way to have it. Go to the Theme File Editor in the Appearance menu and add the following code to the functions.php file.

add_filter(
    'wp_grid_builder/blocks', function( $blocks ) {

        // 'custom_image_block' corresponds to the block slug.
        $blocks['custom_image_block'] = [
            'name' => __( 'Custom image block', 'text-domain' ),
            'render_callback' => function() {

                // Get current post, term, or user object.
                $post = wpgb_get_post();
                $image = get_post_meta( $post->ID, 'custom_field_name', true );

                if ( empty( $image ) ) {
                    return;
                }

                $source = wp_get_attachment_image_src( $image );

                if ( empty( $source ) ) {
                    return;
                }

                printf(
                    '<img src="%s" width="%s" height="%s">',
                    esc_url( $source[0] ),
                    esc_attr( $source[1] ),
                    esc_attr( $source[2] )
                );

            },
        ];

        return $blocks;

    }
);
Remark: Just replace the 'custom_field_name' by the ID of the custom field that you want to get the image.
These lines of code are provided by WP Grid Builder. I put it on Github so you can refer to it.
Now, go back to the card editor, a new block named Custom Image Block will appear. Just add it to the card.
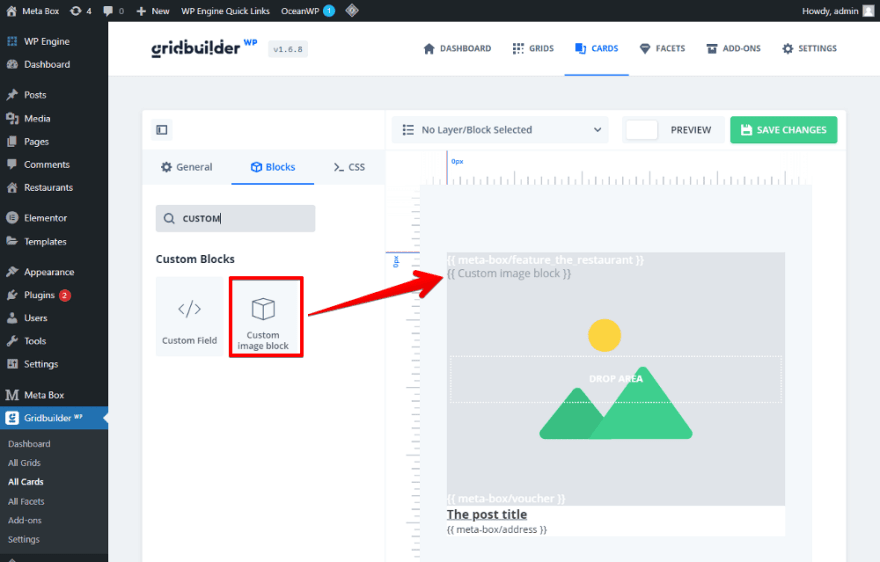
There is no need to change any options for this block because, in the code, I have already stipulated the ID of the custom field which we need to get the image.
So, we’ve done the card.
Step 4: Create a Grid
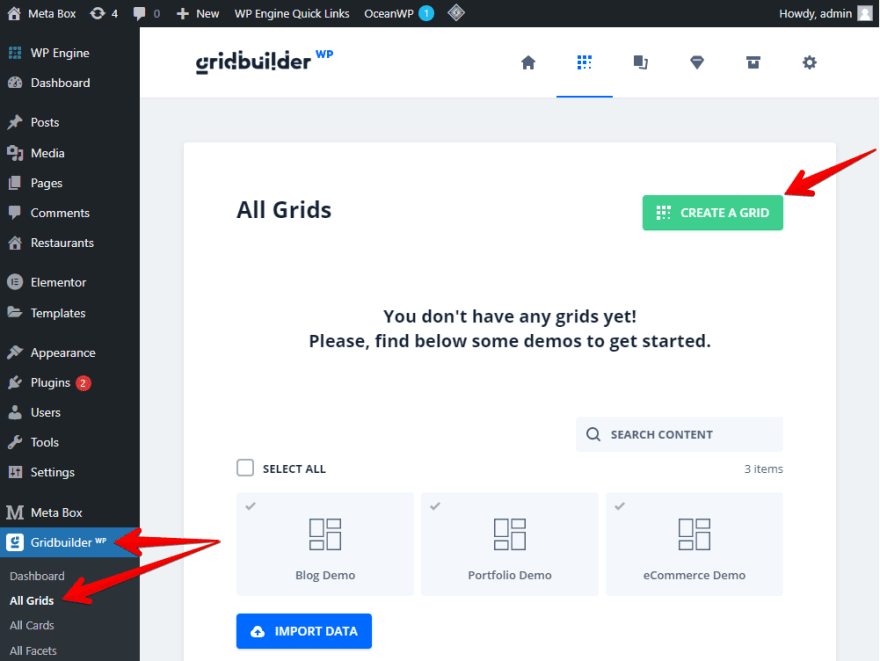
Go to Gridbuilder > All Grids > Create a Grid.
To get the content that you want to display in the grid, go to the Content Query section, and choose the content type as Post Types. Then, choose the name of the post type that we’ve just created for the restaurant so that the grid can get all the posts from that post type.

Then scroll down and pay attention to the Custom Fields section - an important part. This is where you set the condition to display the restaurants.

We’ll display the restaurants which have the Switch field in the On mode only. So, fill in the ID of the Switch field in the Key Field section.
In the Fields Type section, choose Numeric. Since the value saved in the Switch field is 1 or 0 depending on whether it is set On or Off. so its field type will be recognised as numeric.
Next, just enter 1 into the Value Field box to choose showing the restaurants that have the Switch field set in the On mode.
Now, let’s move on to set the layout for the grid.
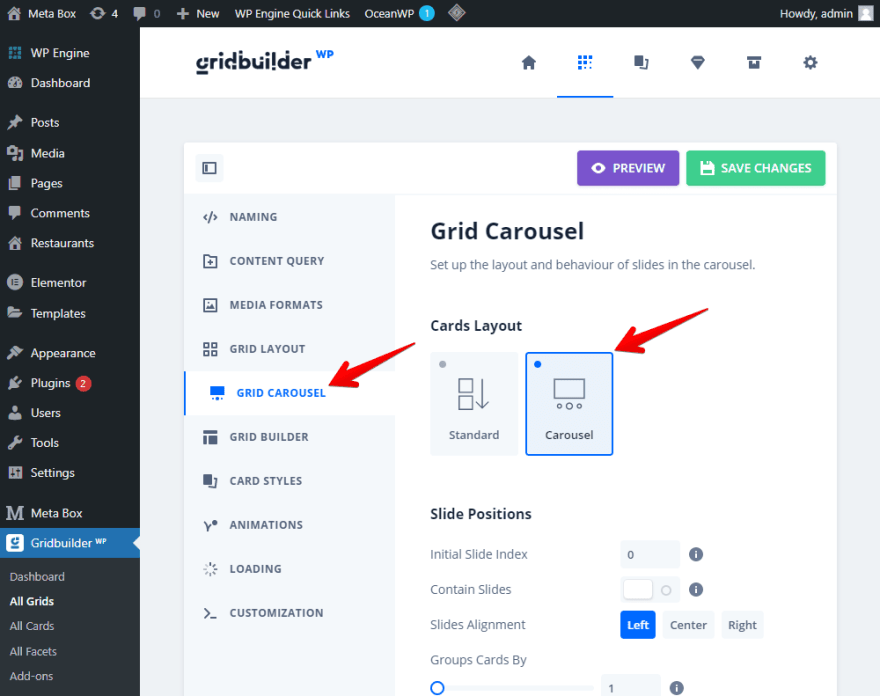
You can set this section to be a slide by choosing the Carousel option in the Grid Carousel section.
For the navigation of the slider, go to the Grid Builder section.
Oh, since back then, I haven’t stipulated which information displayed in the grid yet. So, move to the Card Style section, and set both the Default Card and Post Type Cards as the Featured Restaurants Card which we’ve just created.

Then, we've done the grid as well.
Step 5: Display the Grid on the Frontend
Let’s edit the homepage with Elementor.
Add a section to where you want to display it on the homepage. Add a Heading, name it, and style it as you want.
Then, search for the Grid element and drag it into the section. In the Content box, we need to choose the grid that we have just created.

Then, you’ll see just some of the restaurants displayed on the homepage. They are the featured ones.
Step 6: Style the Section
We’ll use some CSS for this.
In the editor for the created grid of WP Grid Builder, go to the Customization section and add CSS code.
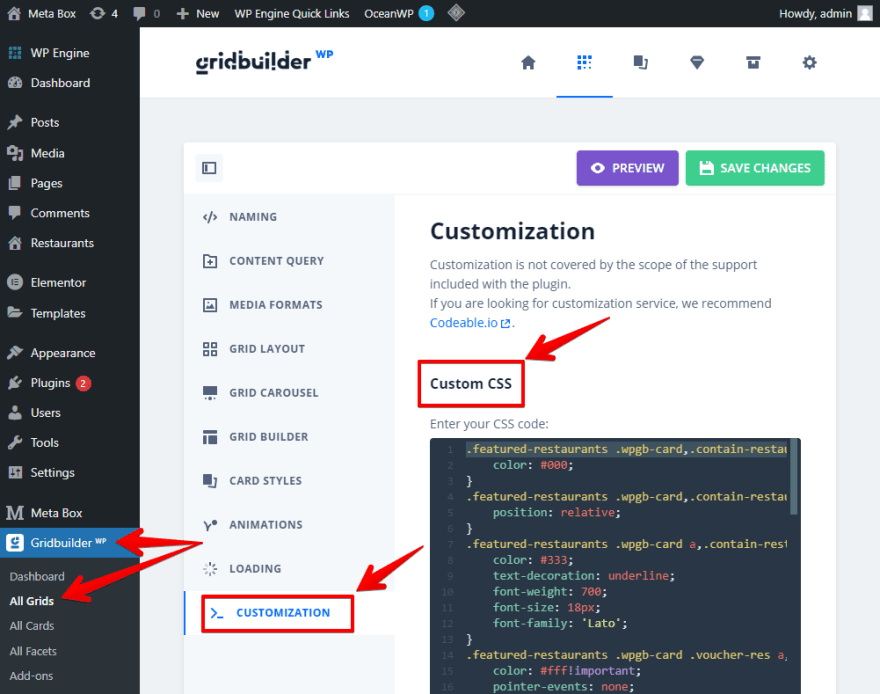
I also put this code on Github, so you can refer to it as well.
Now, go to the frontend, you will see a new look of the section.
Last Words
With the help of WP Grid Builder, displaying posts by a condition seems like quite easy for everyone. Let’s try it out and share the results with us. With the combination of Meta Box, Elementor, and WP Grid Builder, you can build a lot of awesome things, I think.
If you want to watch more tutorials on other topics, don’t hesitate to leave a comment.


Latest comments (0)