
Creating a subscription form is not rocket science today. Website owners often create a subscription form and then integrate it with an email marketing service to manage and send emails more quickly and conveniently. And one of the most common email services today is Mailchimp.
With WordPress by your side, you can create a subscription form on a whim, and then connect it to Mailchimp. This can be done easily with MB Frontend Submission - an extension of Meta Box plugin.
To do it, follow 5 steps below:
Before Getting Started
You need the following plugins to get started:
- Meta Box: to use Meta Box Builder and MB Frontend Submission plugins, you need to install the core plugin Meta Box first. It’s free and available on wordpress.org.
- MB Frontend Submission: it’s a premium extension of Meta Box that allows users to submit content right on the front end of the WordPress website. In addition to the subscription form, it can duel with many other types of form.
- MB Custom Post Type & Custom Taxonomy: it’s a free extension of Meta Box plugin that helps you create custom post types easily. Otherwise, you can use the free tool Post Type Generator (read the documentation here).
- Meta Box Builder: to create custom fields, in addition to coding manually, you should use Meta Box Builder to save your time. It’s a premium extension of Meta Box plugin that has a drag-and-drop intuitive interface to create fields.
And, of course, you need a Mailchimp account. If you still haven’t had an account, create a new one here.
After install and activate all the above plugins, follow these steps:
Step 1: Create a New Post Type for Subscribers
First of all, to save and review subscriber data easily and conveniently, you need to create a new post type called Subscriber. This can be done with the MB Custom Post Type & Custom Taxonomy extension.
Go to Meta Box > Post Types > New Post Type. After that, enter the name and the slug of the post type and then click Publish.
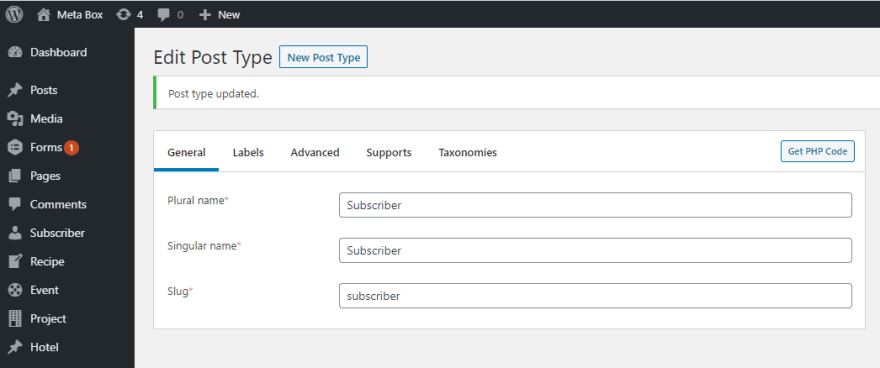
Upon creating, you will see the post type name Subscriber displays on the left sidebar of the Dashboard (like the above image).
Step 2: Create a Subscription Form
Normally, a subscription form has two fields: Name and Email. Also, you can add custom fields as needed (this is the benefit of using custom fields to create the form). In this step, I just create only two basic fields: name and email using custom fields.
Besides, to save the database space, I will use the post title field for name, and the post content field for email. I set the ID for this meta box as subscription-form. The ID of the Name field is post_title, and the ID of the Email field is post_content because post_title and post_content are two default IDs in WordPress for title and post type content.
As mentioned, I use the Meta Box Builder extension to create fields. But if you want to save money, you can use the free tool Online Generator of Meta Box to generate code automatically (read the documentation here).
Go to Meta Box > Custom Fields > Add New to enter the name and ID of the meta box. After that, choose the field type as Text for Name and Email fields.

Read more: How to add and configure custom fields using Meta Box Builder.
Upon creating fields, go to the Settings tab to choose the Subscriber post type.

Finally, click Save Changes. Now you’ve finished creating all the needed fields for the subscription form.
Step 3: Insert and Display the Subscription Form on the Front End
To insert the subscription form into the website and allow users to fill in the form right on the front end, you need to use the MB Frontend Submission extension. This can be done with the shortcode below:
[mb_frontend_form id="subscription-form" ajax="true" recaptcha_key="..." recaptcha_secret="..."]
Explanation:
-
subscription-form: id of the meta box we’ve created -
ajax="true": enable loading ajax -
recaptcha_key: Google reCaptcha site key -
recaptcha_secret: Google reCaptcha secret key
I created a Subscribe page to insert this shortcode. Also, you can insert this shortcode on any other post or widget you want.

To avoid form spamming, I use Google reCaptcha. Integrating Google reCaptcha into the front end form is quite easy, you just need to enter the site key and the secret key into the shortcode of the form as above. To get the detailed instruction for reCaptcha and other attributes of the form, read the documentation of MB Frontend Submission.
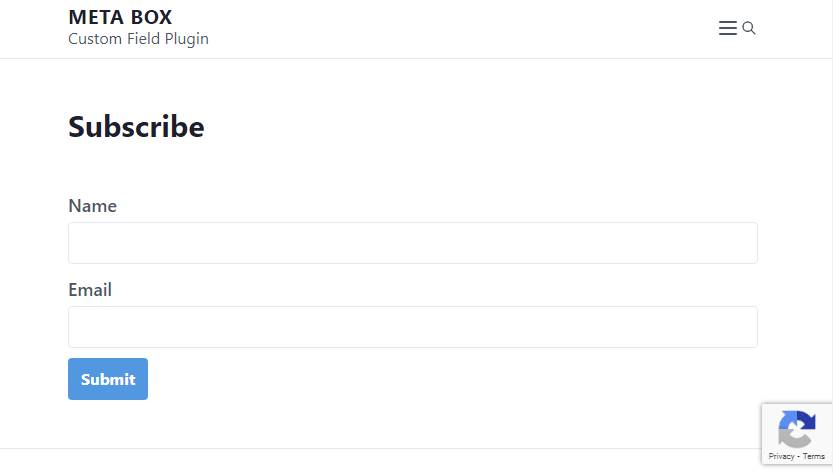
This is the subscription form that I’ve created. You can see the reCaptcha icon in the corner of the screen:
Step 4: Style the Subscription Form
By default, Meta Box displays forms quite beautifully on the front end. However, to customize the subscription form so that it’s more beautiful, we need to make it up with some CSS. You can refer to my CSS code below and add it to Appearance > Customize > Additional CSS:
.rwmb-form {
    background: #e2e8f0;
    padding: 24px;
    border-radius: 4px;
    max-width: 768px;
    margin: 0 auto;
}
.rwmb-form .rwmb-meta-box {
    display: flex;
    justify-content: space-between;
    grid-gap: 12px;
}
.rwmb-form .rwmb-field {
    flex: 1;
}
.rwmb-form .rwmb-field:not(:last-of-type) {
    margin: 0 0 12px;
}
.rwmb-form .rwmb-label,
.rwmb-form .rwmb-field .rwmb-input {
    float: none;
    width: 100%;
    margin-bottom: 5px;
}
.rwmb-form button, .rwmb-form input {
    width: 100%;
}
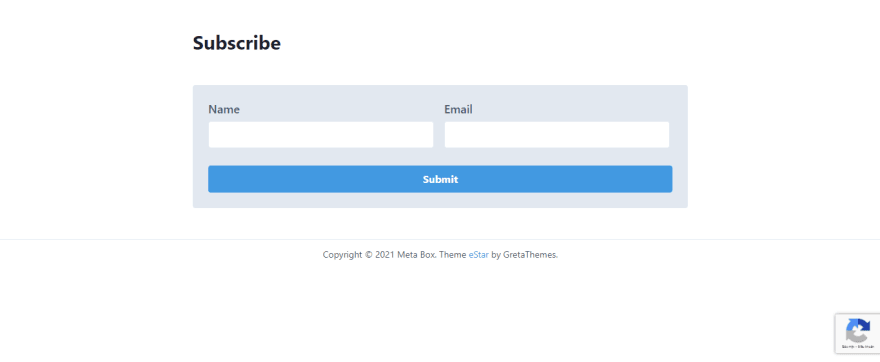
And here is the result:
Step 5: Connect the Subscription Form to Mailchimp
In this step, we’re going to integrate the subscription form to MailChimp. This is to send the subscriber information via the subscription form to MailChimp. After that, you can use MailChimp to send marketing campaigns to these subscribers.
To do it, I use the following library to connect to the Mailchimp API:
https://github.com/drewm/mailchimp-api
Click the link to download the Mailchimp.php file, and then insert it into your theme. I’m using eStar theme and its child theme, so I will create an inc folder and copy the Mailchimp.php file into this folder.
Next, add this code to the functions.php file:
include get_stylesheet_directory() . '/inc/MailChimp.php';
use \DrewM\MailChimp\MailChimp;

function insertList() {
    $key = 'API keys mailchimp của bạn';
    $list_id = ' id of the list that you want to integrate';
    $merge_var = array(
        'FNAME' => $_POST['post_title'],
        'LNAME' => '',
    );
    $mailchimp = new MailChimp( $key );

    $result = $mailchimp->post( '/lists/' . $list_id . '/members', array(
        'email_address' => $_POST['post_content'],
        'merge_fields'  => $merge_var,
        'status'        => 'subscribed',
    ) );
    return json_encode( $result );
}

add_action( 'rwmb_frontend_after_process', function( $config, $post_id ) {
    if ( 'subscription-form' === $config['id'] ) {
        insertList();
        die;
    }
}, 10, 2 );
Explanation:
-
'rwmb_frontend_after_process': the hook we have after the form is submitted. -
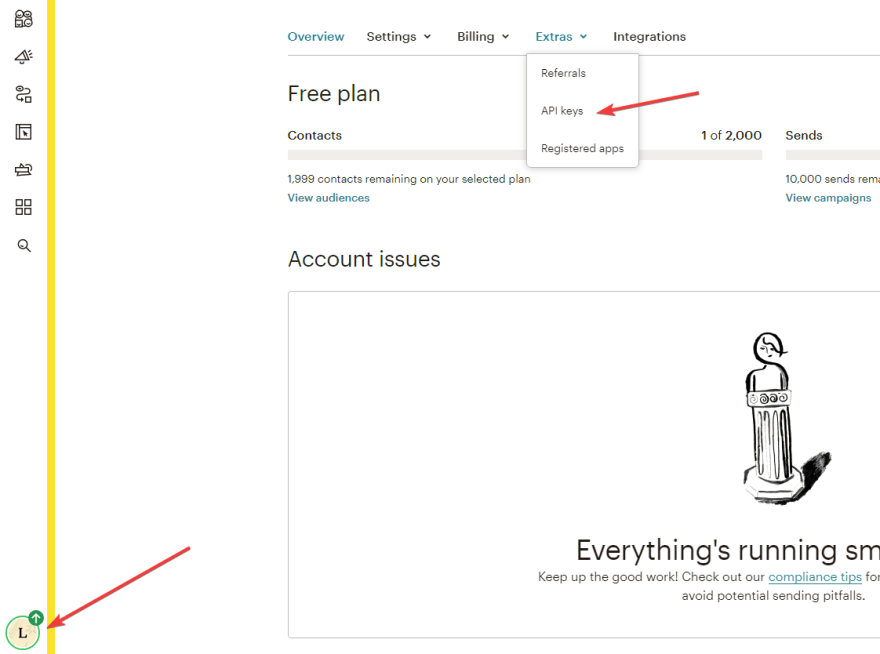
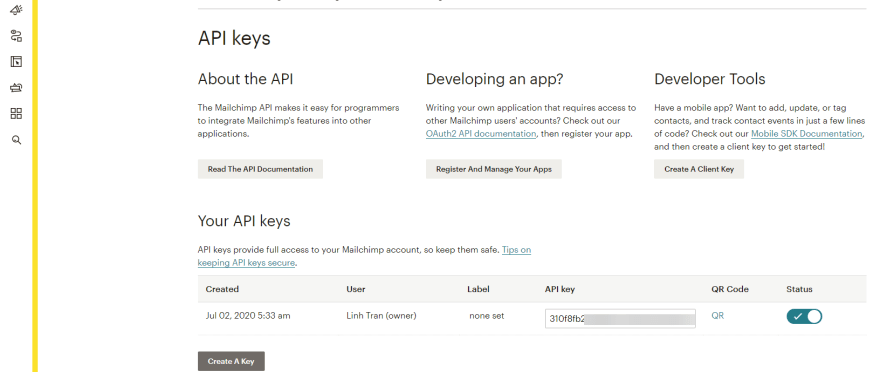
subscription-form: id of the meta box we’ve created in step 2 - To get the API key of Mailchimp, log in to your Mailchimp account, and then copy the API key in the Your API keys section.
- To get the id of the list, log in to your Mailchimp account, and then go to Audience > All Contacts, click Settings, and choose Audience name and defaults:

In the Audience ID section, you will see your list id:

Note: Mailchimp often changes their interface, so the next time going to Account Mailchimp, it may look different from this article. However, the process is still the same.
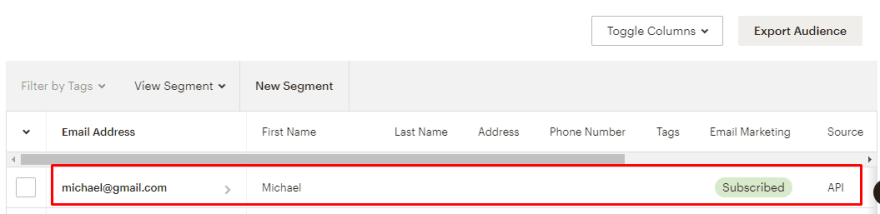
After you finish it, make a test if the system works appropriately. I tried filling in the subscription form with my name and email:

And here they are in the email list of Mailchimp:
Tada! We’ve finished creating the subscription form and integrating it with Mailchimp.
Last Words
Creating a subscription form with MB Frontend Submission is quite flexible. You can create forms with various field types and advanced fields for users to submit depending on their needs. Besides, MB Frontend Submission has many other applications, so you can take advantage of them to enhance your website.
As for Mailchimp, you should learn how to send WordPress blog posts by email to make your marketing campaign more effective.
Wishing you have successful campaigns!


Top comments (0)