
Kentico Xperience's Form Builder enables marketing professionals to quickly build and manage forms in a no-code UI for use across their website 👩🏾💼.
The experience for site visitors submitting a form can be customized for successful submissions 👍🏽.
Let's look at what's possible and how a few lines of customized code can extend the functionality even more 😮!
📚 What Will We Learn?
- What happens after a Form is submitted
- How to customize the Form management UI
- How to customize Razor Class Libraries
❓ What Happens After a Form is Submitted?
Forms on a website are one of the most common ways for marketers to engage with visitors.
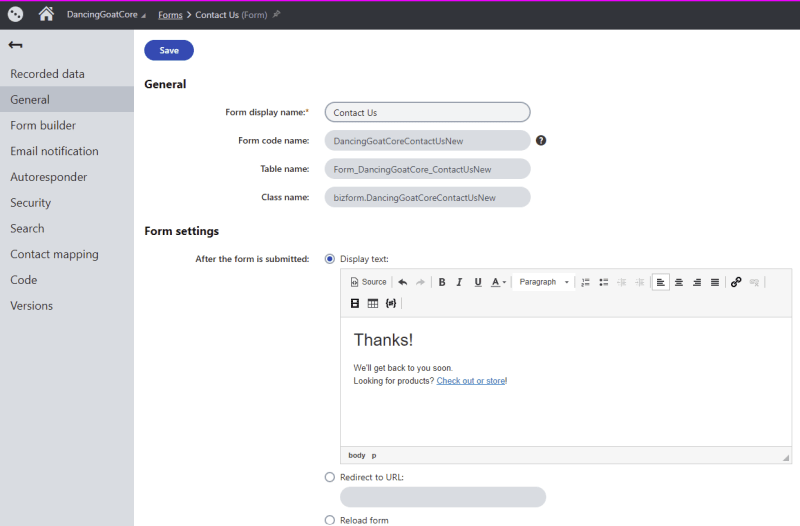
Let's take the Dancing Goat demo site Contact Form as an example:
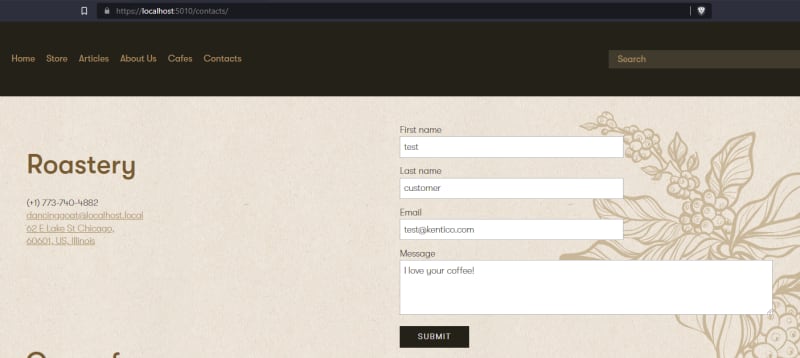
When a visitor fills out this Form and submits it, what exactly happens 🤔?
- If the form is not valid (based on form field validation) Xperience will re-render the form with validation error UI and messages
- If the form is valid, Xperience looks for an existing form entry for the submitter (if the visitor is identified as an existing Contact) and updates it, or adds a new Form submission to the database.
- If the Form's Redirect Url is populated, redirect the page to a new URL (usually to display some "thank you" content).
- If Form's Display Text is populated, return Display Text and replace the Form with the Display Text.
Redirecting to a new page gives a marketer a lot of control over the visitor's experience 💪🏻, but it also requires maintaining an additional page on the site 😞.
Using the Display Text is simpler and more convenient 🤗!
Unfortunately, the Display Text field only accepts plain text. What if we want to respond to a form submission with a helpful message, links, and maybe a Call To Action with an accessible design 🤷🏼♂️?
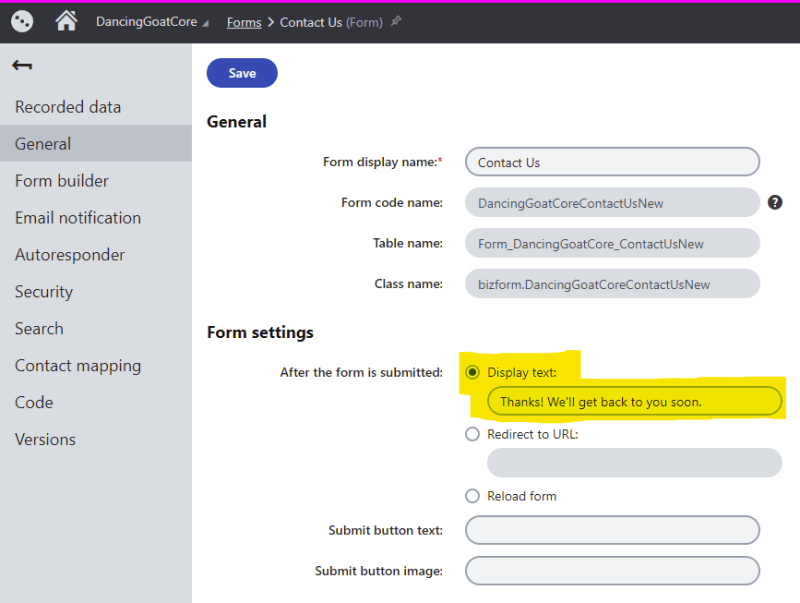
It seems as though we'll need to customize what kind of content we can author here and how it's displayed on the site after a submission 🤓!
🗃 How to Customize the Form Management UI
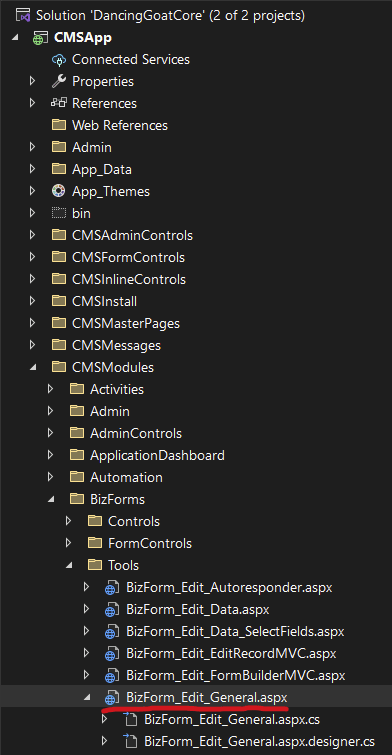
The first thing we need to look for is a way to change the Display Text field's Text input to a Rich Text input.
This UI element can be found at CMS\CMSModules\BizForms\Tools\BizForm_Edit_General.aspx:
The key customization we need to make to this file is to register a new "Rich Text" User Control (called HtmlAreaControl) at the top of the file:
<%@ Register
    Src="~/CMSFormControls/Basic/HtmlAreaControl.ascx"
    TagName="HtmlArea"
    TagPrefix="cms" %>

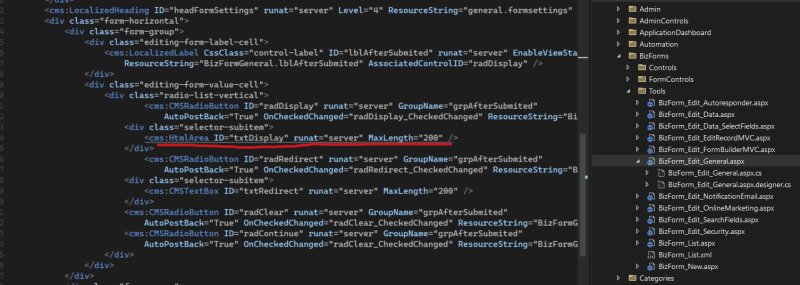
With that registration added, we can refer to the control further down the file, replacing the <cms:LocalizableTextBox /> currently being used for Display Text input with a <cms:HtmlAreaControl />:
<cms:CMSRadioButton ... />

<div class="selector-subitem">
    <cms:LocalizableTextBox ID="txtDisplay" runat="server" MaxLength="200" />
</div>
is replaced by:
<cms:CMSRadioButton ... />

<div class="selector-subitem">
    <cms:HtmlArea ID="txtDisplay" runat="server" MaxLength="200" />
</div>
With these two changes, we can rebuild the CMS application and go back to the Form "General" tab and add Rich Text as our Display Text 🦾!
📅 How to Customize Razor Class Libraries
Even though we're now storing Rich Text as our Form's Display Text, we won't get very far if we don't change how that Display Text is rendered on the live site 😏.
Fortunately, ASP.NET Core includes a feature that allows us to override a View included in our project from a Razor Class Library by adding a View file with the exact same name and path as the file from the Razor Class Library 🧐.
The View that controls how the Form Display Text is rendered after a successful submission is in the Razor Class Library at the following path:
~/Views/Shared/Kentico/Widgets/FormWidget/_FormWidgetTextConfirmation.cshtml
We don't have a file at that path in our project, so let's create a new empty one 🙃.
Make sure you use the same path and filename, otherwise ASP.NET Core will see your View as a new one and not a replacement for the View coming from the library!
The Razor in the original View from the library looks this like:
@model string

<div class="formwidget-submit-text">@Model</div>
Which we are going to replace with the following:
@model string

<div class="formwidget-submit-text">@Html.Raw(Model)</div>
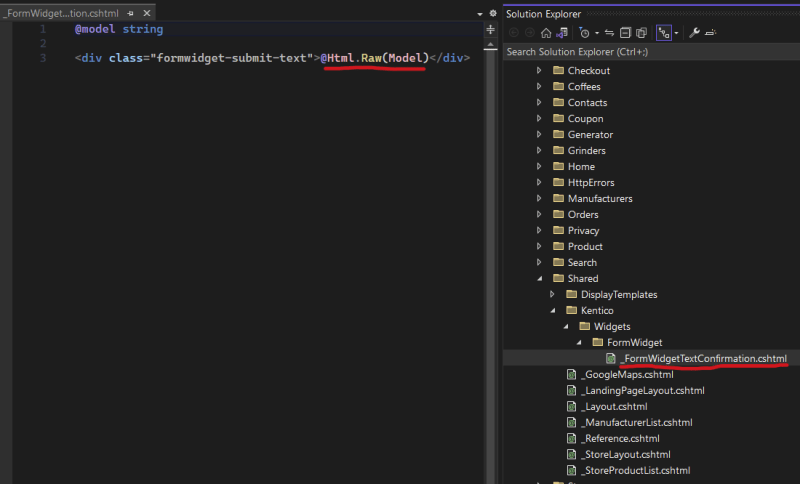
By rendering the Model with Html.Raw() we ensure our Rich Text Display Text won't be escaped when displayed on the page.
At this point we can rebuild our ASP.NET Core application and we're all set 🙌🏿!
🏁 Conclusion
With our 2 simple customizations, we can try out the Contact form to see our Rich Text message displayed on the page:
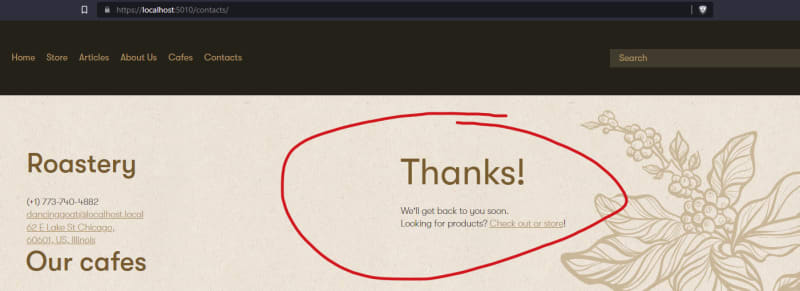
It worked 🎉!
We can use any content or design to our Display Text that can be authored in Rich Text and craft a "richer" experience (pun intended 😆) without having to go through the process of creating a completely separate page to redirect to.
As always, thanks for reading 🙏!
References
- Form Builder - Xperience Docs
- Form Builder field validation - Xperience Docs
- Form Builder Smart Fields - Xperience Docs
- Overriding Razor Class Library Views - ASP.NET Core Docs
We've put together a list over on Kentico's GitHub account of developer resources. Go check it out!
If you are looking for additional Kentico content, checkout the Kentico or Xperience tags here on DEV.
Or my Kentico Xperience blog series, like:


Oldest comments (0)