Apache Hadoop is an open-source solution for storing and analysing massive amounts of unstructured data. It can process messy data sets to provide end users with some fascinating insights into their unstructured data.
For this tutorial, I’m going to show you how we can create HDInsight clusters in Azure, how we can connect and see what’s in our clusters and run MapReduce jobs on the data within our clusters.
What you’ll need to complete this tutorial:
- Microsoft Azure subscription. You can sign up for a trial or if you have one, use an MSDN subscription.
- Putty. HDInsight Hadoop clusters can be provisioned as Linux virtual machines in Azure. We can connect to Hadoop services using a remote SSH session.
- Azure Storage Explorer. We’ll be working with Azure Blob Storage during this tutorial. We can use the command line, but for simplicity this graphical tool is fine.
- Windows OS (I’m using Windows 10). You can do this on tutorial on Linux or Mac’s, but I don’t use those operating systems so you’ll have to search elsewhere for guidance on that.
Provisioning and Configuring an HDInsight Cluster
Alright, enough theory! Let’s have a go at provisioning our HDInsight Cluster in Azure. Let’s head over to Azure and start this process.
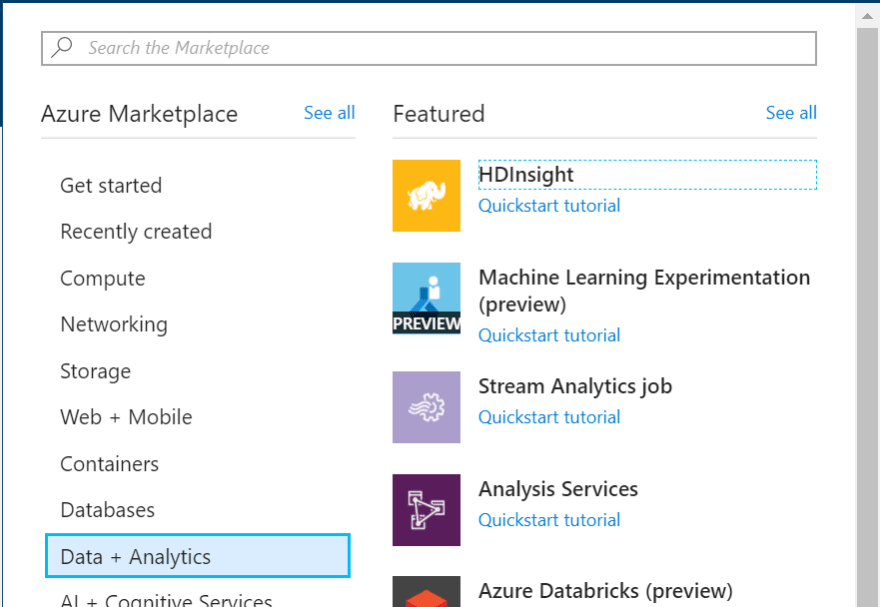
In your portal, click on New > Data + Analytics > HDInsight. Then create a New HDInsight Cluster to create a new cluster:
Create your new cluster with the following attributes:
- Cluster Name: create your own
- Subscription: Choose your Azure subscription
- Cluster Type
- Cluster Type: Hadoop
- Operating System: Linux
- Version: Choose the latest one
- Cluster Tier: Standard
- Cluster Username: Create your name (make sure you remember it!)
- Cluster Password: Create your password (make sure you remember it!)
- SSH Username: (Has to be different to your cluster username)
- SSH Password (same as the cluster password
- Resource Group (create a new one if you don’t have one)
- Location: Choose one closest to you
- Storage:
- Primary Storage Type: Azure Storage
- Selection Method: My Subscriptions
- Create a new storage account
- Default Container: Enter the cluster name you specified previously
- Applications: None
- Cluster Size
- Number of worker nodes: 1
- Worker Node Size: Smallest available
- Head Node Size: Smallest available
- Advanced Settings: None
Click Create and wait for it to provision. This can take a while (20 minutes), so treat yourself to some green tea :)
[caption id=”attachment_511" align=”aligncenter” width=”560"]

Soon…[/caption]
Once it’s created, we can view the configuration of our cluster in the portal. We can view a summary of our cluster through the HDInsight Cluster blade. We can also scale the amount of worker nodes to meet increasing processing demand.
Connecting to an HDInsight Cluster
Awesome! We have a Cluster and we’re ready to connect to it!
In the Azure portal, navigate to the HDInsight Cluster blade for your HDInsight Cluster. Click on Secure Shell and then in the blade, note your host name for your cluster (should take the format of yourclustername-ssh.azurehdinsight.net)
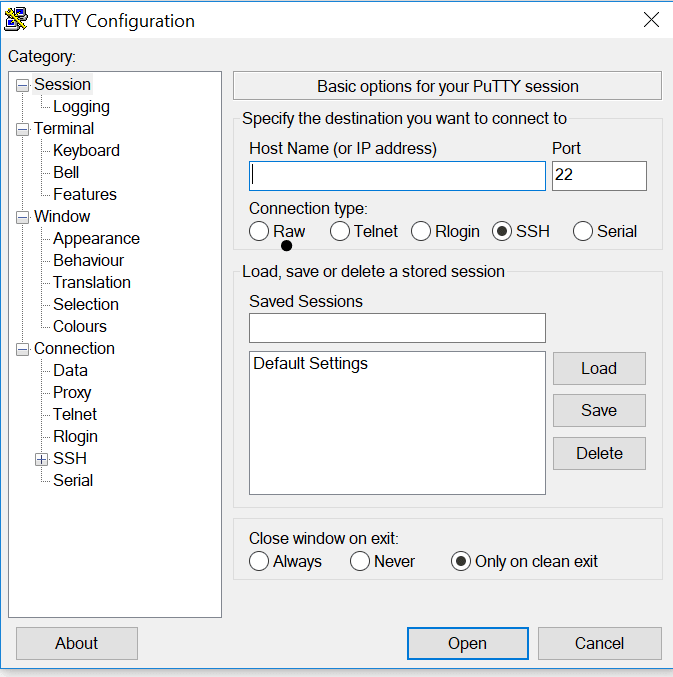
Open PuTTY and in the session blade, enter the host name in the host name text box. Then under connection type, select SSH and click Open. (If a security warning pops up stating that the host certificate can’t be verified, just click Yes to continue).
When prompted, enter your SSH username and password you specified earlier (NOT THE CLUSTER USERNAME!!).
Browsing your cluster
Hadoop uses a file system called HDFS, which is implemented in Azure HDInsight clusters as Azure Blob storage.
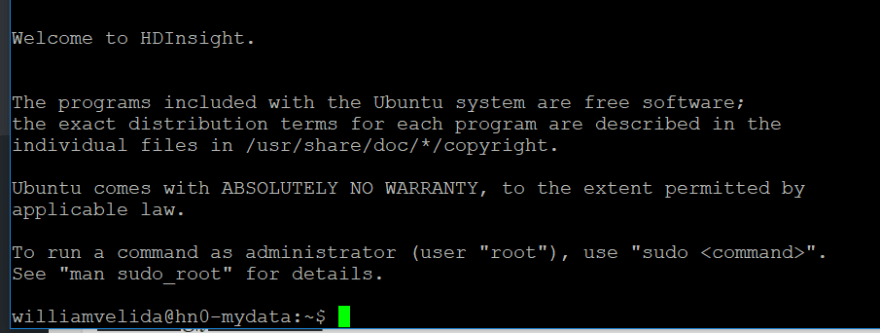
In the SSH console, enter your username and password. If you’re successful, you should see this output.
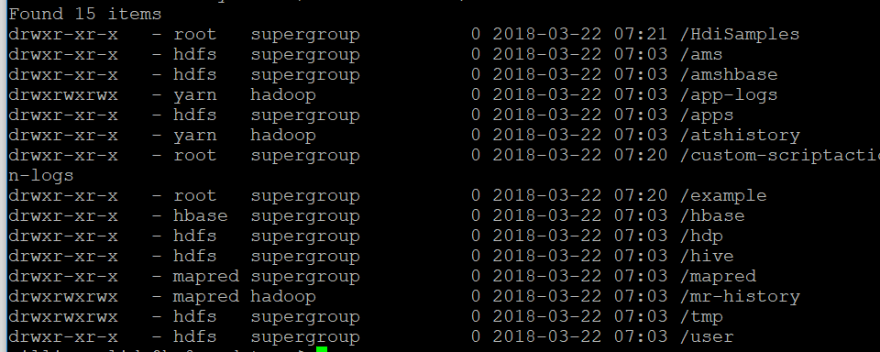
Let’s start by entering the following command to view the contents of the root folder in our HDFS file system:
hdfs dfs -ls /
We should see the following items:
Let’s take a closer look at our examples folder. This contains subfolders for sample apps, data and JAR components:
hdfs dfs -ls /example
Ooo, looks like there’s a couple of things in there!

Alright, let’s take a look at the data folder by entering the following command:
hdfs dfs -ls /example/data/gutenberg

We seems that we have a couple of txt files in here already. Let’s see what we can do with these files.
Run a MapReduce Job
MapReduce is used in Hadoop to distribute the processing of data across nodes in our cluster. Each job is divided into a map phase during which one or more mappers split the data into key/value pairs, and a reduce phase, which one or more reducers process the values for each key.
Enter the following command to view sample JARS stored in the cluster head node:
ls /usr/hdp/current/hadoop-mapreduce-client
WOW! that’s a lot of JARS! Let’s refine our command to just list the MapReduce functions:
hadoop jar /usr/hdp/current/hadoop-mapreduce-client/hadoop-mapreduce-examples.jar
Okay, it seems that we’re missing an argument for a example program. Let’s see if we can get help for the wordcount function. Enter the following command:
hadoop jar /usr/hdp/current/hadoop-mapreduce-client/hadoop-mapreduce-examples.jar wordcount
Cool, looks pretty simple. Let’s run it on our davinci.txt file that’s already in our cluster!
hadoop jar /usr/hdp/current/hadoop-mapreduce-client/hadoop-mapreduce-examples.jar wordcount /example/data/gutenberg/davinci.txt /example/results
Wait for the MapReduce job to complete and then view the output by entering the following command:
hdfs dfs -ls /example/results

See that a file named part-r-00000 has been created by the job. Let’s view it’s output by entering our final command:
hdfs dfs -text /example/results/part-r-00000
Pretty neat huh? We’ve separated our key/values into words and word counts! Minimise the window.
Upload and Processing our Files
Alright, now that we’ve played around with sample files, let’s use our own and upload the data to Azure blob storage to process it with Hadoop.
Open up Azure Storage explorer and if you have to sign in with your Azure subscription.
Expand your storage account and the Blob Containers folder and then double-click the blob container for your HDInsight cluster.
In the upload drop-down list, click folder and upload the folder you downloaded as a block blob to a new folder name items in the root of the container

Process the Uploaded Data
Alright, let’s run our wordcount function to process the txt file we just uploaded and store results of the job in the items/results folder! Run the following command in our SSH console:
hadoop har /usr/hdp/current/hadoop-mapreduce-client/hadoop-mapreduce-examples.jar wordcount /items/items/dogs.txt /items/results
Once the job is done, we can view the output in the same way as before!
Clean it up
Now that we’re finished, we’ll need to clear this up. Unforunately, this isn’t free and we’ll want to save our Azure credits for another day. Let’s delete our cluster resources.
In the Azure portal, click Resource Groups and then click the resource group that contains your HDInsight cluster. Then on the Resource group blade, click delete. Type the name of your resource group and then click delete.
Wait for the resource group to be deleted and then click All Resources. Verify that the cluster and the storage account that was created with your cluster have been removed.
Conclusion
In this tutorial, we’ve gone through what Hadoop is, how we can create a cluster on Azure and how we can use it to upload data and run MapReduce jobs on our data.
If you enjoyed this tutorial or you have any feedback, please feel free to shout out!


Top comments (0)