
In this tutorial, we will send an event to Wia using Android Things.
Components
- Raspberry Pi (We used a Raspberry Pi 3 Model B)
- PIR Sensor
- USB Cable
- Jumper wires
You will also need Android Studio and a Wia account. You can download the latest version of Android Studio here.
Wia is a cloud platform to support your Internet of Things devices. You can sign up or login here.
Getting Started
First, we need to install Android Things onto the raspberry pi. Click here to go to the Android Things console, and sign in using a google account.
Create a product and choose Raspberry Pi as the SOM, name it what you like, and save.

You will be taken to this page. Click on your model:

Click on NEW and choose Start from scratch from the drop down menu.
Name your build. Keep all of the default settings by clicking Next on each step. Then click create build.
Your build is now available for download. Download the file and choose production.

Once the file has downloaded, unzip it. The file will take a moment to expand. You will get a .img file.

Burning the SD Card
Next, burn the image to the SD card. We used Etcher to do this. You can download Etcher here.
Insert the SD card into your computer and open Etcher. Select the image we just downloaded and select the SD card, then click Flash. Then, remove the SD card from your computer and insert it into the raspberry pi.

Connect the raspberry pi to an ethernet cable and use a USB to connect the raspberry pi to a 5V power source. Use an HDMI to connect the raspberry pi to a monitor and obtain the IP address. You will need the IP address later.
Wiring the Hardware

Use this diagram to help you connect the hardware:

Connect a USB to the raspberry pi and your computer. Connect the HDMI cable to a monitor and the raspberry pi.
Set up your space in Wia
If you don't already have a Wia account, you can sign up here, it's free.
In the Wia dashboard, click Create a New Space. In the left sidebar, navigate to Devices and click Add Device. We used the Raspberry Pi 3 Model B. Name your device anything you like.

Once your device is added, navigate to the Configuration tab. Here you will find your device's secret key, which starts with d_sk. You will need this key later.

Development
Open Android Studio and start a new project. Fill in the required fields:

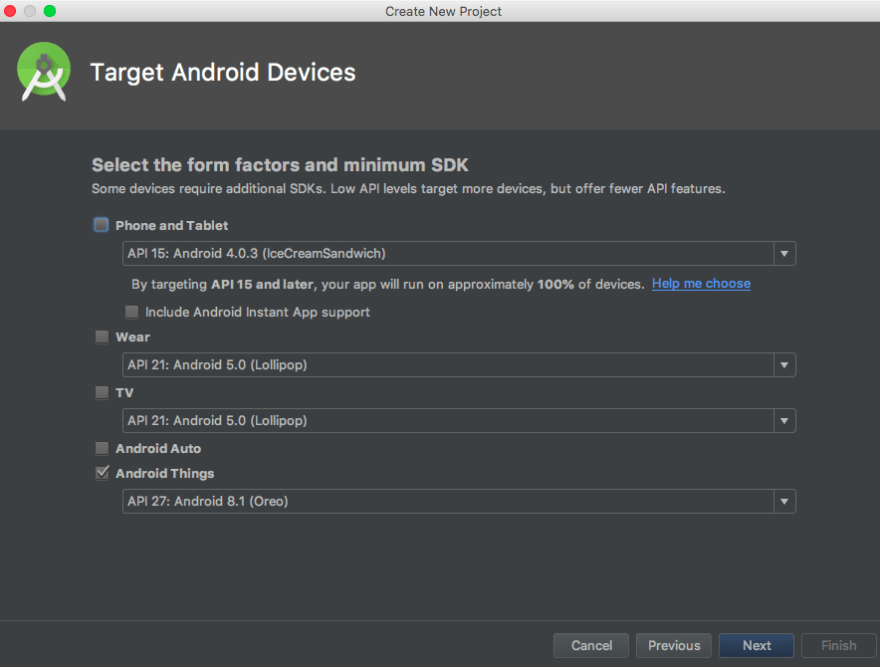
Click next. For the target devices, select only Android Things
Click next. Choose Empty Activity
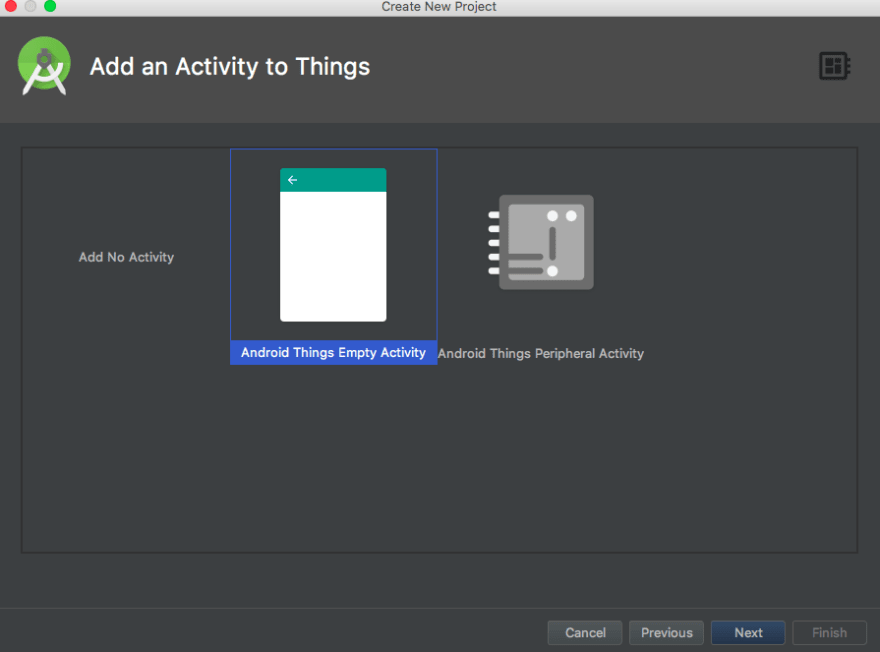
Click next and then Finish.
In the left sidebar, click Gradle Scripts > build.gradle (Module: app), and enter this line of code in dependencies:
implementation 'io.wia:wia-android-sdk:0.3.1'
Your screen should look like this:

Now, it's time to connect the raspberry pi to our project. You need to know the IP address of the raspberry pi for this step. In the terminal, run this command:
adb connect Your-Raspberry-Pi-IP-address)
Open Android Studio. Copy and paste this code into MainActivity.java:
import android.app.Activity;
import android.os.Bundle;

import android.util.Log;

import com.google.android.things.pio.Gpio;
import com.google.android.things.pio.PeripheralManager;


import io.reactivex.Observable;
import io.reactivex.android.schedulers.AndroidSchedulers;
import io.reactivex.schedulers.Schedulers;
import io.wia.Wia;

import io.wia.WiaEvent;


public class MainActivity extends Activity implements MotionsSensor.Listener {

    private static final String GPIO_PIN = "BCM18";
    private PirMotionSensor motionSensor;
    private static final String TAG = "TEST";
    private Gpio mGpio;

    @Override
    protected void onCreate(Bundle savedInstanceState) {
        super.onCreate(savedInstanceState);
        PeripheralManager pms = PeripheralManager.getInstance();
        try {
            mGpio = pms.openGpio(GPIO_PIN);
            motionSensor = new PirMotionSensor(mGpio, this);
            motionSensor.startup();
        } catch (Exception ex) {
            Log.d(TAG, "failing", ex);
        }
        Log.d(TAG, "IN ON CREATE FUNCTION.");

        Wia.initialize(new Wia.Configuration.Builder(this.getApplicationContext())
                .server("https://api.wia.io/v1")
                .build()
        );
        //replace this with your own device secret key
        Wia.accessToken("your-device-secret-key");

    }

    @Override
    public void onMovement() {
        Log.d(TAG, "in onMovement");
        Log.d(TAG, "MOVEMENT DETECTED");
        Observable<WiaEvent> result = Wia.createEvent("motion");
        result.subscribeOn(Schedulers.io())
                .observeOn(AndroidSchedulers.mainThread())
                .subscribe(response -> {
                    Log.d(TAG, "In onMovement function");
                }, error -> {
                    Log.d(TAG, "ERROR IN MOVEMENT EVENT");
                });
    }
In the code, locate this line, around line 45 in Android Studio:
//replace this with your own device secret key
        Wia.accessToken("your-device-secret-key");
Change "your-device-secret-key" to your own device secret key. This can be found in the Wia Dashboard in your space > device > configurations. The key starts with d_sk.
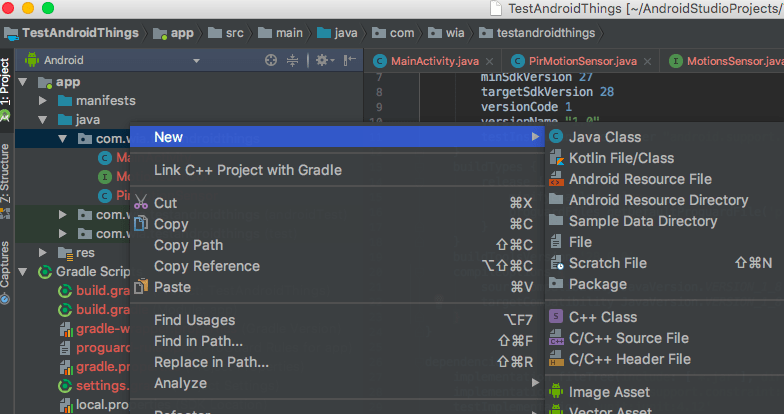
In the left hand menu, navigate to App > Java and right click on the package name. Choose New > New Java Class and name it PirMotionSensor.
Then, copy and paste this code into the class PirMotionSensor :
import android.util.Log;

import com.google.android.things.pio.Gpio;
import com.google.android.things.pio.GpioCallback;

import java.io.IOException;

public class PirMotionSensor implements MotionsSensor {
    private final Gpio bus;
    private final MotionsSensor.Listener listener;

    PirMotionSensor(Gpio bus, Listener listener) {
        this.bus = bus;
        this.listener = listener;
    }

    @Override
    public void startup() {
        try {
            bus.setDirection(Gpio.DIRECTION_IN);
            bus.setActiveType(Gpio.ACTIVE_HIGH);
            bus.setEdgeTriggerType(Gpio.EDGE_FALLING);
        } catch (IOException e) {
            throw new IllegalStateException("Sensor can't start", e);
        }
        try {
            bus.registerGpioCallback(callback);
        } catch (IOException e) {
            throw new IllegalStateException("Sensor can't register callback", e);
        }
    }

    private final GpioCallback callback = new GpioCallback() {
        @Override
        public boolean onGpioEdge(Gpio gpio) {
            listener.onMovement();
            return true; // True to continue listening
        }
    };

    @Override
    public void shutdown() {
        bus.unregisterGpioCallback(callback);
        try {
            bus.close();
        } catch (IOException e) {
            Log.e("TEST", "Failed to shut down. You might get errors next time you try to start.", e);
        }
    }

}
In the lefthand menu, navigate again to App > Java and right click on the package name. Choose New > New Java Class. In the pop-up screen, change the field Kind to Interface instead of Class. Name the interface MotionsSensor.
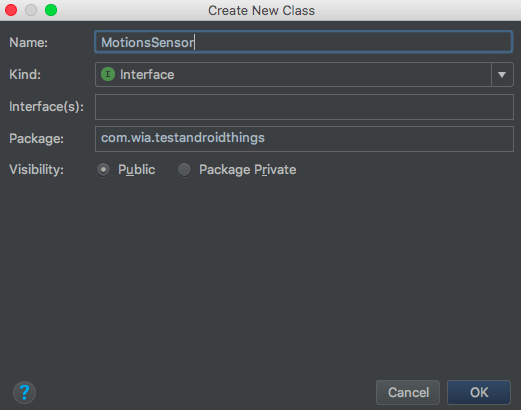
Then, copy and paste this code into the interface:
public interface MotionsSensor {
    void startup();

    void shutdown();

    interface Listener {
        void onMovement();
    }
}
Click run and in the next screen choose Google_Iot_rpi3 as the device.
Go back to the Wia Dashboard. In the debugger tab, you can see your events appearing in real time! Each time motion is detected, and event is being sent to Wia.
To take this a step farther, you can use the Wia platform to send you a notification when motion is detected.
Wia Flows
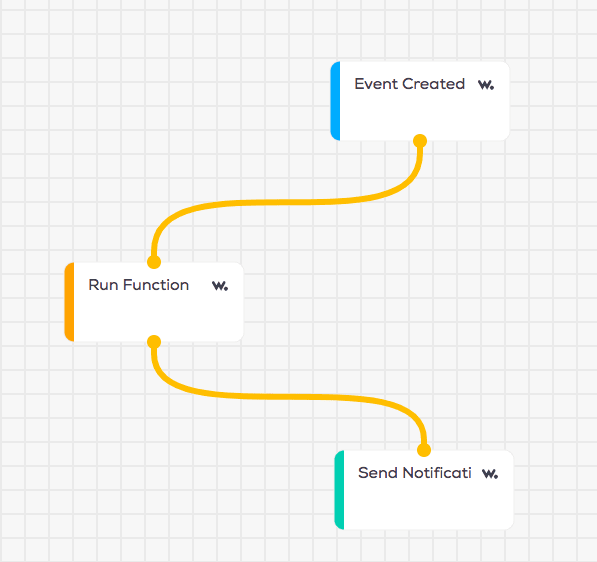
In the left sidebar, navigate to Flows and add a new flow. Name it anything you like. From the Trigger tab, drag over a Create Event node. Name this node motion and select your device.
Next, in the Logic tab, drag over a run-function node. Copy and paste this code into the box:
if (input.body.name == "motion") {
  output.body.data = "motion detected";
}
else {
  output.body.data = "no motion";
}
Connect the nodes by dragging the orange dots.

Then, in the Action tab, drag over a Notification node. Enter "Motion detected!" as the message. When motion is detected, this flow will send a notification to the Wia mobile app.
PIR Sensor Sensitivity Measures
The PIR Sensor allows you to change the Delay Time as well as the Sensitivty Level.
The PIR Sensor is a digital device. This means that it reads two values: HIGH and LOW. When the sensor detects movement, it reads HIGH. Otherwise, it reads LOW.
The Delay setting determines how long the PIR Sensor will read HIGH after it has detected a motion. The Sensitivity Sensor determines the proximity at which the PIR Sensor will register a movement. This sensor is more accurate when it is set to a lower proximity level. You can control these settings using the orange panels located directly across from the pins you used to wire your device.


Oldest comments (0)