Disclaimer : This blog is more of a “mental notes” for me. I am nowhere near an expert in this area, and Cosmos DB is still new (hours old) to me. Drop me a line if I have missed the point massively 🙂
Last time, I got a very basic C# Azure Function hooked up to accept a request from an NLOG web service target. This time, I will be attempting to persist(insert) the incoming log information into an Azure Cosmos database container, direct from my Azure Function in VS Code.
Setting up Cosmos DB, databases and containers.
To get started I will make a new Cosmos DB on the Azure Portal by selecting “Azure Cosmos DB” from the resources panel and selecting “Create new”.
On this page I need to specify:
- Subscription: Your Azure subscription to create this under.
- Resource Group: You should already have a resource group which matches the Azure Function you created earlier.
- Instance Details
- Account Name: This will be prefixed to the URL – i.e. blah documents.azure.com
- API: For this example I will be using Core(SQL) so I can create a document database and query using SQL syntax.
- Location: Select the closest location to you.
- Other options: Other options like Geo-Redundancy etc can be left as disabled for now.
Select “Review and Create”, then on the next screen “Create” – Providing you are happy with the inputs.
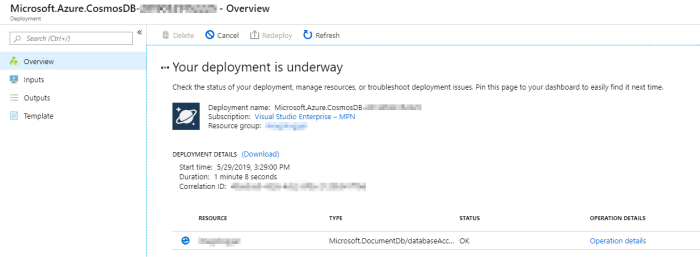
Which will switch to “Your deployment is complete” when it is ready to be used. It shouldn’t take longer than a couple of minutes.
Clicking on “Go to resource”, or navigating to your new Cosmos DB via the Resource manager will load up the quick-start window for this database. First however, we need a “container”. Selecting the Azure Cosmos DB account we just created, we need to select “Add container”.

Here we have a few inputs:
- Database ID. I didn’t have a database, so needed to create one. If you already have one, specify the name here.
- Throughput: 400 RU (Request Units/S) should be more than enough for basic testing and operation for my purpose.
- Container ID: I specified a container ID that lives inside the new/existing database. azlogger is where I want all my logging related data, and a container of azlogger-logs for the logs I will be storing.
- Partition key: I used “loggerName” as my partition key. See this video for info, but essentially I believe this is for managing partitions if the data exceeds the limit so partitions can be grouped(?) correctly (~10GB?). I”m not 100% sure to be honest, without reading more. I just went with a recommended S/O post.
Updating the Azure function to connect with Cosmos DB
We first need to use the CosmosDB package in this project, so in the terminal, run:
dotnet add package Microsoft.Azure.WebJobs.Extensions.CosmosDB
Now I need to set up the solution so it’s ready for using Cosmos DB.
In local.settings.json I added my connection string:
{ "IsEncrypted": false, "Values": { "AzureWebJobsStorage": "", "FUNCTIONS\_WORKER\_RUNTIME": "dotnet", "MyCosmosDBConnection": "\<conn string\>" } }
Where the connection string value comes from your Cosmos dashboard, under “Keys” -> “Primary connection string”
Now I will need a C# model to bind against. I made a simple LogDetail class with the required fields. Note that I am using the JsonProperty items on the fields. I read conflicting blog posts about the requirement for annotating everything other than the ID, but I found no harm in leaving it in for now.
public class LogDetail{ [JsonProperty("id")] public string Id { get; set; } [JsonProperty("timestamp")] public string Timestamp; [JsonProperty("logName")] public string LogName; [JsonProperty("logLevel")] public string LogLevel; [JsonProperty("message")] public string Message; }
Now time to update the main method/function! This was actually the hardest part for me (Partly due to lack of experience with this tech), the documentation was a little confusing, misleading and often specific to a particular scenario.
I’m not sure how correct this is, but I ended up changing my main method so that it read:
public static class Log { [FunctionName("Log")] public static **void** AcceptLogRequest( [HttpTrigger(AuthorizationLevel.Anonymous, "get", "post", Route = "Log")] HttpRequest req, **[CosmosDB( databaseName: "azlogger", collectionName: "azlogger-logs", ConnectionStringSetting = "MyCosmosDBConnection", Id = "{sys.randguid}", PartitionKey ="/loggerName" )] out** LogDetail logDetail, ILogger log) { log.LogInformation("HTTP trigger fired for log entry."); string timestamp = req.Form["timestamp"]; string loggerName = req.Form["loggerName"]; string loggerLevel = req.Form["loggerLevel"]; string message = req.Form["message"]; var res = $"{timestamp} | {loggerName} | {loggerLevel.ToUpper()} | {message}"; log.LogInformation(res); logDetail = new LogDetail(); logDetail.Timestamp = timestamp; logDetail.LogLevel = loggerLevel; logDetail.LogName = loggerName; logDetail.Message = message; } }
The main changes were:
- Making it a synchronous void method for saving data into CosmosDb which was recommended in the Microsoft Docs here. Could be wrong, but it works and is in-line with their docs.
- changing
LogDetail logdetailto beout LogDetail logDetail - Add in the Cosmos DB annotation (See below)
The CosmosDB annotation has the following options:
- databaseName : This is the main database name for the database set up in the previous step.
- collectionName : This is the _ container _ name set up in the previous step
-
ConnectionStringSetting : The app setting name placed inside
local.settings.jsonin the previous step. -
id : The Id entry for the record. For this I used an inbuilt system parameter of
{sys.randguid} - partitionKey : The partition key I specified in the earlier setup step.
Now, if I debug (or deploy) this Azure Function and cause my application to insert a bunch of NLOG entries, it should now create some entries in a Cosmos DB container.
To view the results, I can go to Cosmos DB on the Azure portal and select “Data Explorer”. From here, the Database and Container can be expanded to show the “Items” in the container – In my case, a load of NLOG entries.

Conclusion
It’s early days, but deploying a new Azure function is trivially easy using the most recent tooling, and the only real difficulty seems to be nailing down decent documentation in Azure (Which has always been the case from my experience!)
The next stages would be to look into Azure Function triggers on a timer to produce MI reports, or time/action based triggers to forward captured events onto the appropriate person.
The post Remote NLOG logging with Azure Functions (Part two) – Persisting data into Azure Cosmos DB. appeared first on yer.ac | Adventures of a developer, and other things..


Top comments (0)